Cutting Guide
Before starting, please join the Discord server.
It can be overwhelming to learn how to use the scripts and the cutting machine. After you cut your first set of cards, you’ll see it’s not so complicated, but it’s easy to hit roadblocks starting out. I set up the Discord server to build a community so we can all learn and help each other.
If you get stuck or have questions or just want to learn more before diving in, the best place to get help is in the Discord server.
Milestones
This lengthy guide is meant to depict a complete picture on how to use cut cards with your Silhouette cutting machine but it may be too much for a newcomer to tackle at once.
If you’re starting out, read through the whole guide but work towards the following milestones. Each milestone brings its own challenges so completing them in this order will make the whole process easier.
- Figure out your cutting settings.
- Basic cutting:
- Use plain card stock, not foil or holographic card stock.
- Ignore printer alignment.
- Ignore plugins.
- Learn to generate a PDF and learn to cut it.
- Double-sided cutting:
- Figure out your printer offset using the calibration sheet.
- Learn to apply an offset to your generated PDF.
- Learn to use the plugins.
- Learn to cut foil or holographic card stock.
Prerequisites
Printer alignment
If you plan on having card backs and if you plan on making double faced cards, then you need to ensure that printer can print with good front and back alignment. Otherwise, your card fronts and backs may have an offset.
Your printer may have built-in tools for calibration and alignment adjustment. However, it doesn’t, you can use offset_pdf.py to compensate for the printer’s offset.
Cutting settings
Silhouette Studio provides a number of cutting settings to control your cutting machine.
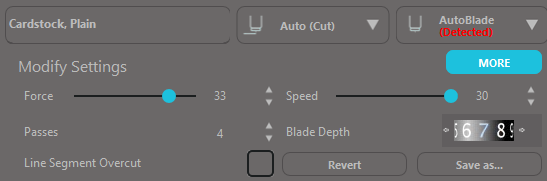
There are 4 main cutting settings:
- Force - how hard the machine will push the blade into the material.
- Speed - how fast the machine will move the blade.
- Depth - how much of the blade the machine will expose.
- Passes - how many times the machine will go around a cutting path.
Before starting, you must determine the cutting settings that are best suited for your materials. Failing to do so can result in at best, poorly cut cards or at worse, holes in the your cutting mat.
My recommendations for determining cutting settings:
- Create a simple cutting template in Silhouette Studio.
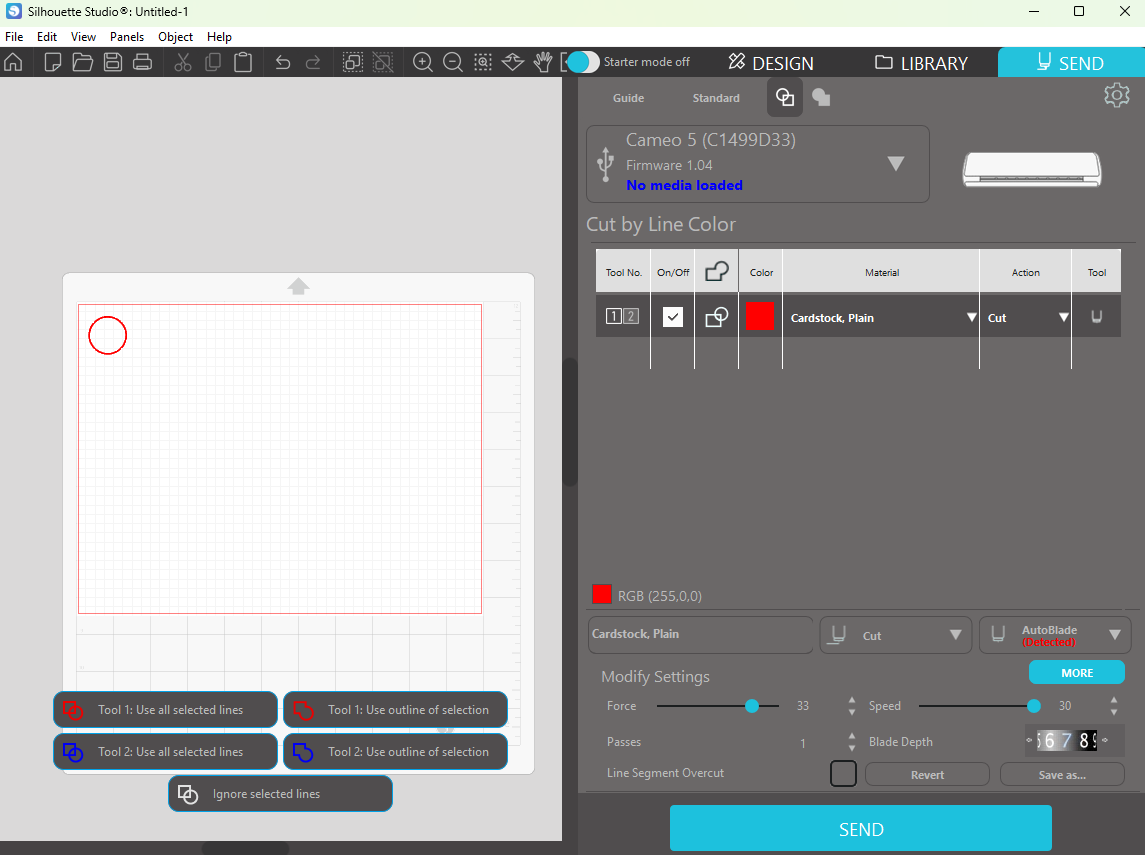
- Click the
Sendtab to show the cutting settings. - Set the force, speed, and depth to something reasonable. To start, try 25, 25, and 7.
- Set passes to 1. By repeating the cutting job, you can determine the required passes.
- Load your test sheet the press the
Sendbutton to start the cutting job. - When the job finishes, do not eject the mat. Lift the corner of the test sheet and check the cut. If the cut is clean, you’re done. If not, restart the cutting job as many times as necessary. This will determine required passes.
- Repeat the entire process. Change the cutting template to cut a different part of your test sheet and experiment with the cutting settings.
Unfortunately, there’s no easy way to get around this. You must experiment. You should not copy someone else’s settings. Even if we have the same machine, same blade, and same cutting materials, we will need different cutting settings. Learning to adjust cutting settings is a part of using cutting machines.
As a reference, here are my settings for my Cameo 5 with an autoblade and the recommended cardstock and laminate from the supply list:
- Force: 35
- Speed: 25
- Depth: 7
- Passes: 4
You can try these settings but you’ll likely need to make adjustments for your set up. If you’d like to see settings for other machines and other setups, you can search for them in the Discord server.
Here are some other tips:
- You could use a cutting template from cutting_templates/ but disable registration marks and cut one card at a time to perform multiple tests per sheet.
- You may be tempted to use max force and/or max speed to cut as quickly as possible. You can try but your machine will likely skip. If your machine skips, power cycle it so it can rehome the tool carriage.
- You may think that increasing depth will help you cut deeper but that’s not always true. Depth is just a limit to how deep your machine can cut. Whether your machine can cut up to that limit depends on the other cutting settings.
- To go with the previous point, I would prioritize the cutting settings in the following order: passes, force, speed, and depth. As long as your depth is reasonable, the other cutting settings matter more.
- If the edges of your laminated cards are rippled, try reducing force. This happens when the blade is too dull or the machine is pushing the blade too hard and the lamination is ripped through instead of sliced through.
Instructions
If you run into any issues, you can get help in the Discord server.
First try searching posts in the #troubleshooting channel. There are hundreds of resolved post so it’s likely that someone has already encountered your problem and fixed it.
If you still need help, create a new post in the #troubleshooting channel and include photos and videos.
Set up environment
Download the Silhouette Card Maker code by clicking here. Unzip the code if necessary. You can also clone the repo here if you know how.
Check if Python is installed
If you’re on macOS or Linux, open Terminal. If you’re on Windows, open PowerShell.
Then copy and paste the following into Terminal or Powershell.
python --versionThe command should display the Python version installed on your computer.
If the command does not work, try replacing python with python3.
If you don’t have Python installed, install it by clicking here. In the installer, check the box to “Add python.exe to PATH”.
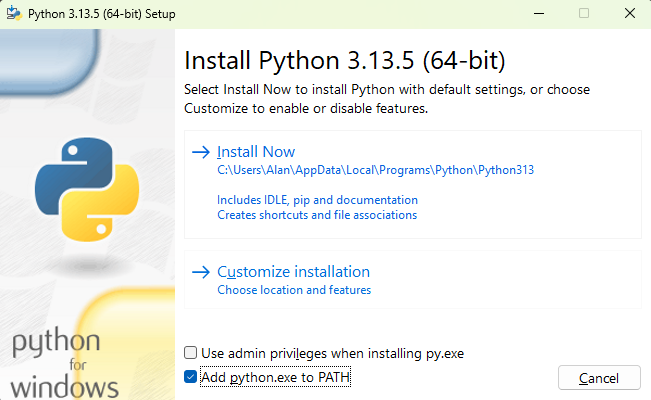
After installing Python, close Terminal or Powershell, reopen it, and verify again.
Upgrade pip
Pip is the package manager for Python. It is used to help install the tools needed for Silhouette Card Maker to work.
python -m pip install --upgrade pipNavigate to the code
In Terminal and Powershell, the commands you run depend on which directory you are currently in. When you start Terminal and Powershell, you start off in your home directory.
For Silhouette Card Maker to work, you need to go to the directory where the code is downloaded. In the following command, replace <path to the code> with the file path to the code.
cd ~
cd <path to the code>
Tip
For example, if you unzipped the code in the Downloads folder, then use the following:
cd ~
cd Downloads/silhouette-card-maker-main/silhouette-card-maker-main
Create a Python virtual environment
A virtual environment ensures that the Python packages you will install in the next step will not affect the rest of your computer.
Create a new virtual environment:
python -m venv venvThen, activate the environment:
. venv/bin/activate.\venv\Scripts\Activate.ps1Tip
If you see a security error, run the following, then try activating the environment again.
Set-ExecutionPolicy -ExecutionPolicy RemoteSigned -Scope ProcessYou will know if the virtual environment has been activated when (venv) appears in the prompt.
Install Python packages
pip install -r requirements.txtCreate the PDF
Put card front images into the game/front/ folder. Then, put a card back image into the game/back/ folder.
Tip
You can use the game, Zero sumZ, as an example. Simply move the game assets to the appropriate image folders.
You can also use a plugin to populate the image folders. Many games, including Magic: The Gathering, Pokemon, Yu-Gi-Oh!, Riftbound, One Piece, and Lorcana, are currently supported.
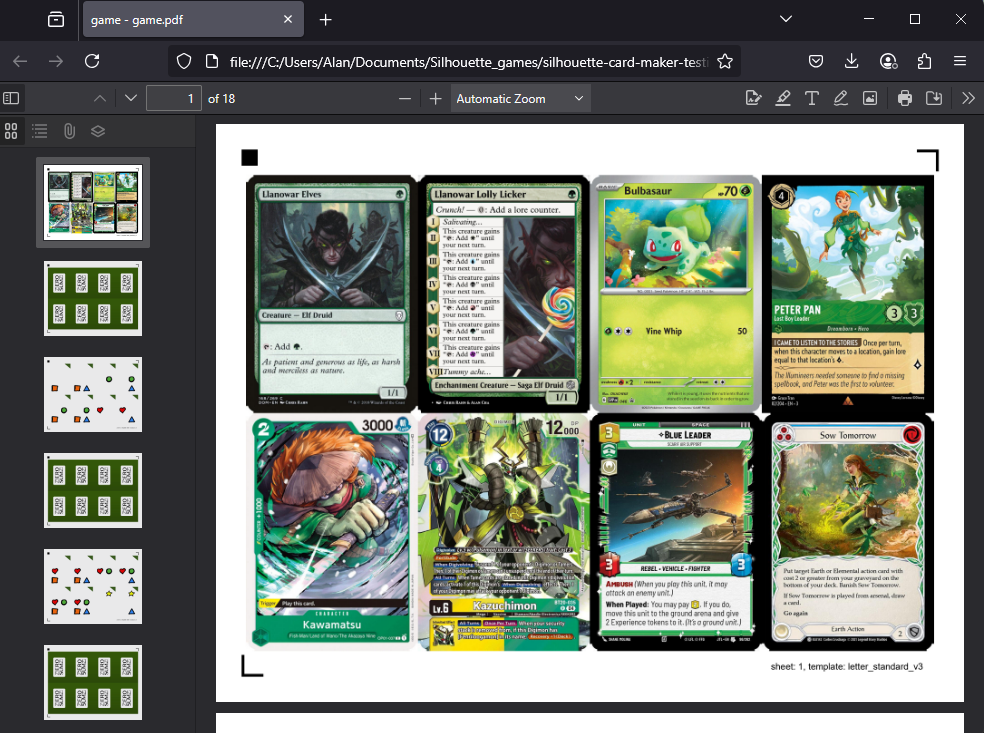
Generate the PDF with the following:
python create_pdf.pyThis will create a PDF for letter paper size and standard card size. The default standard card size is appropriate for most TCGs.
python create_pdf.py --paper_size a4This will create a PDF for a4 paper size and standard card size. The default standard card size is appropriate for most TCGs.
Tip
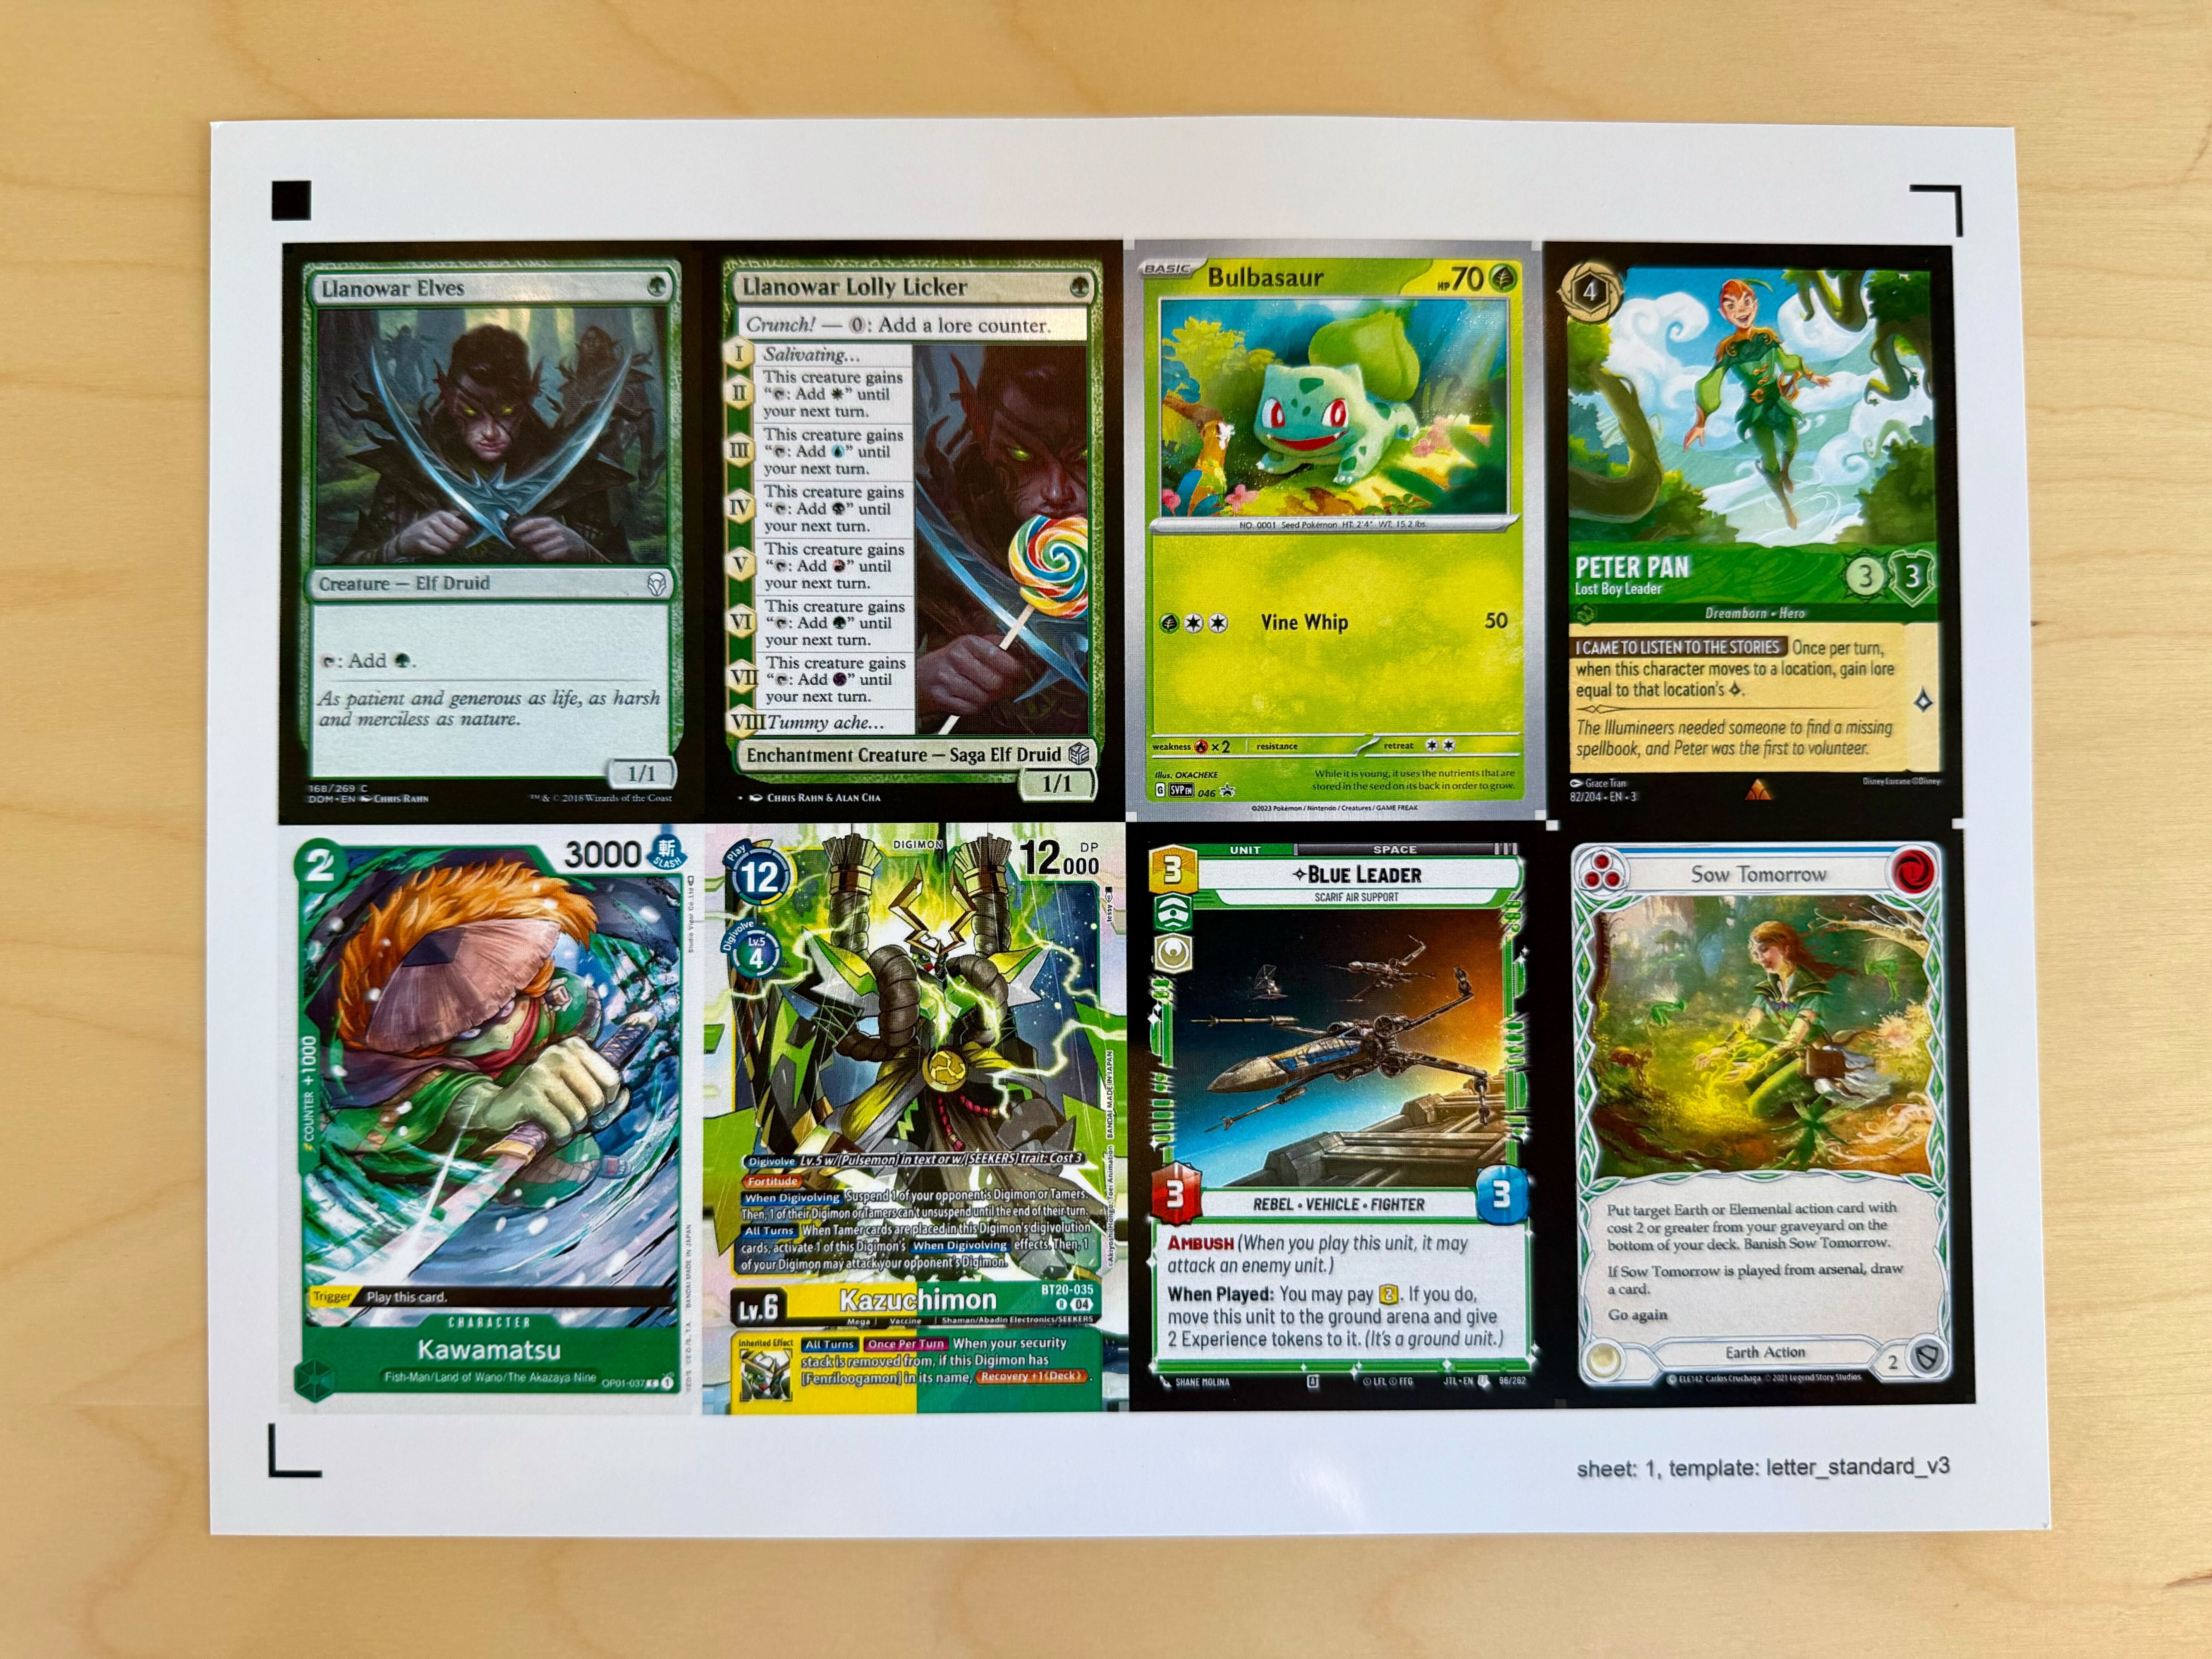
You can find the PDF in game/output/game.pdf and it should look similar to the following:
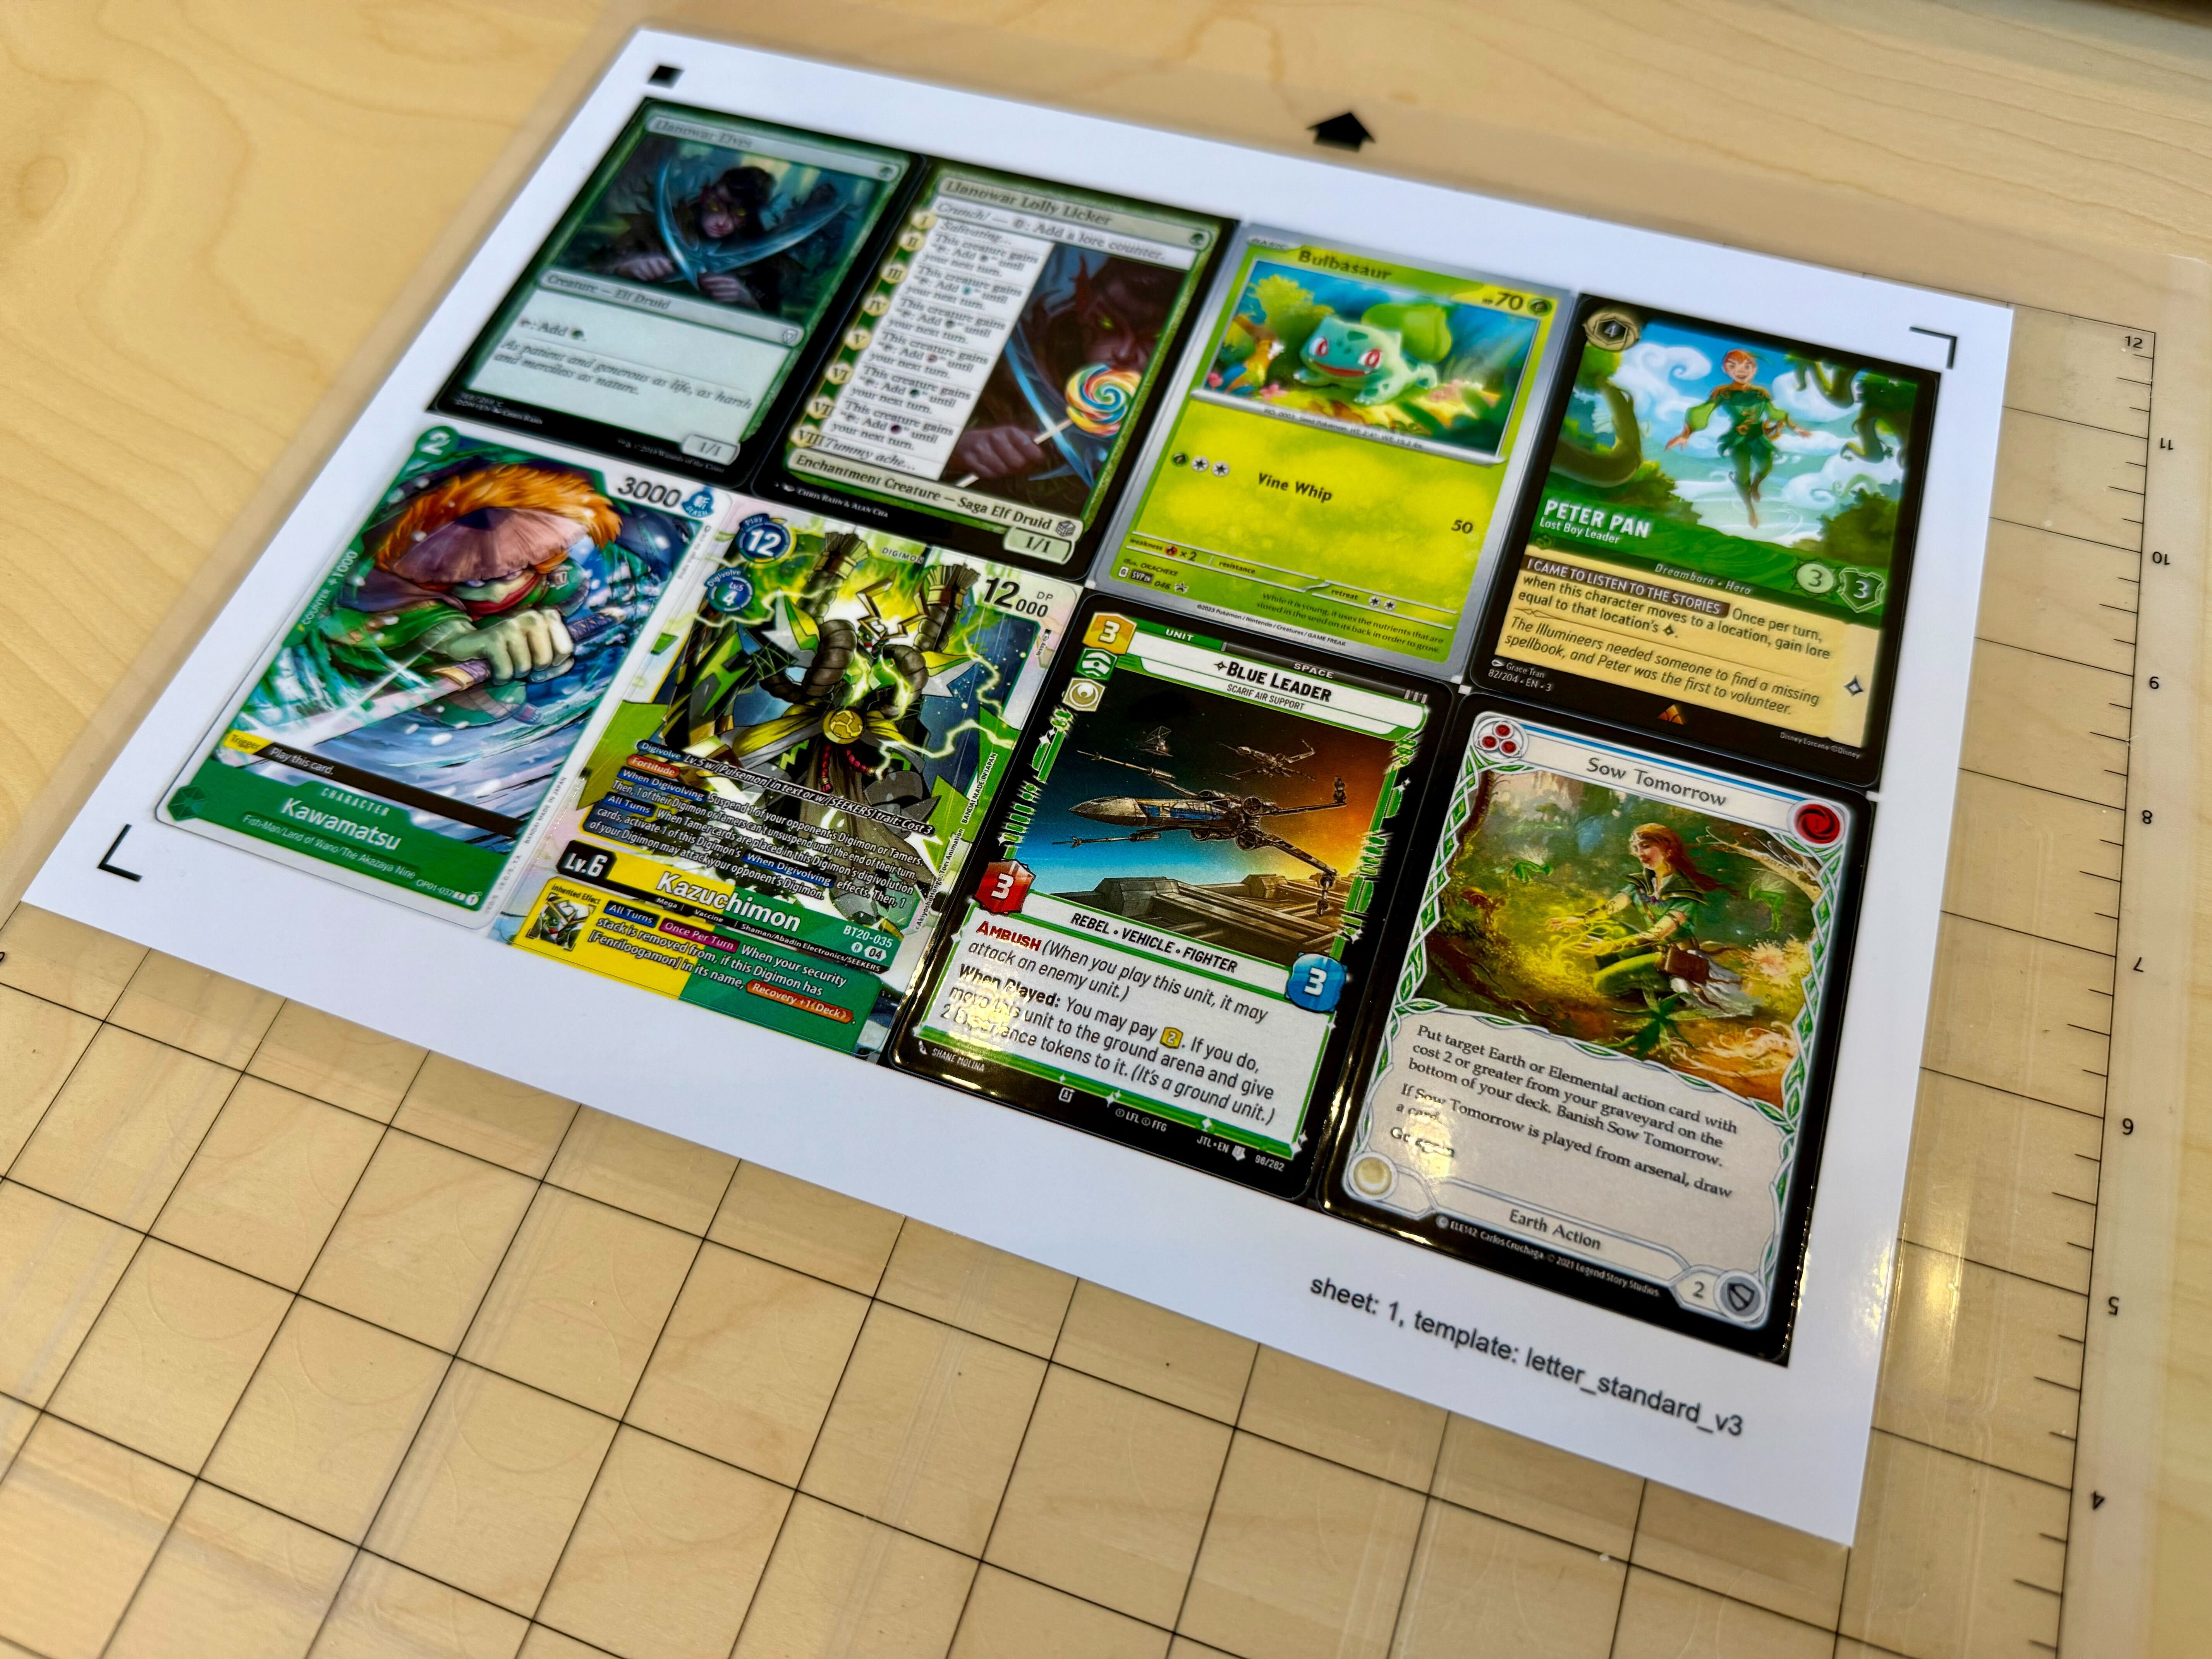
Prepare the sheets
Print the PDF with actual size scale. Ensure the print exactly matches the PDF and pay close attention to the white margins. If the print does not match, your cards will be the wrong size or registration will fail entirely.
Important
If you’re using duplex printing (double-sided printing), make sure to use long side flip (also called “flip on long edge”). This ensures the backs align correctly with the fronts.
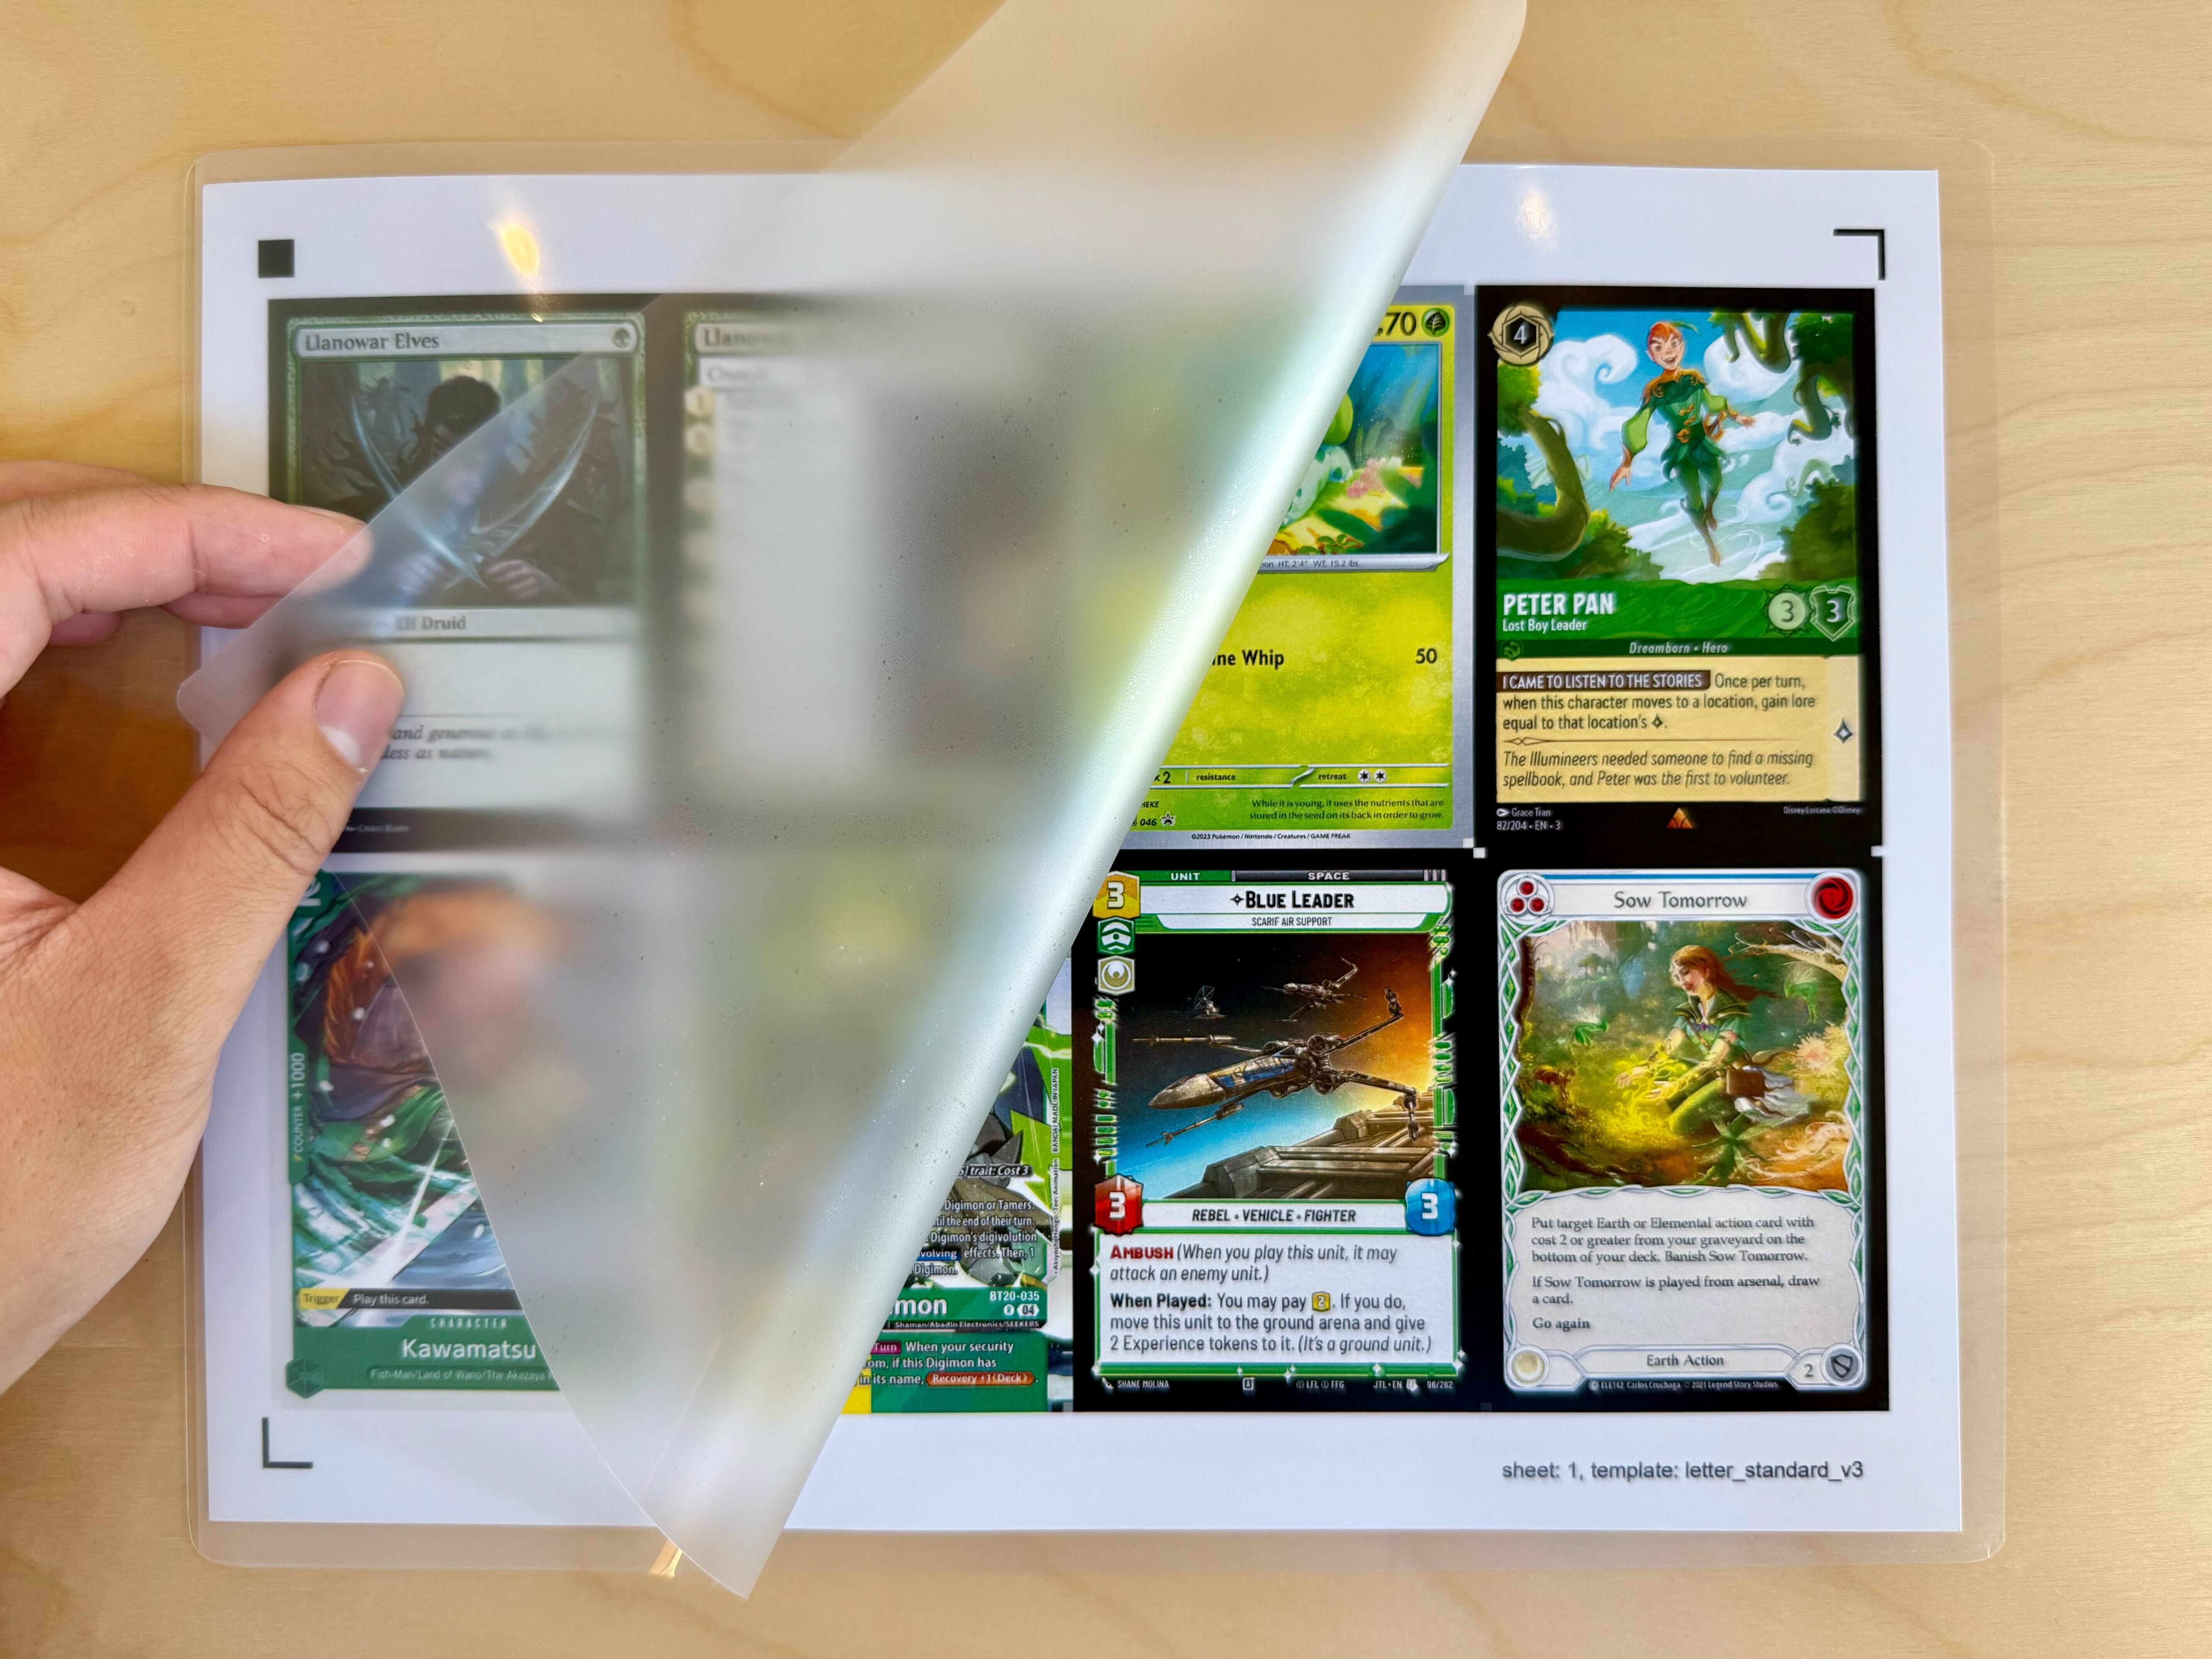
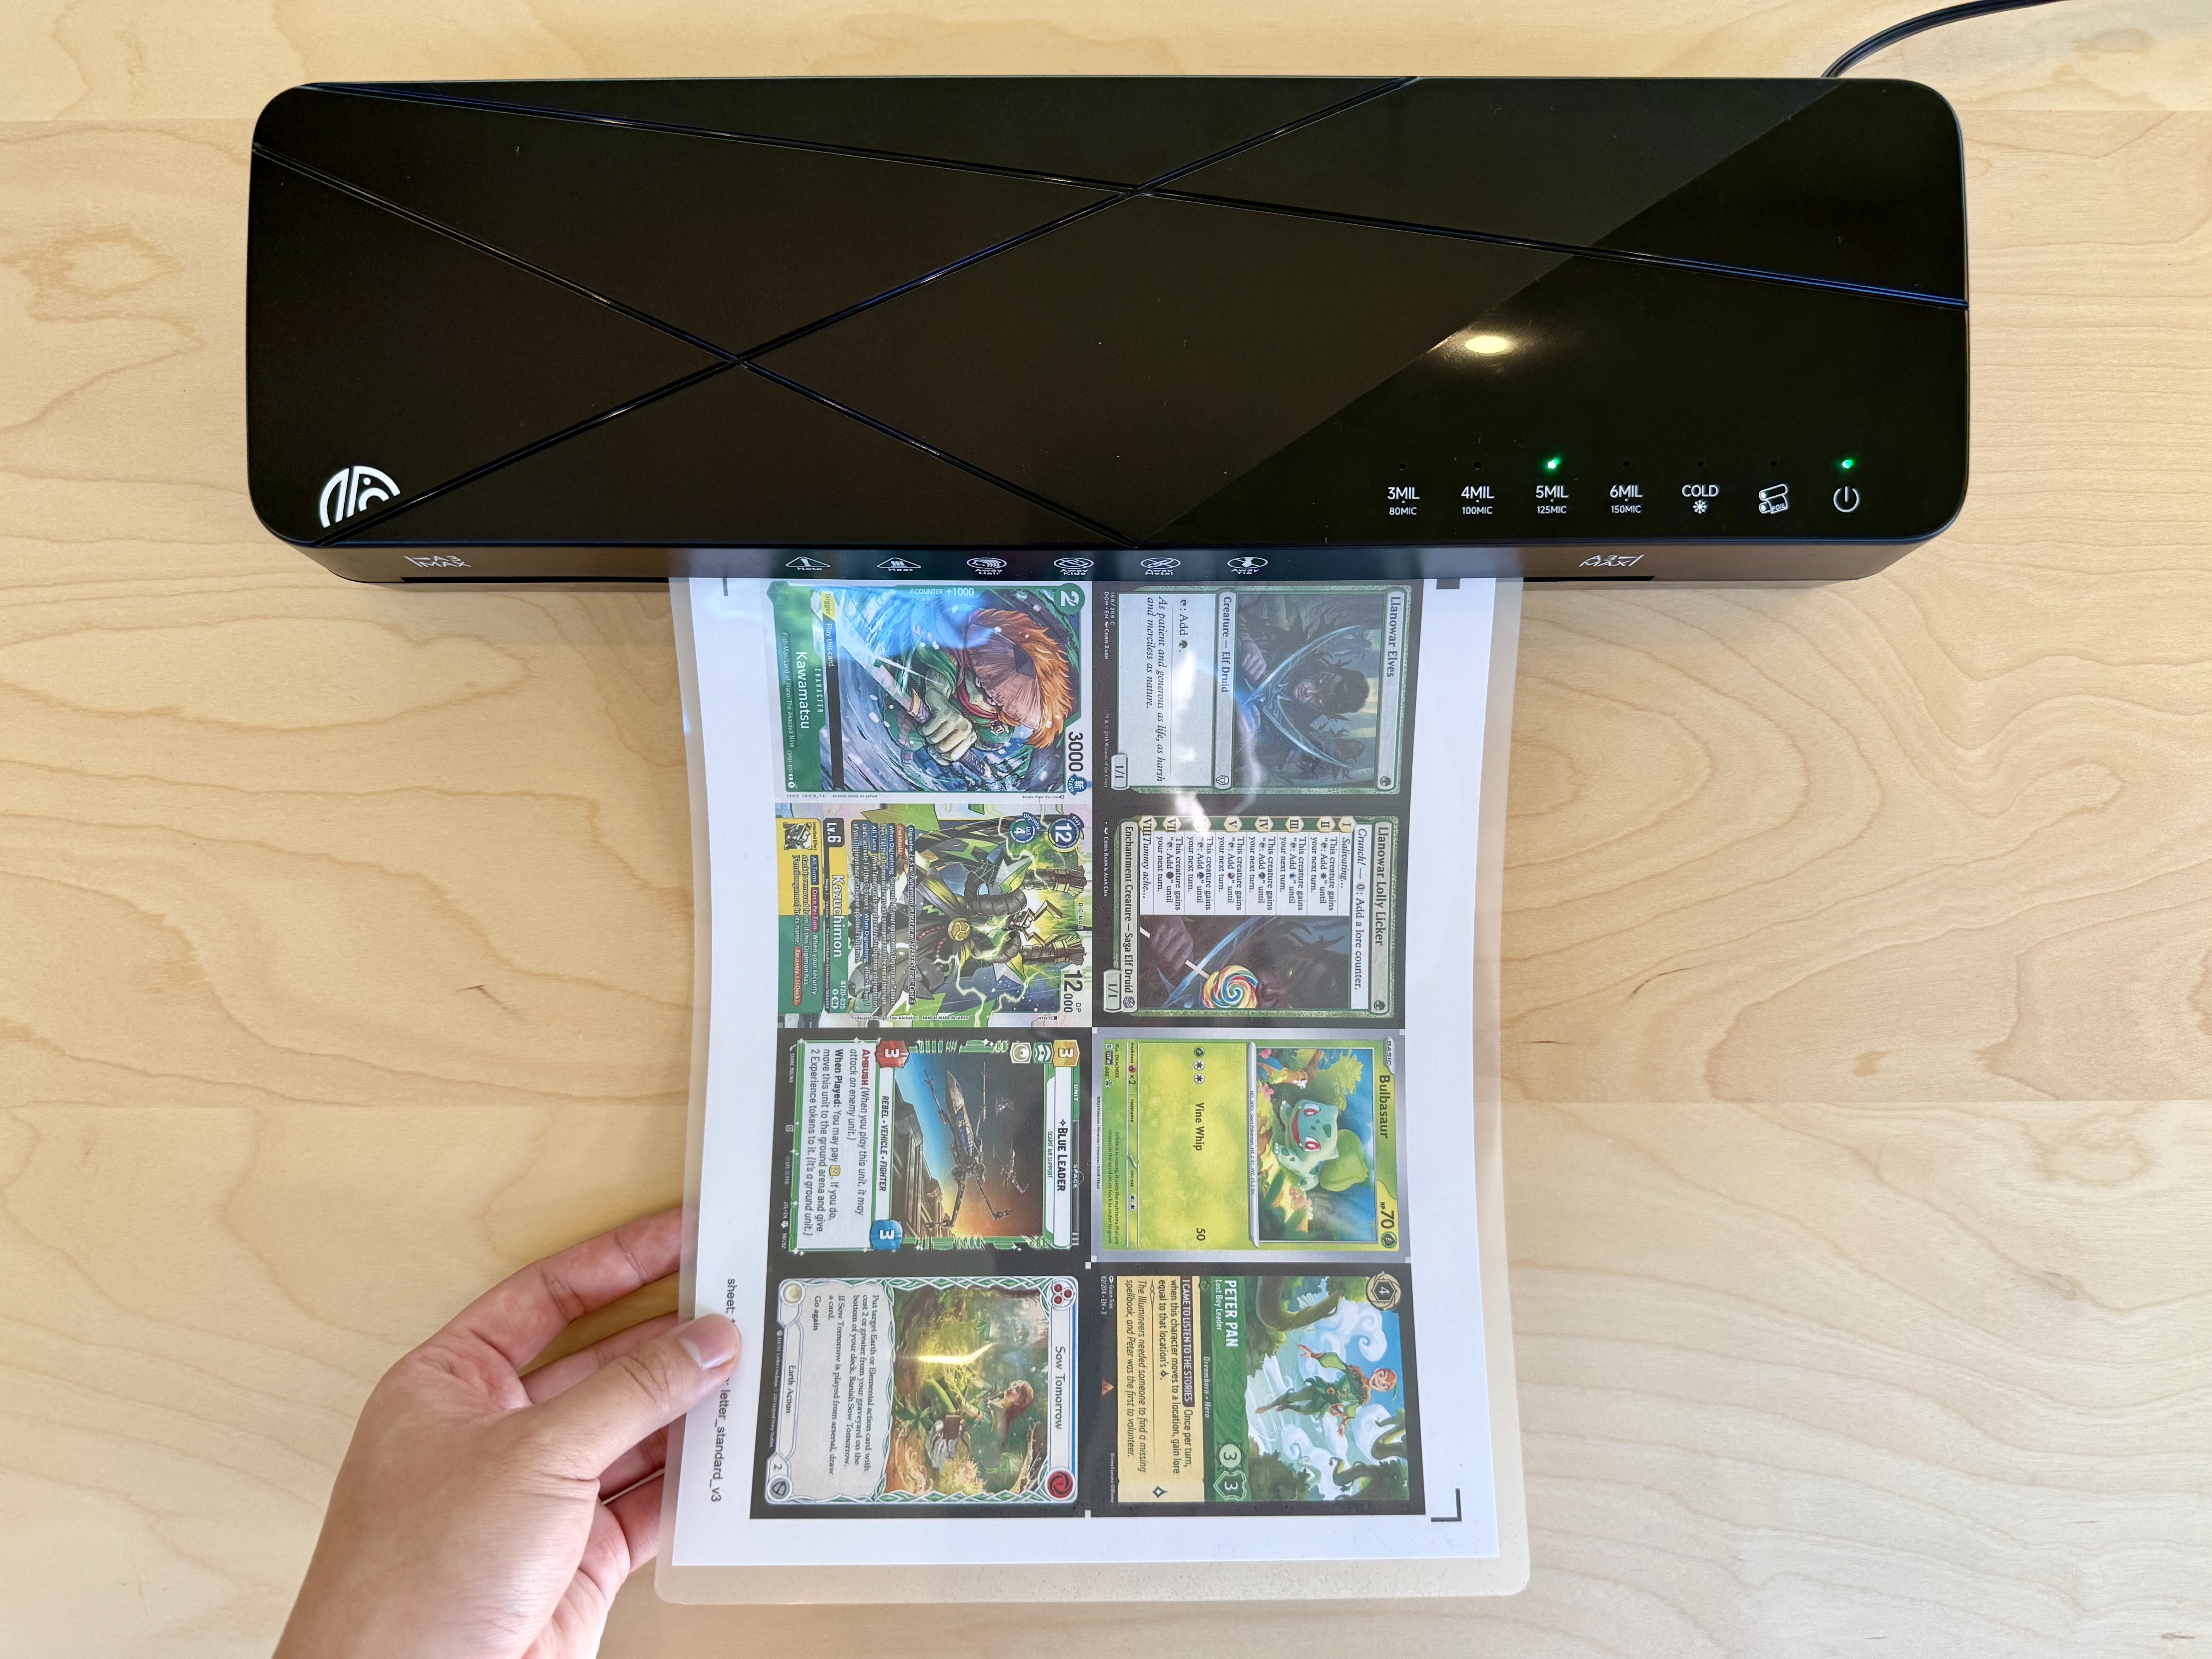
Laminate the sheets. Because cardstock is thicker than printer paper, you may need to use a higher setting on your laminator. If not, you could have cloudy lamination or delamination issues.
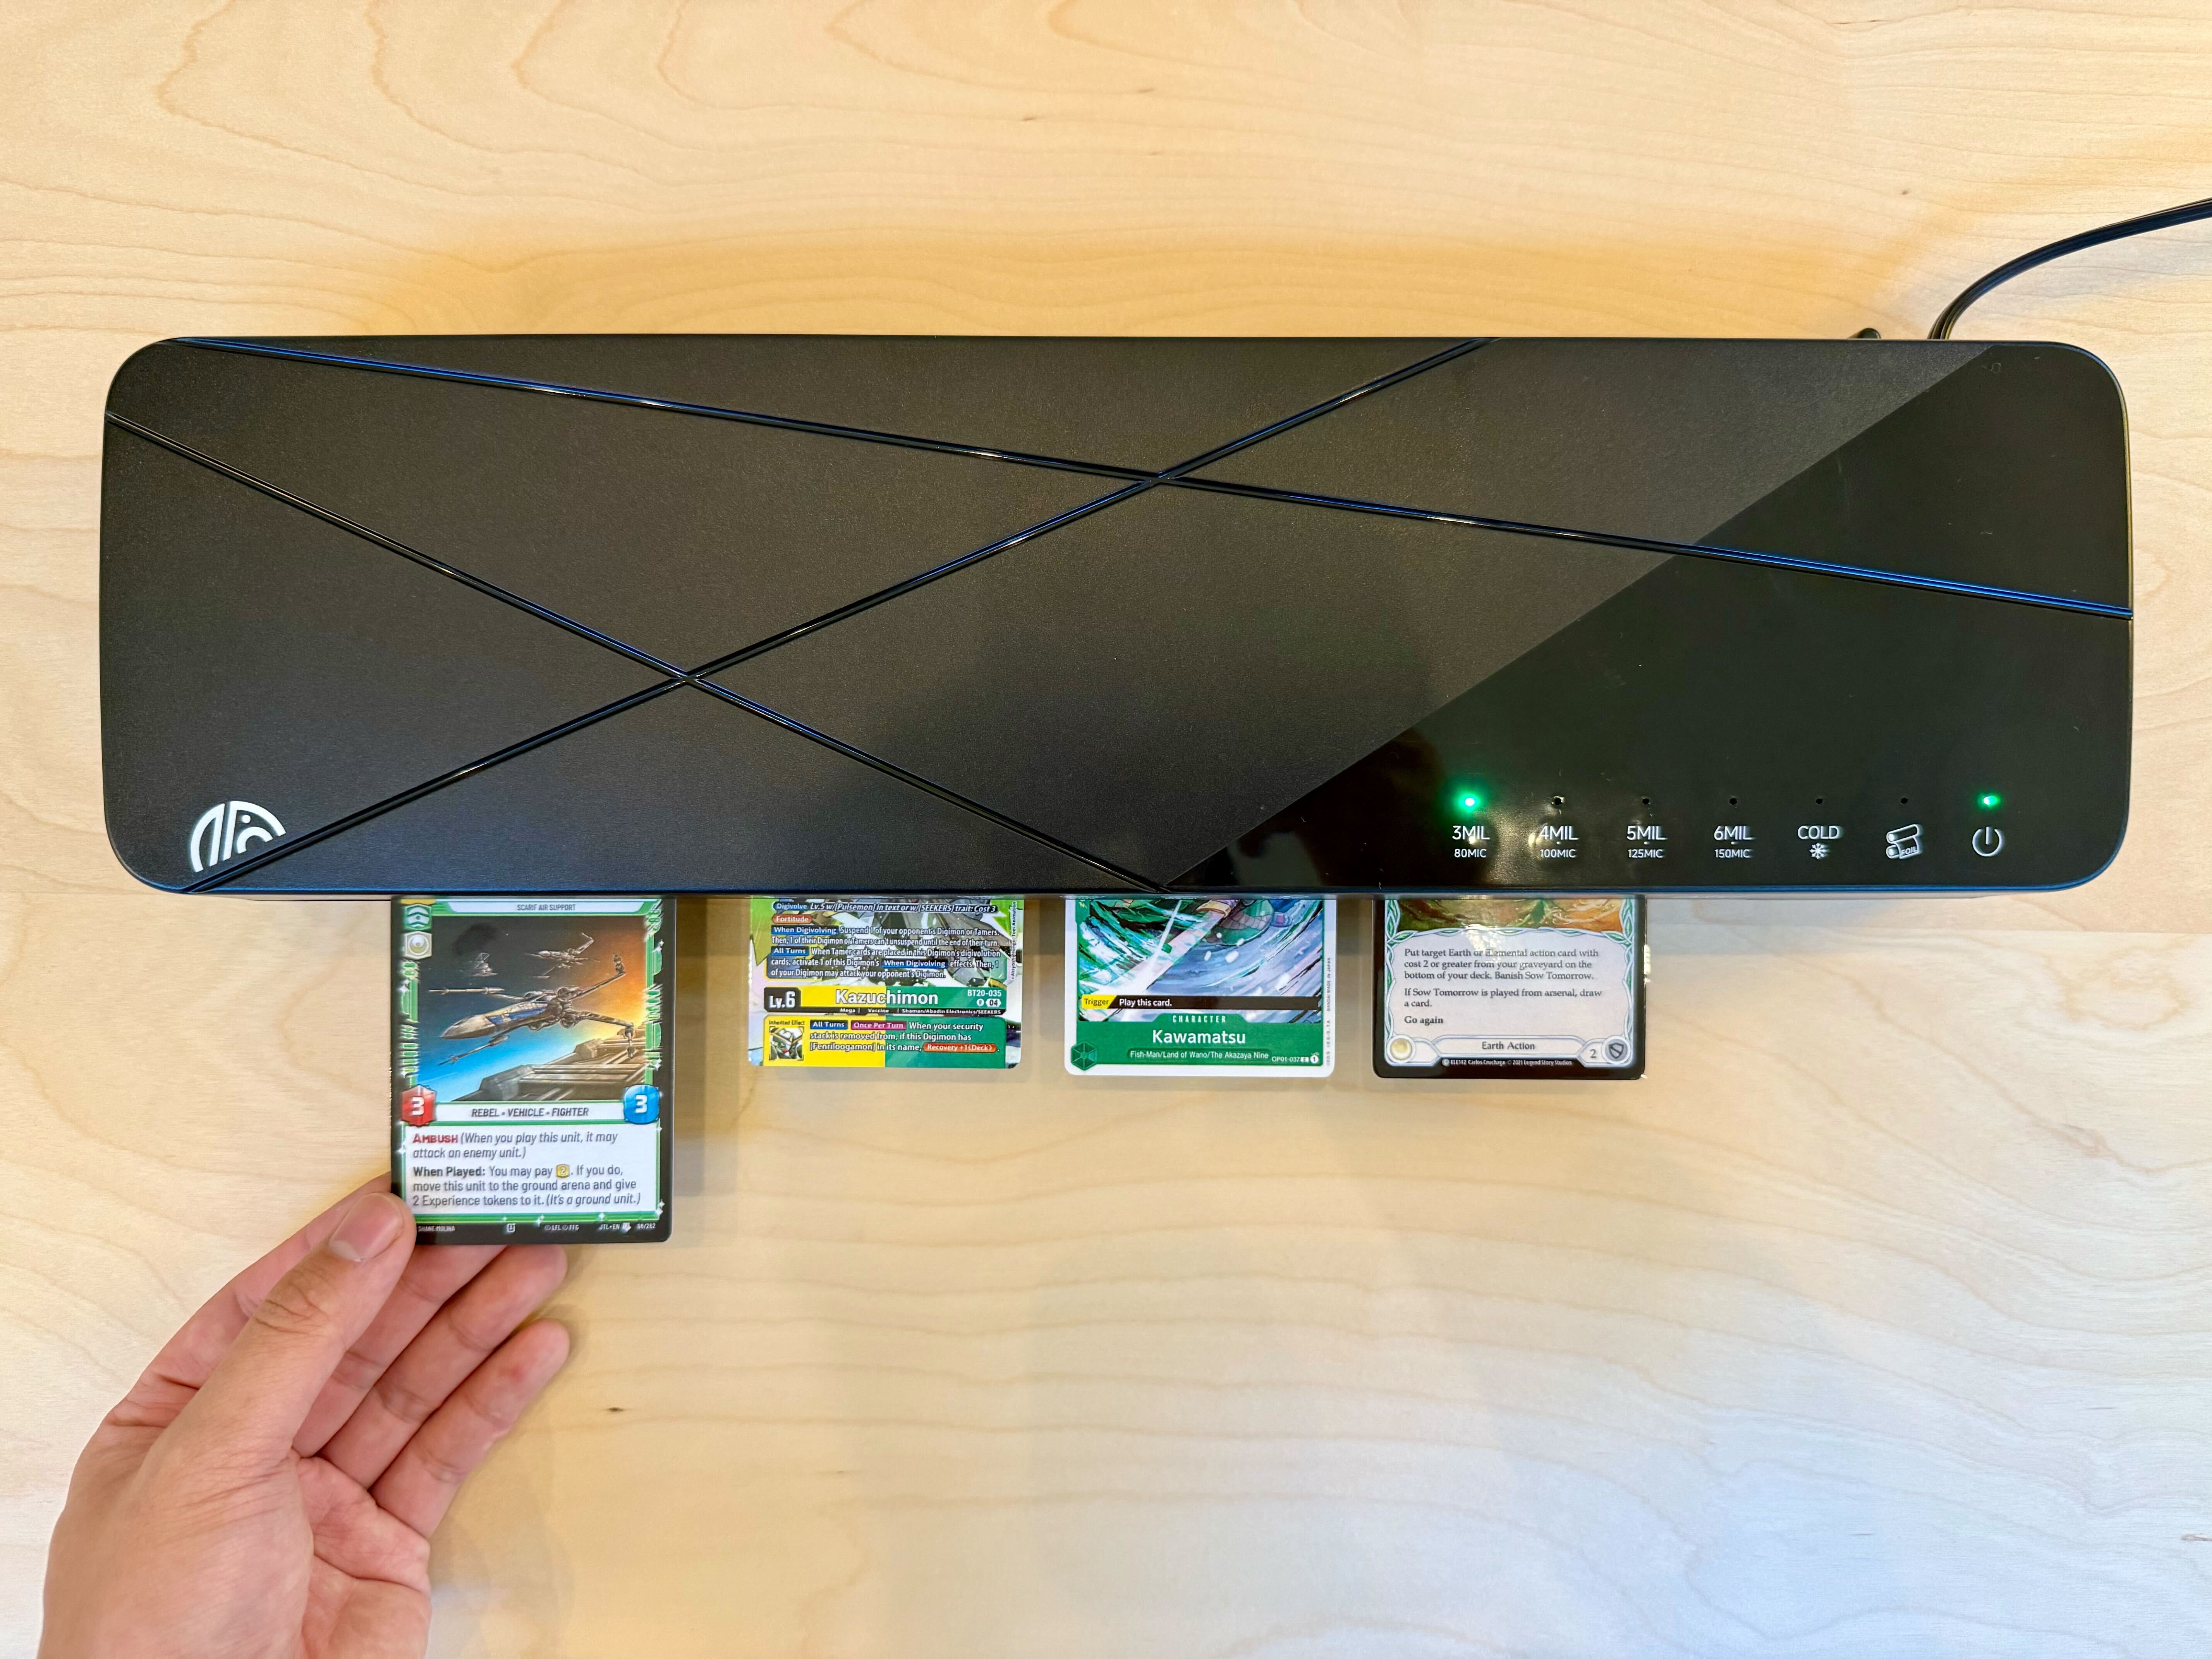
For example, even though I use 3 mil lamination pouches, I use the 5 mil setting on my laminator.
Cut the sheets
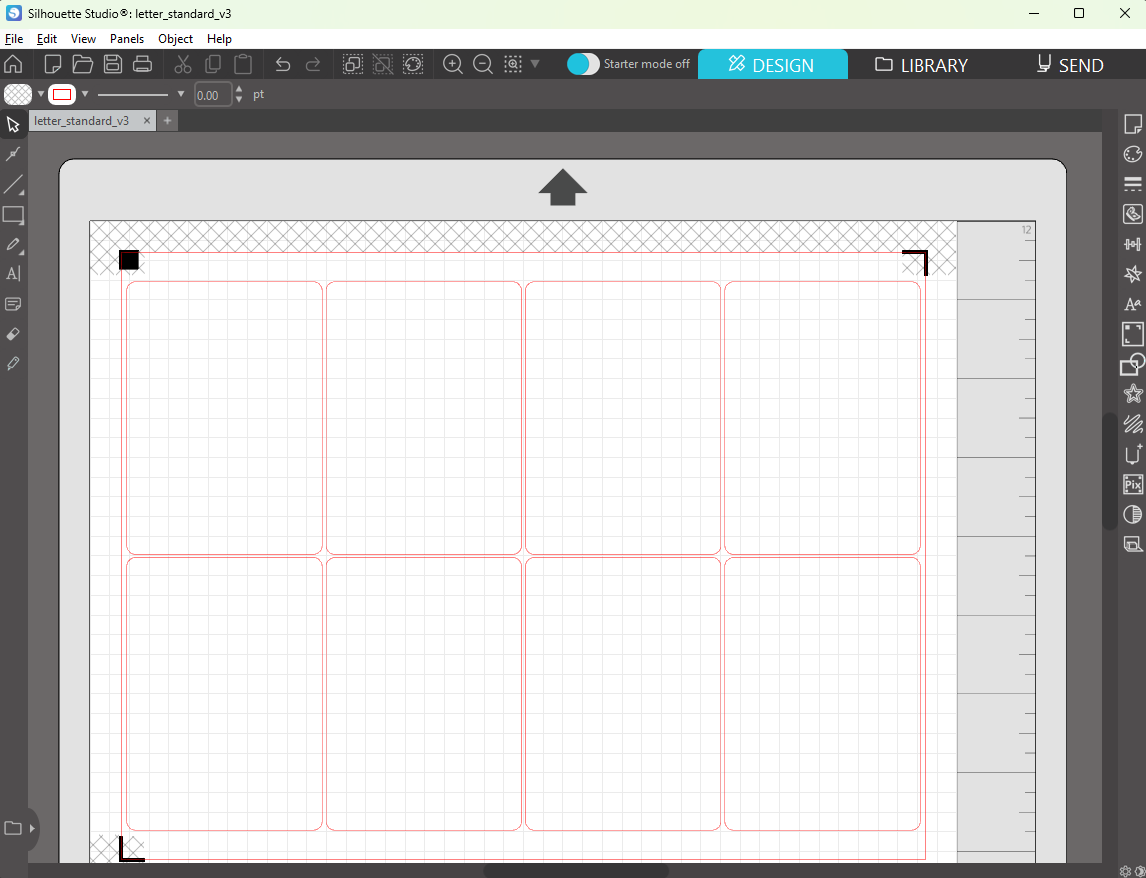
Open the appropriate cutting template in Silhouette Studio. Cutting templates are found in the cutting_templates/ folder.
The cutting template you should use depends on the paper and card sizes you used during PDF generation. If you are unsure, the appropriate cutting template is printed on the PDF.
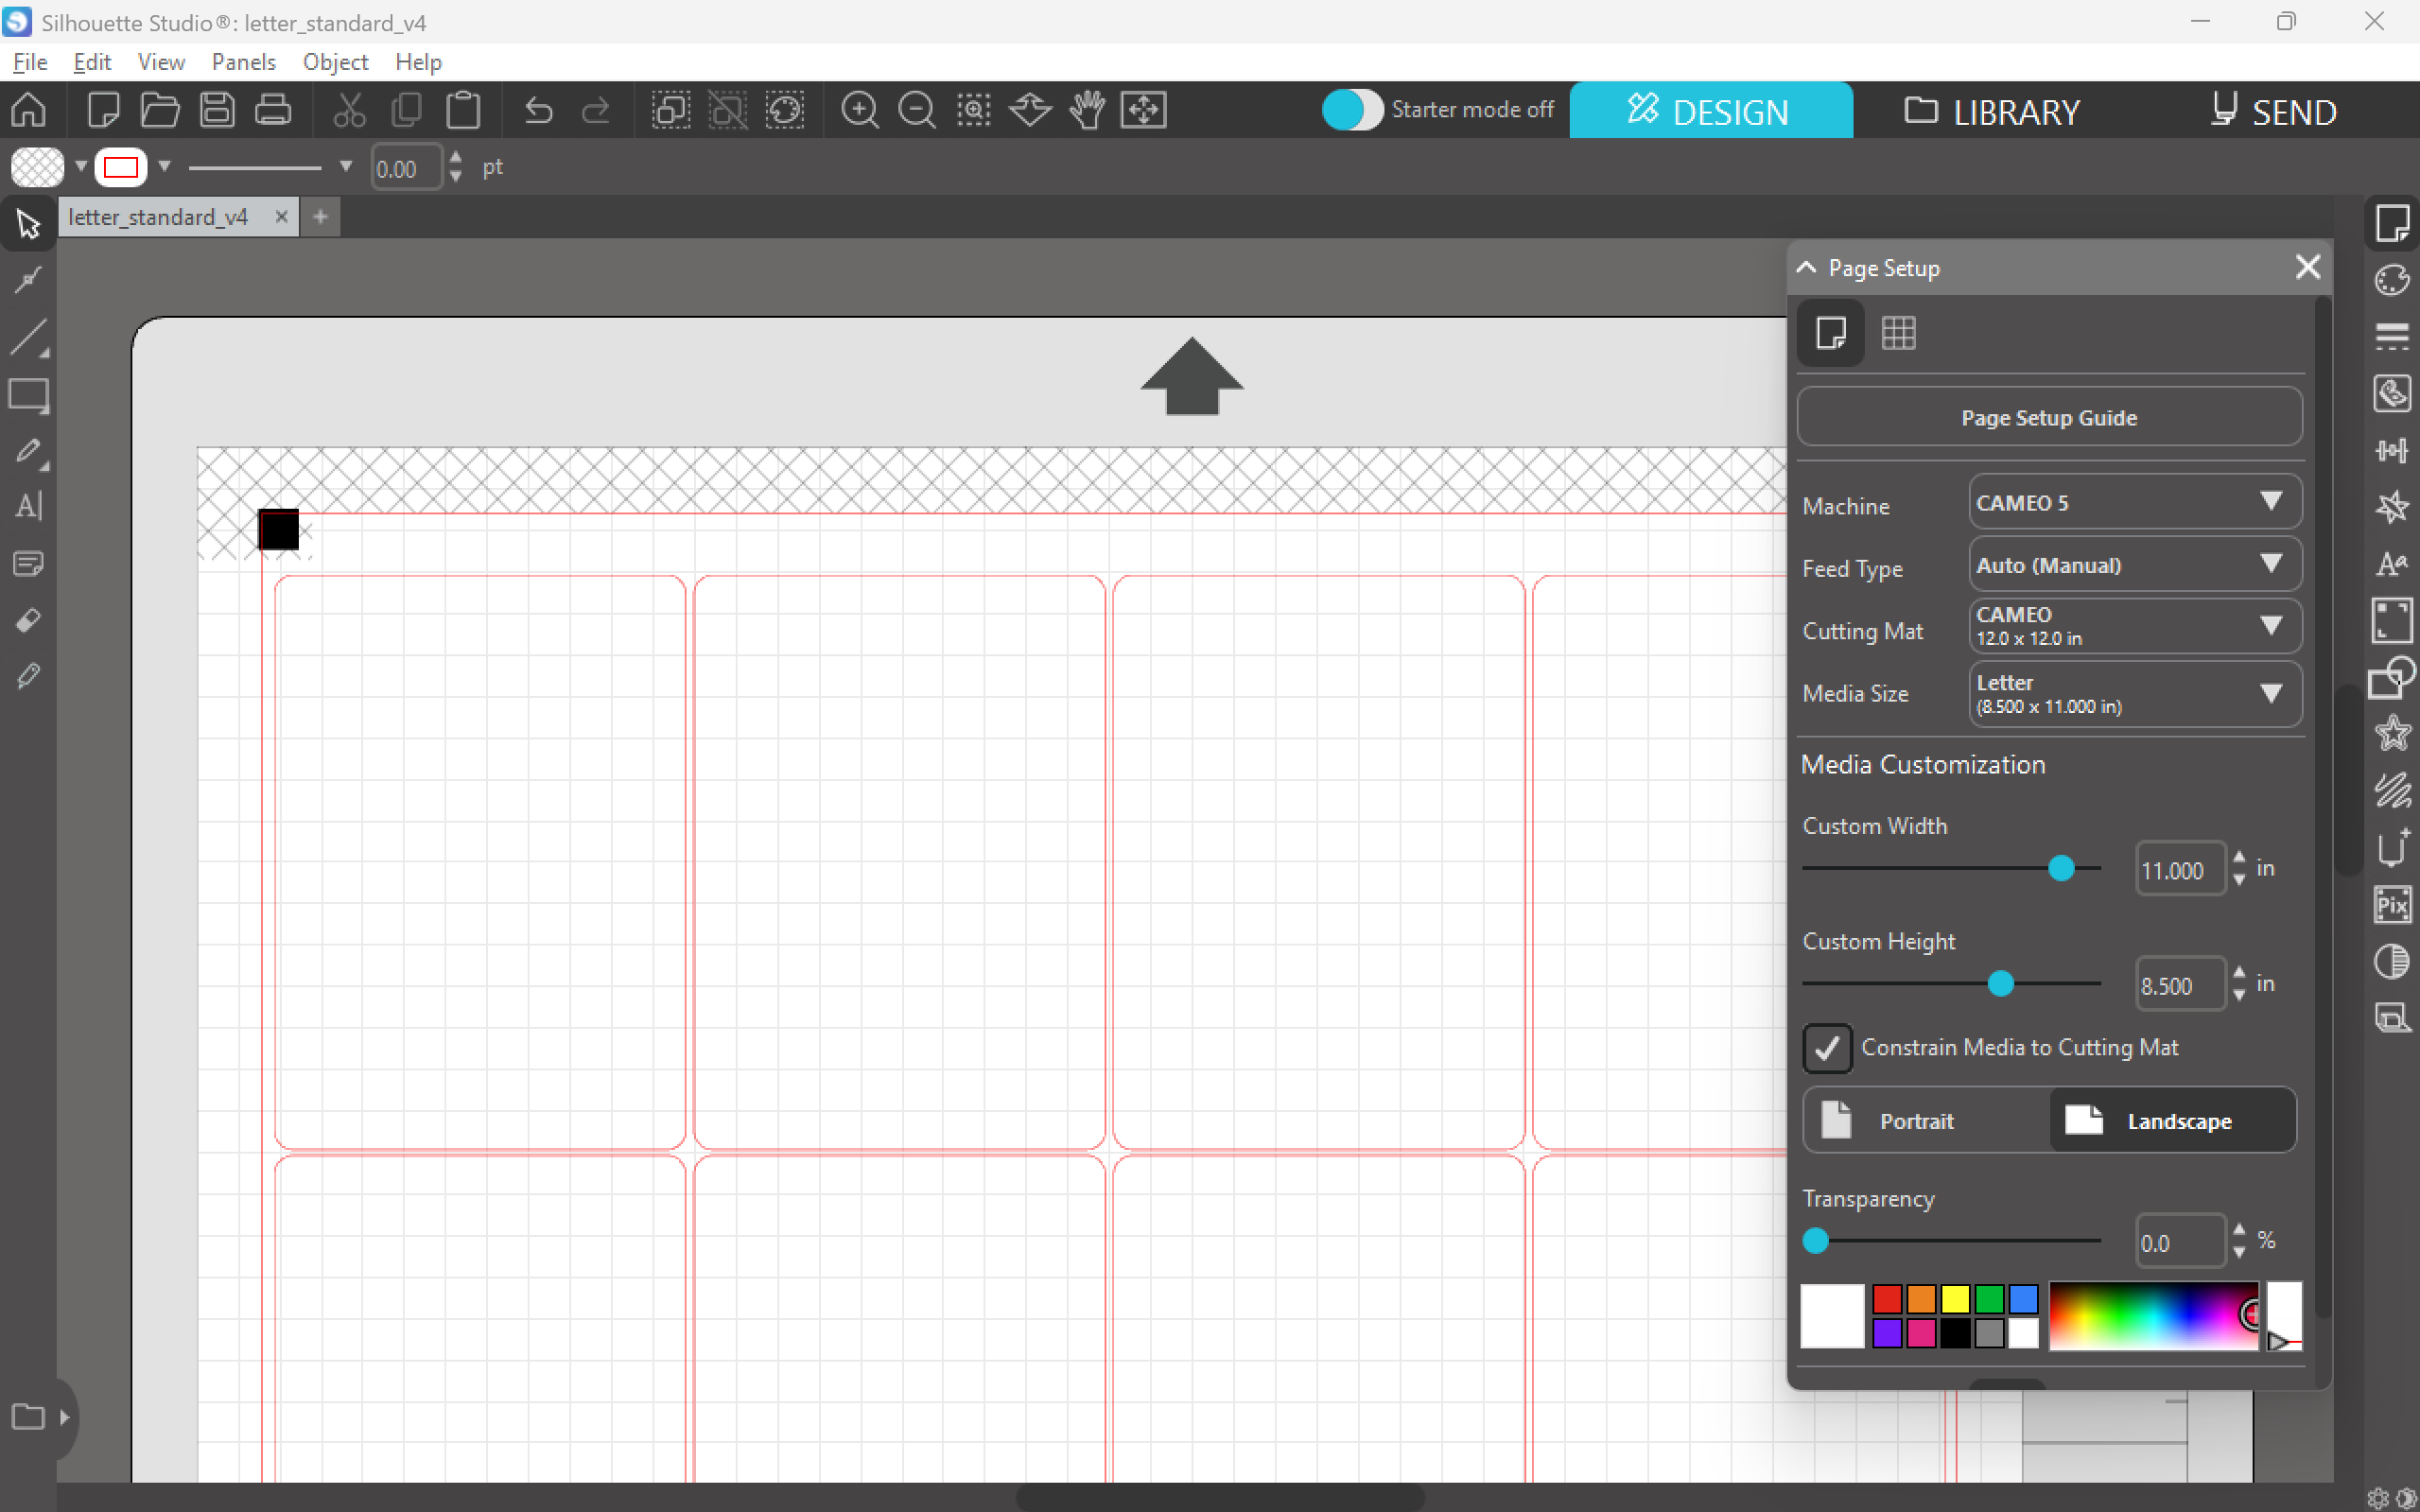
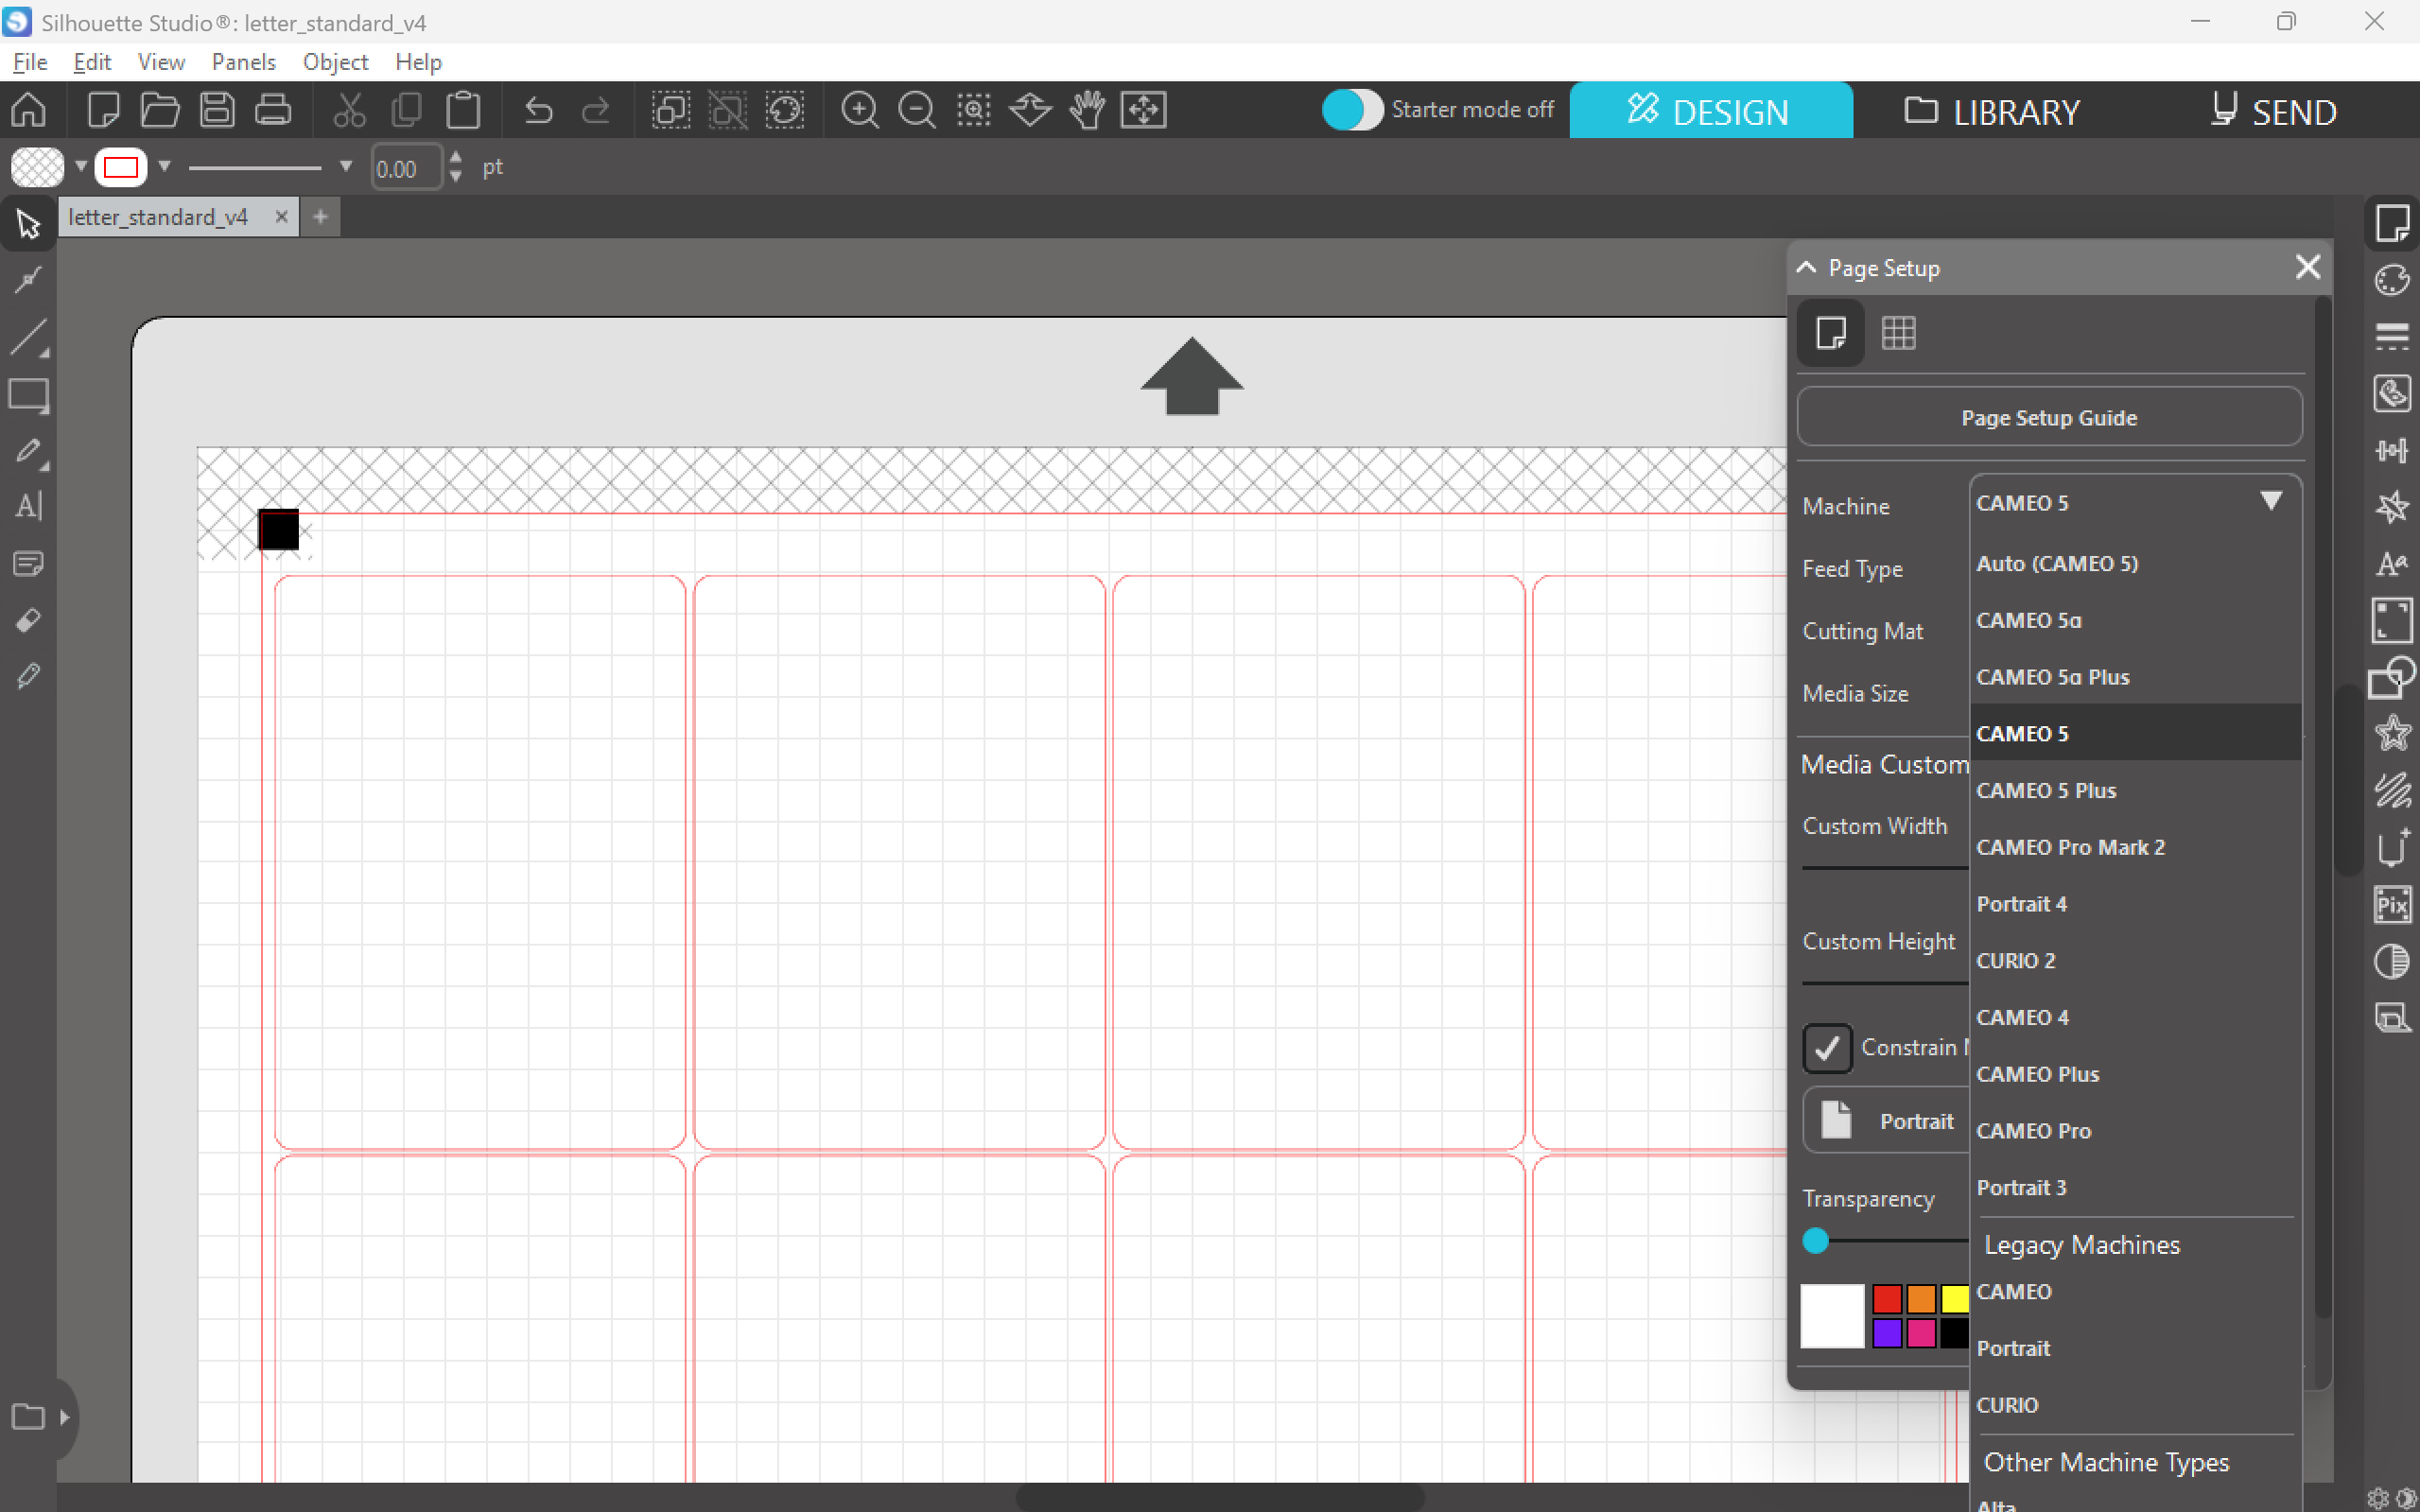
Ensure that your machine is selected.
Tip
If you have a Cameo 5 Alpha, select Cameo 5 instead.
The Cameo 5 Alpha uses the new 4 corner registration marks. If you followed the tutorial, you generated a PDF with the old 3 corner registration marks. The Cameo 5 Alpha can still use the old registration marks by changing the machine to Cameo 5.
While create_pdf.py can generate a PDF using the new registration marks, most Cameo 5 Alpha users still prefer the old registration marks for reliability.
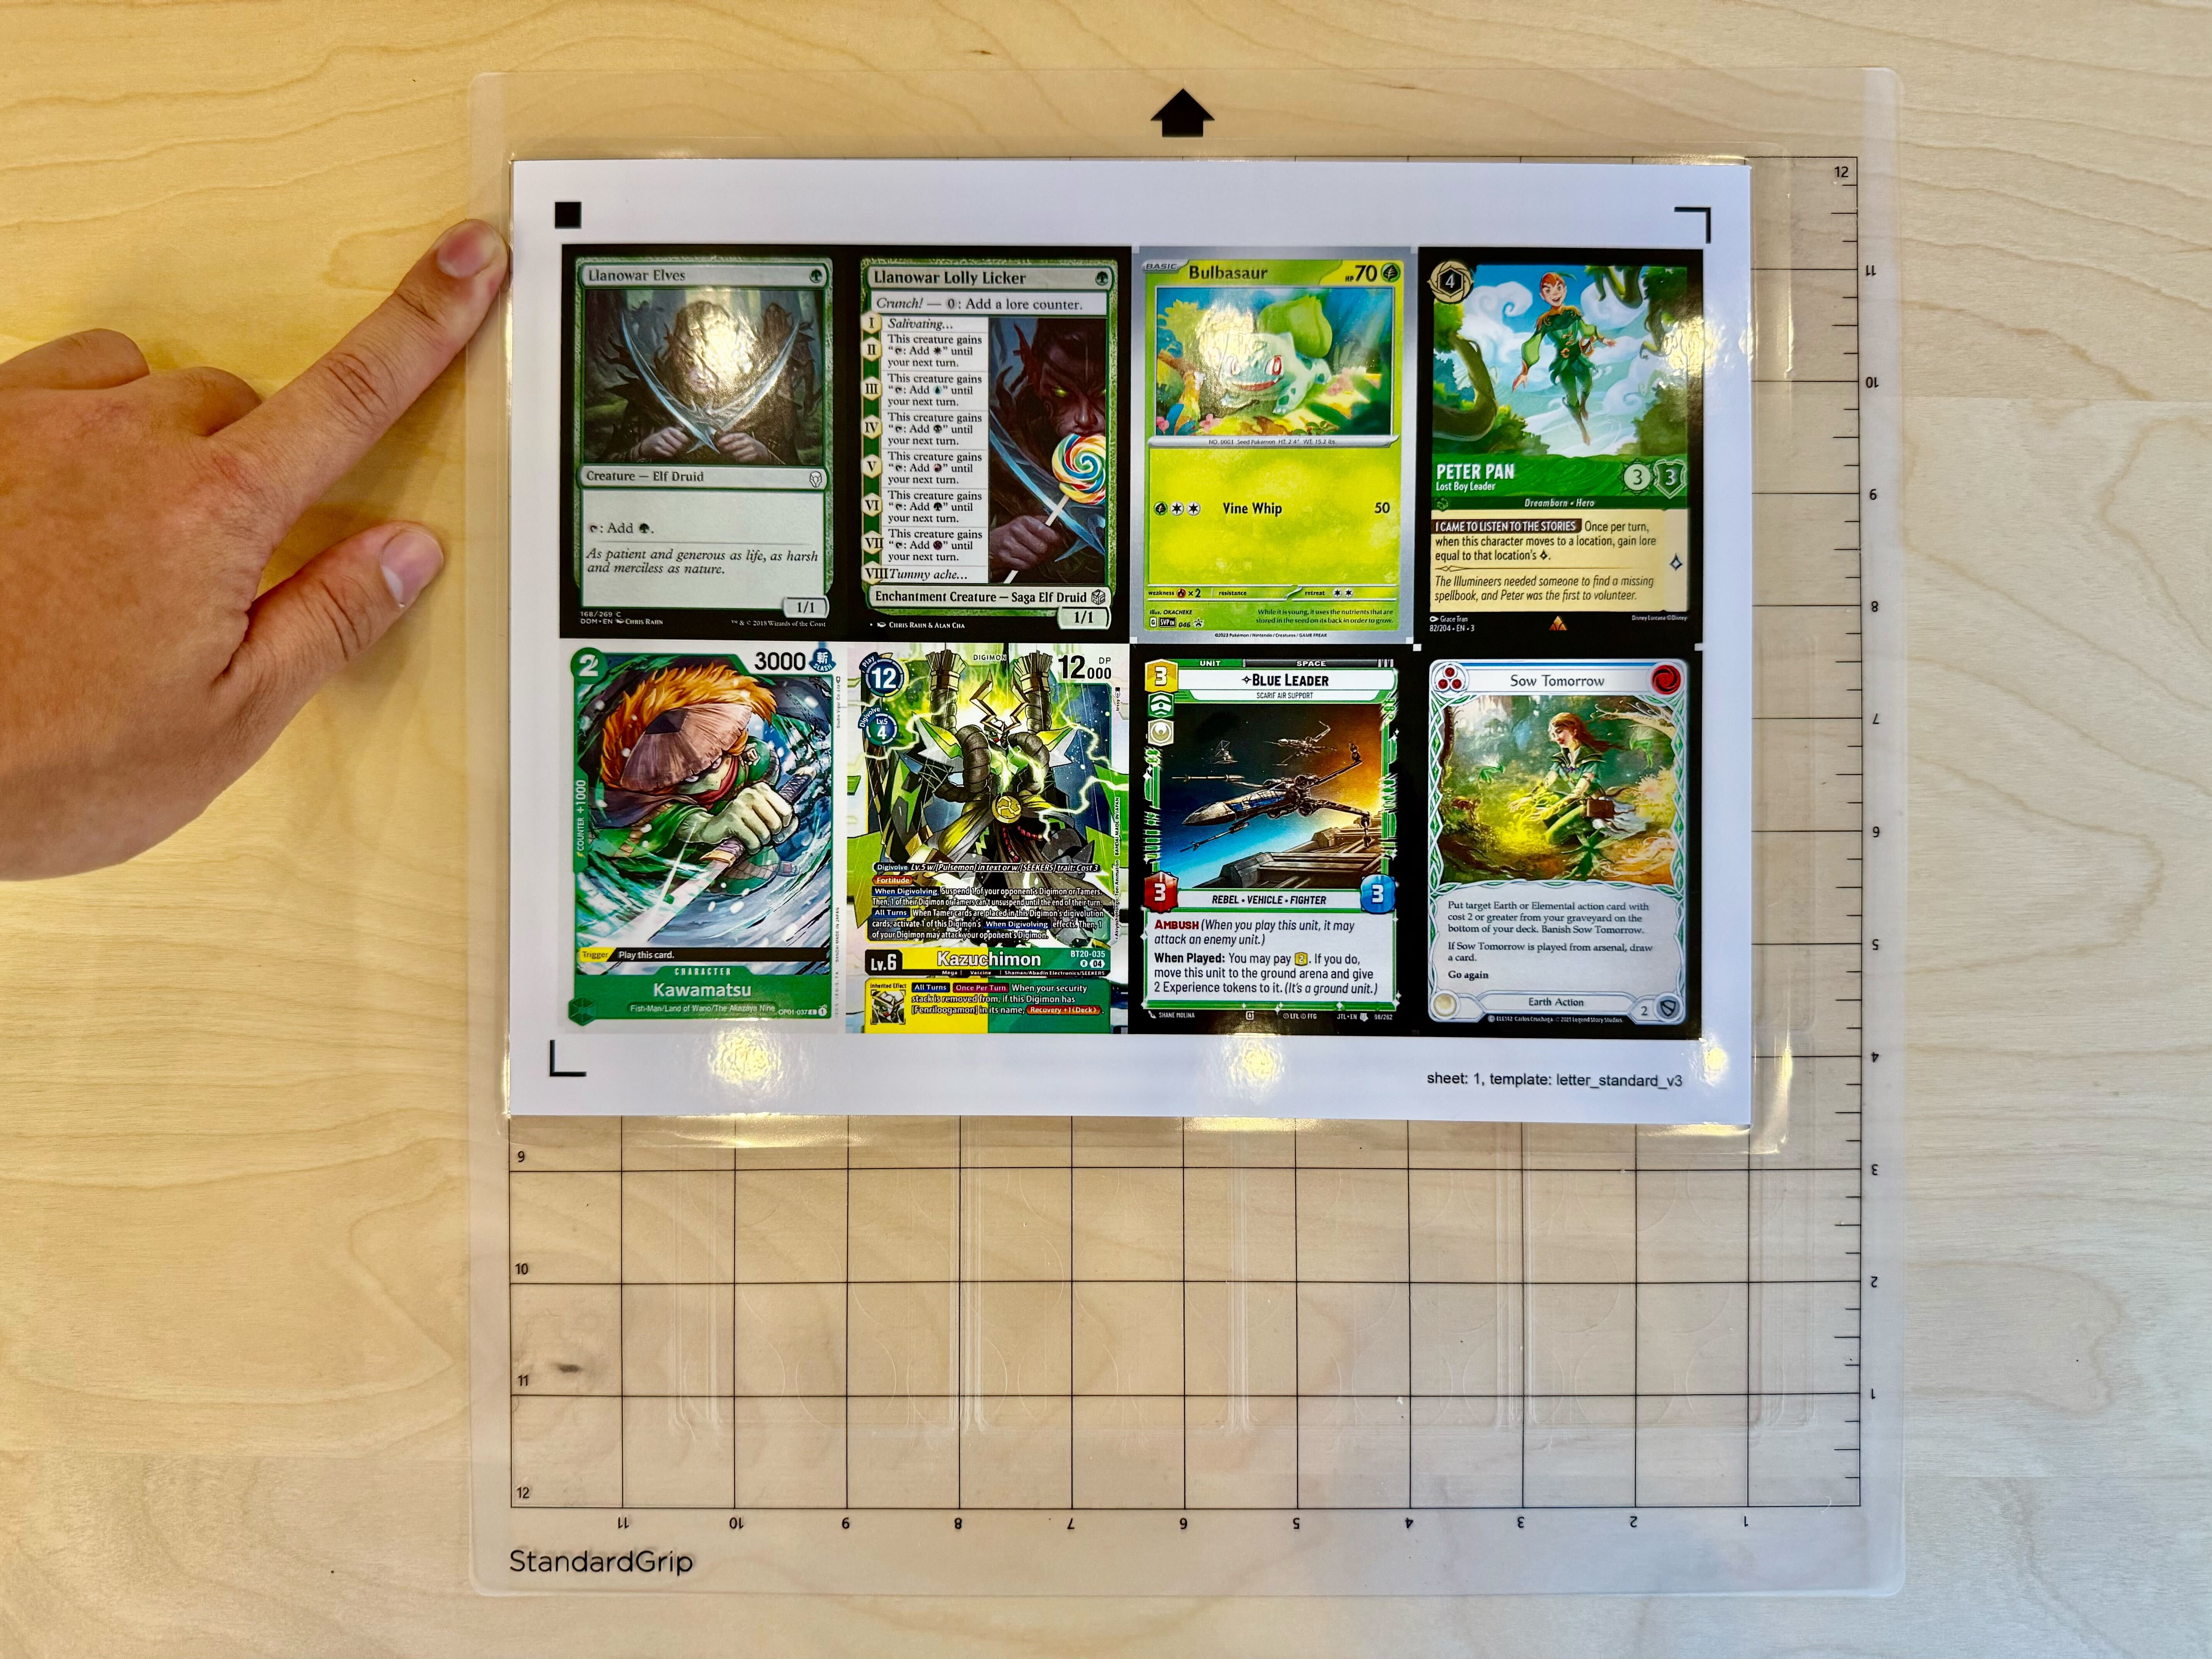
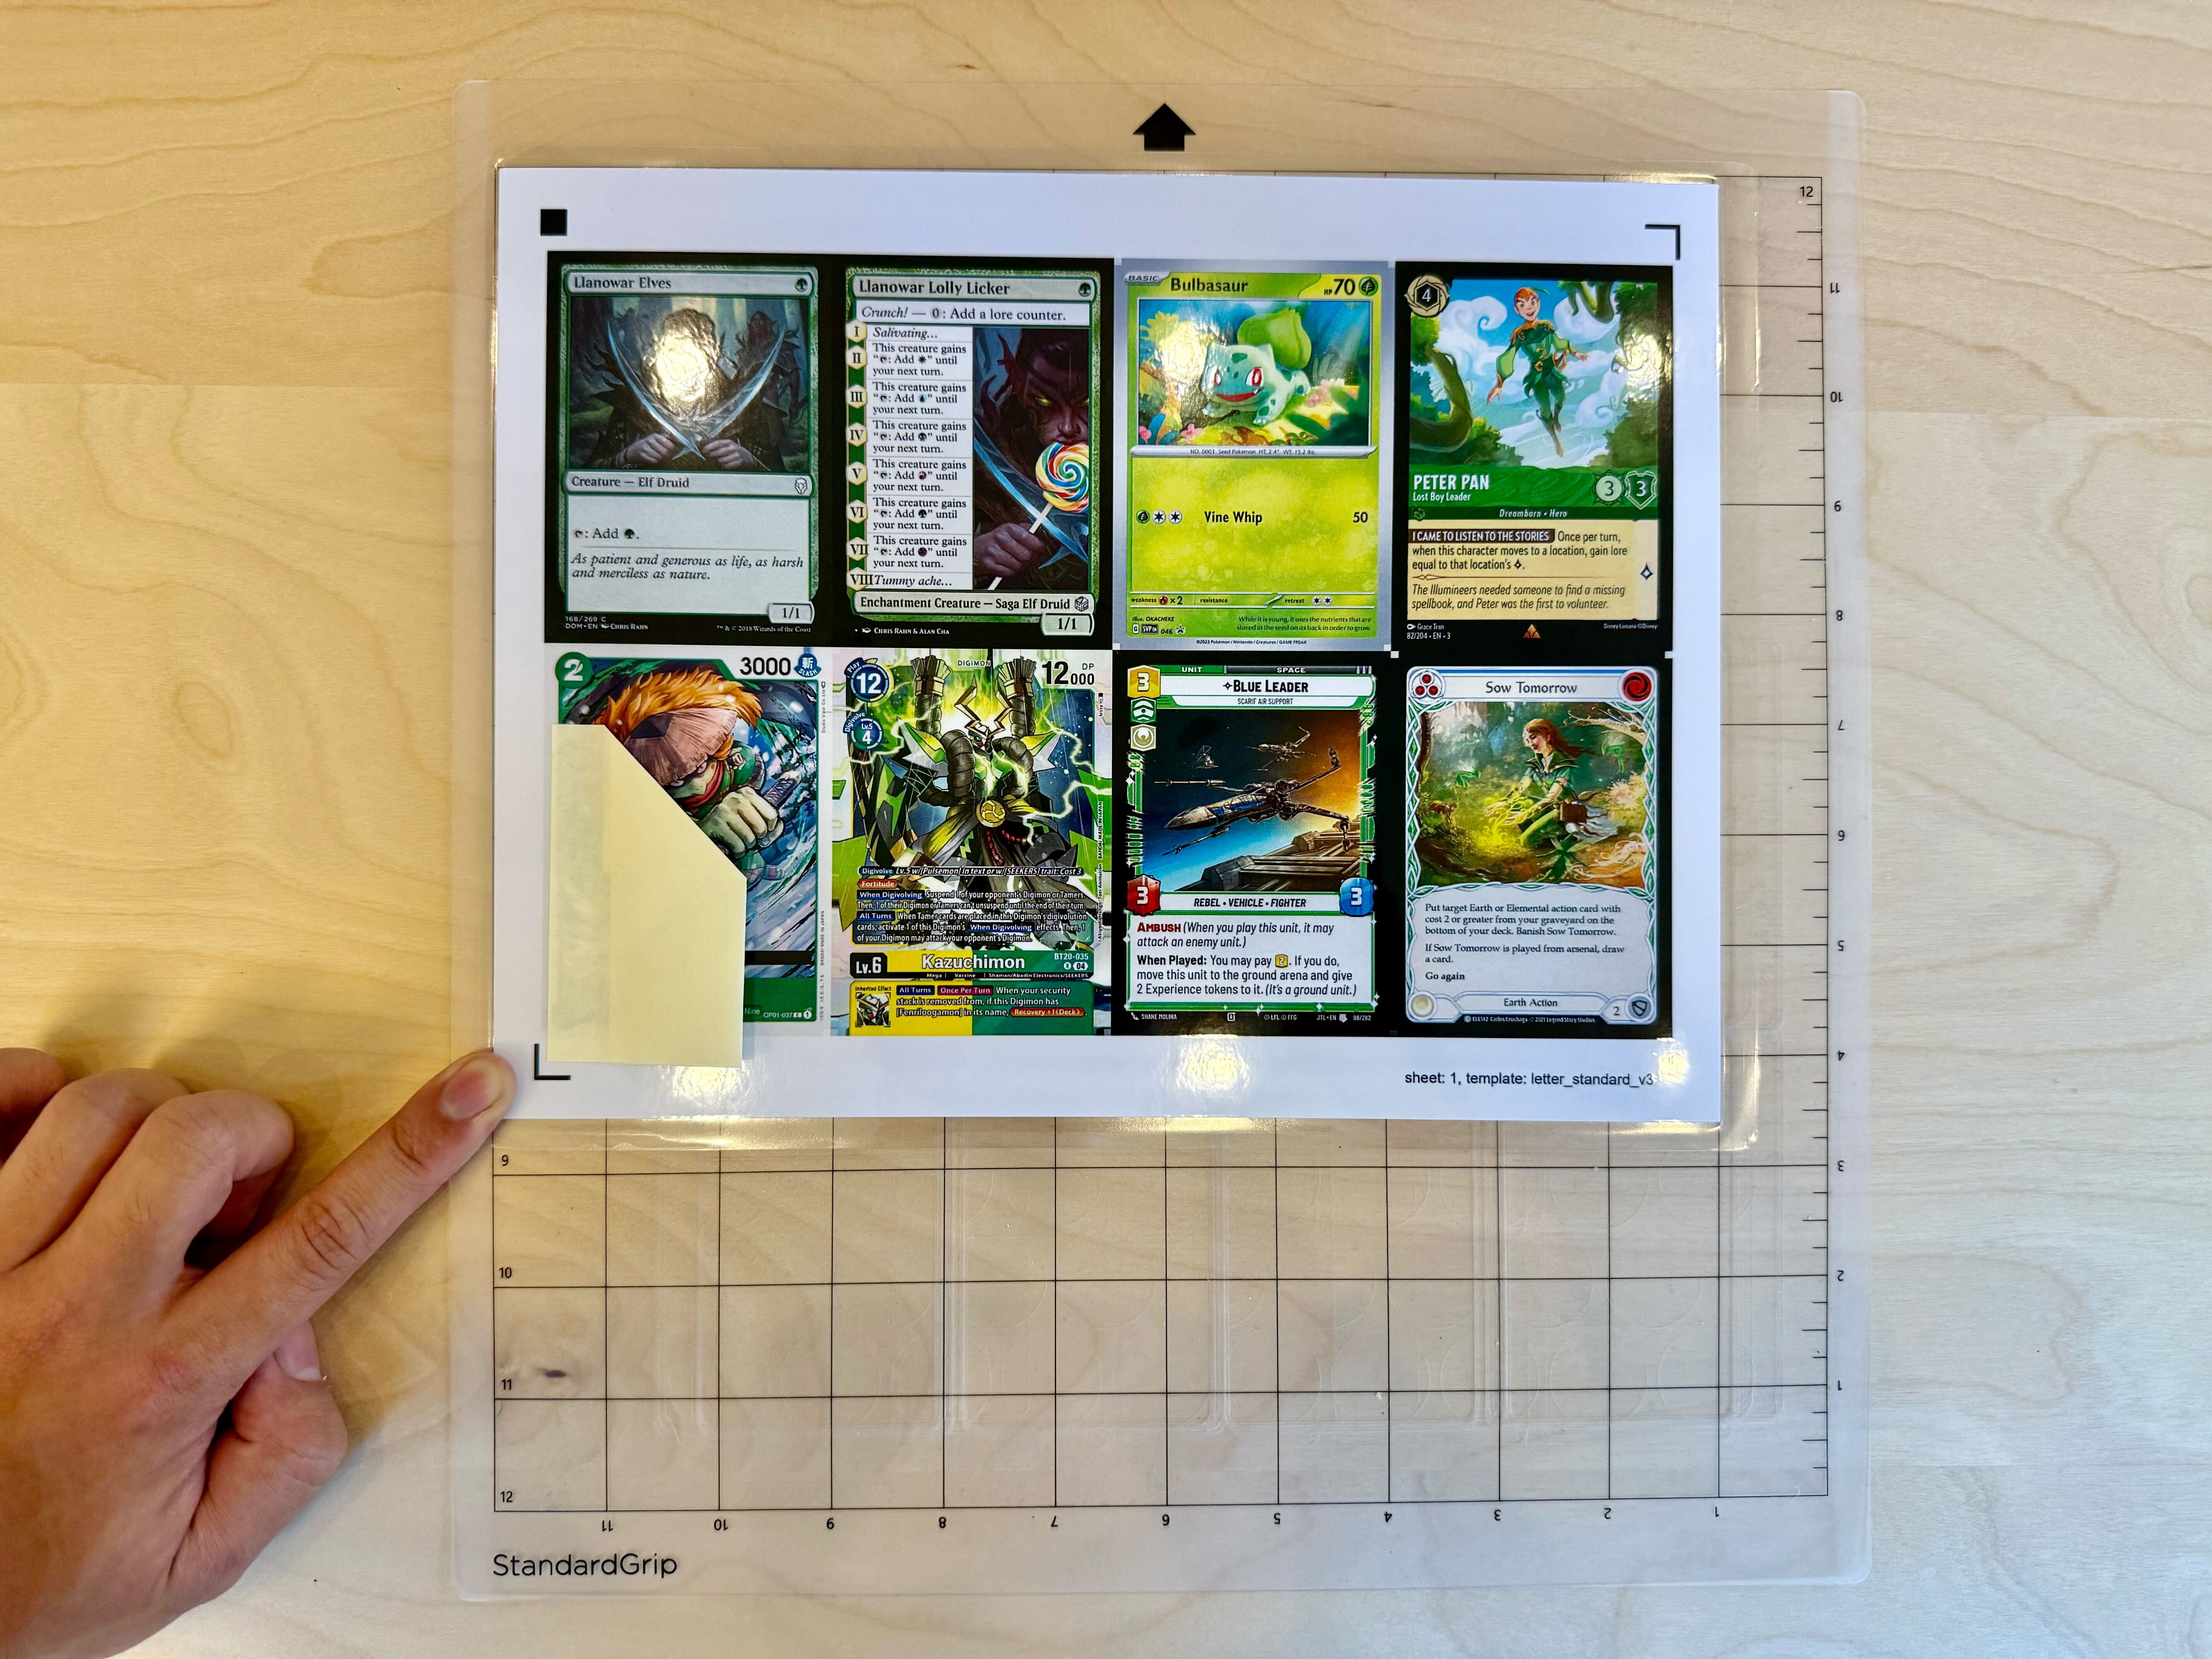
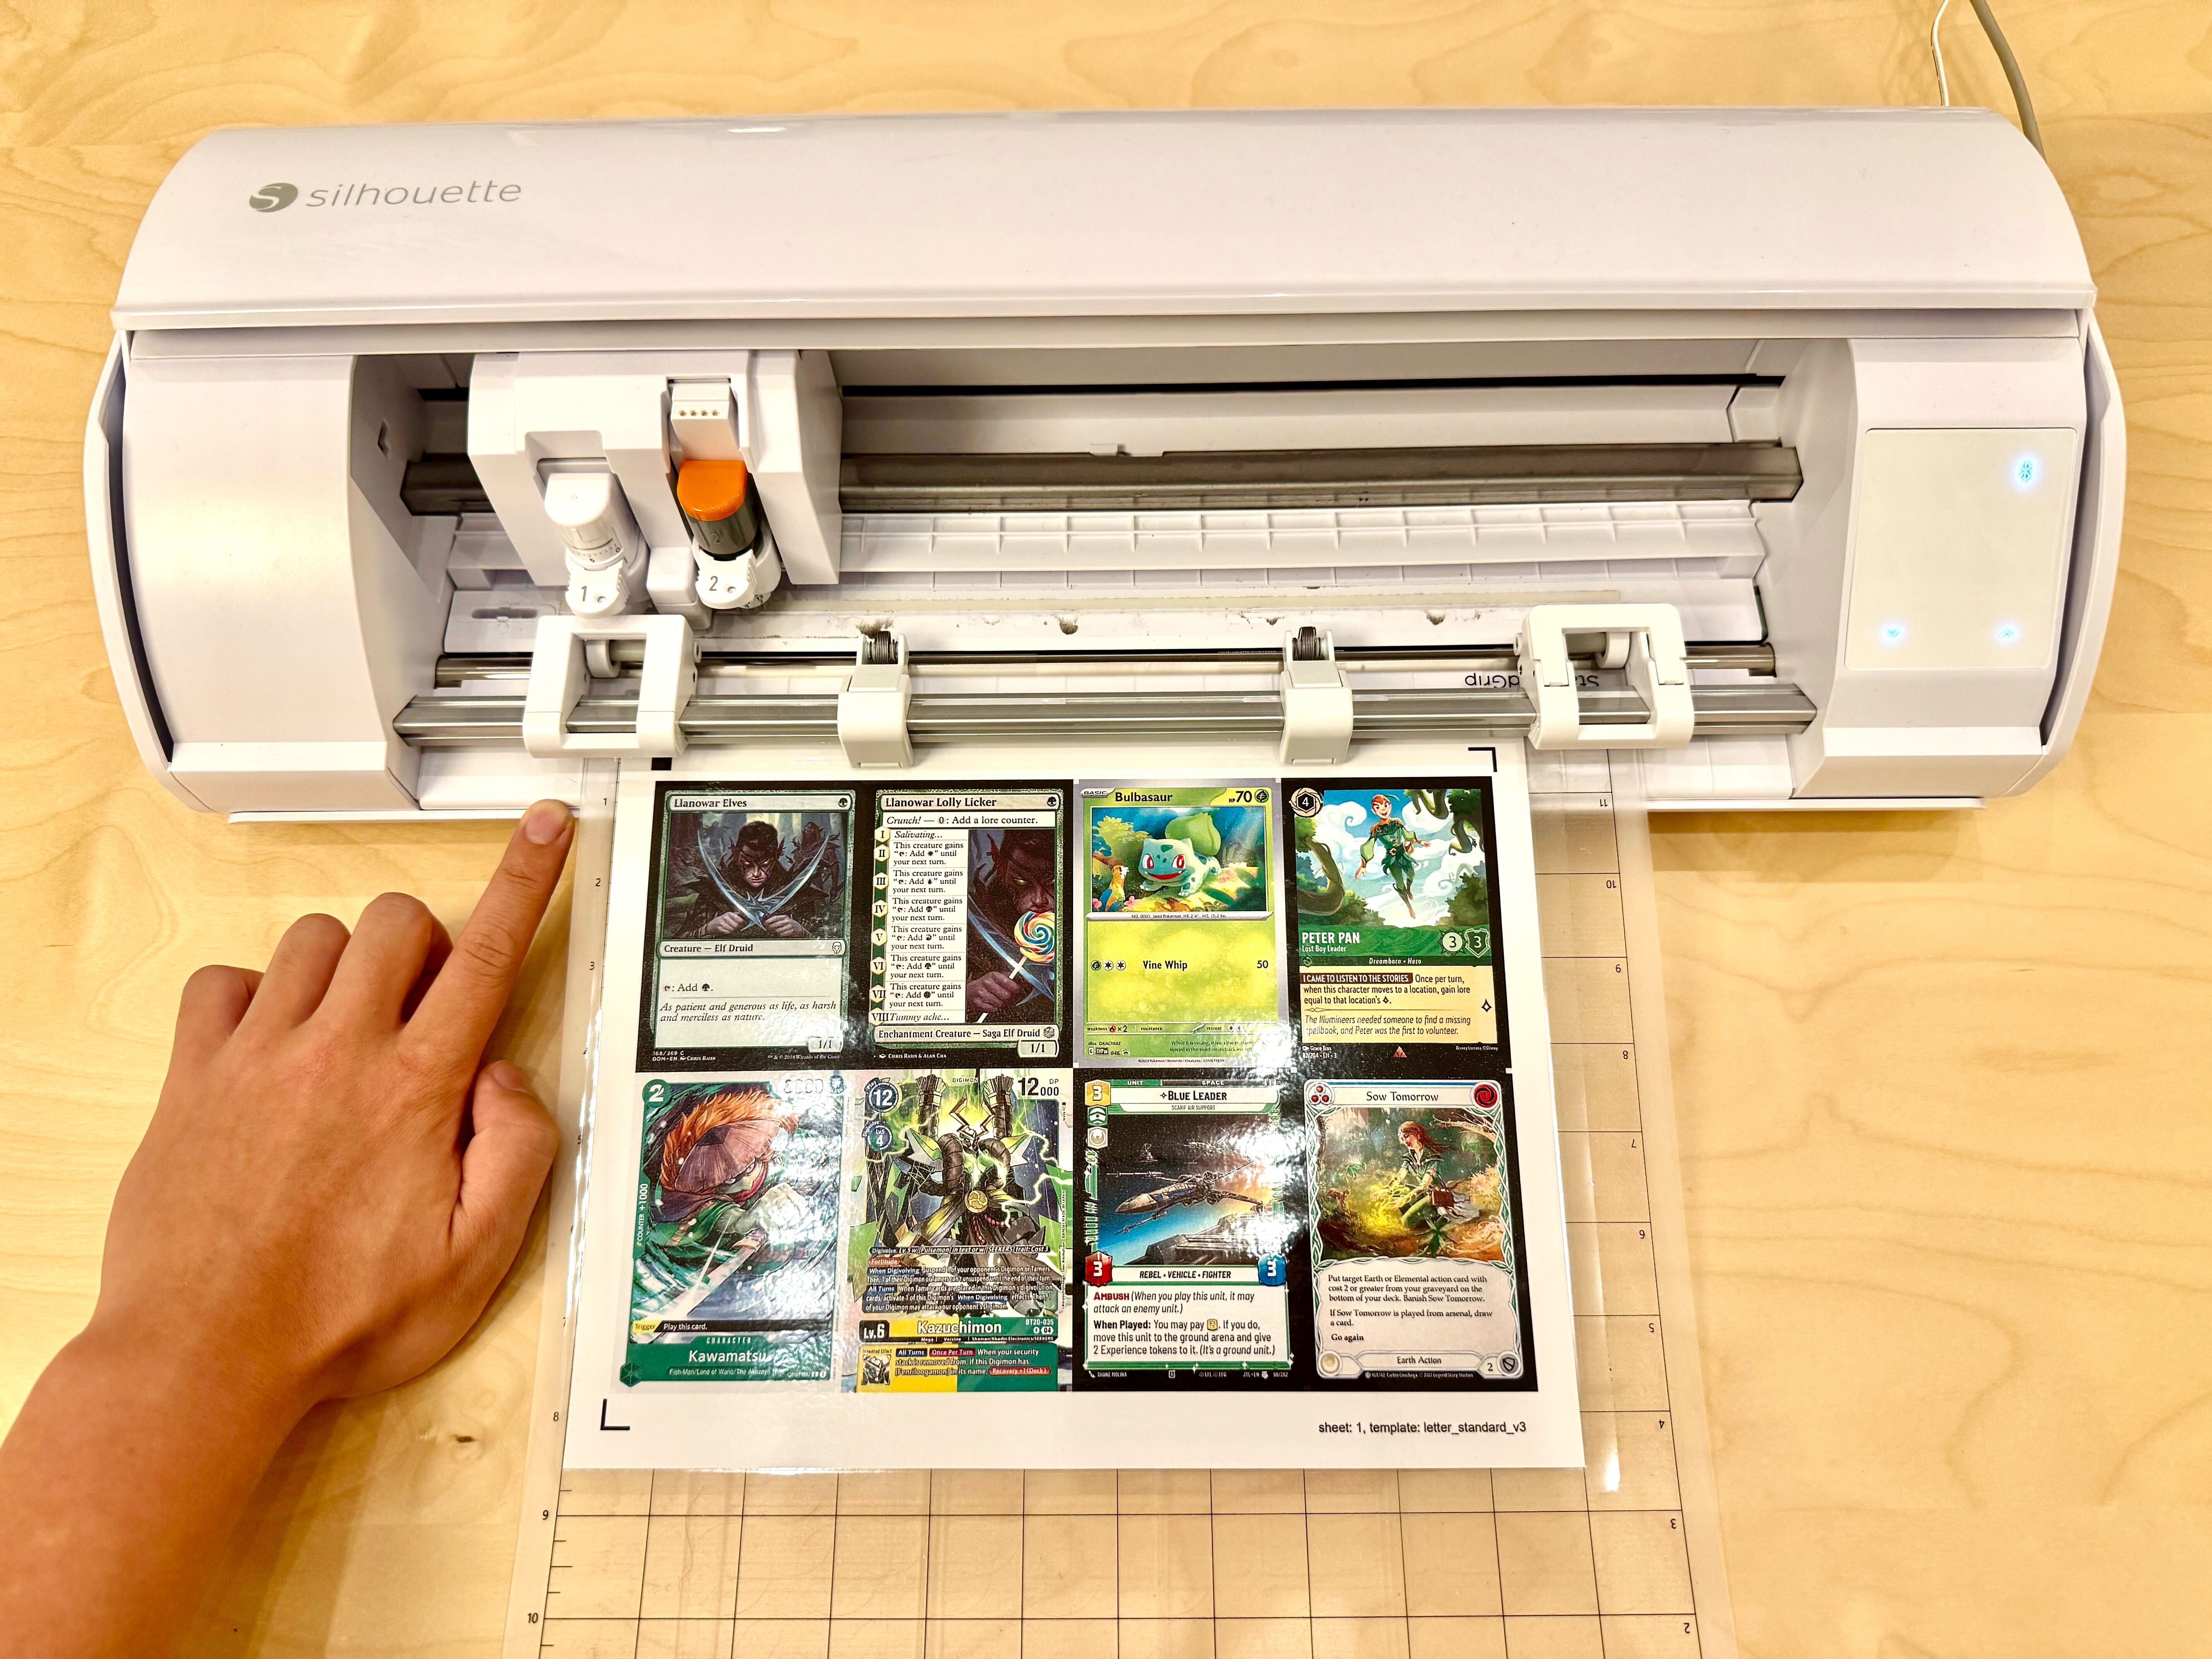
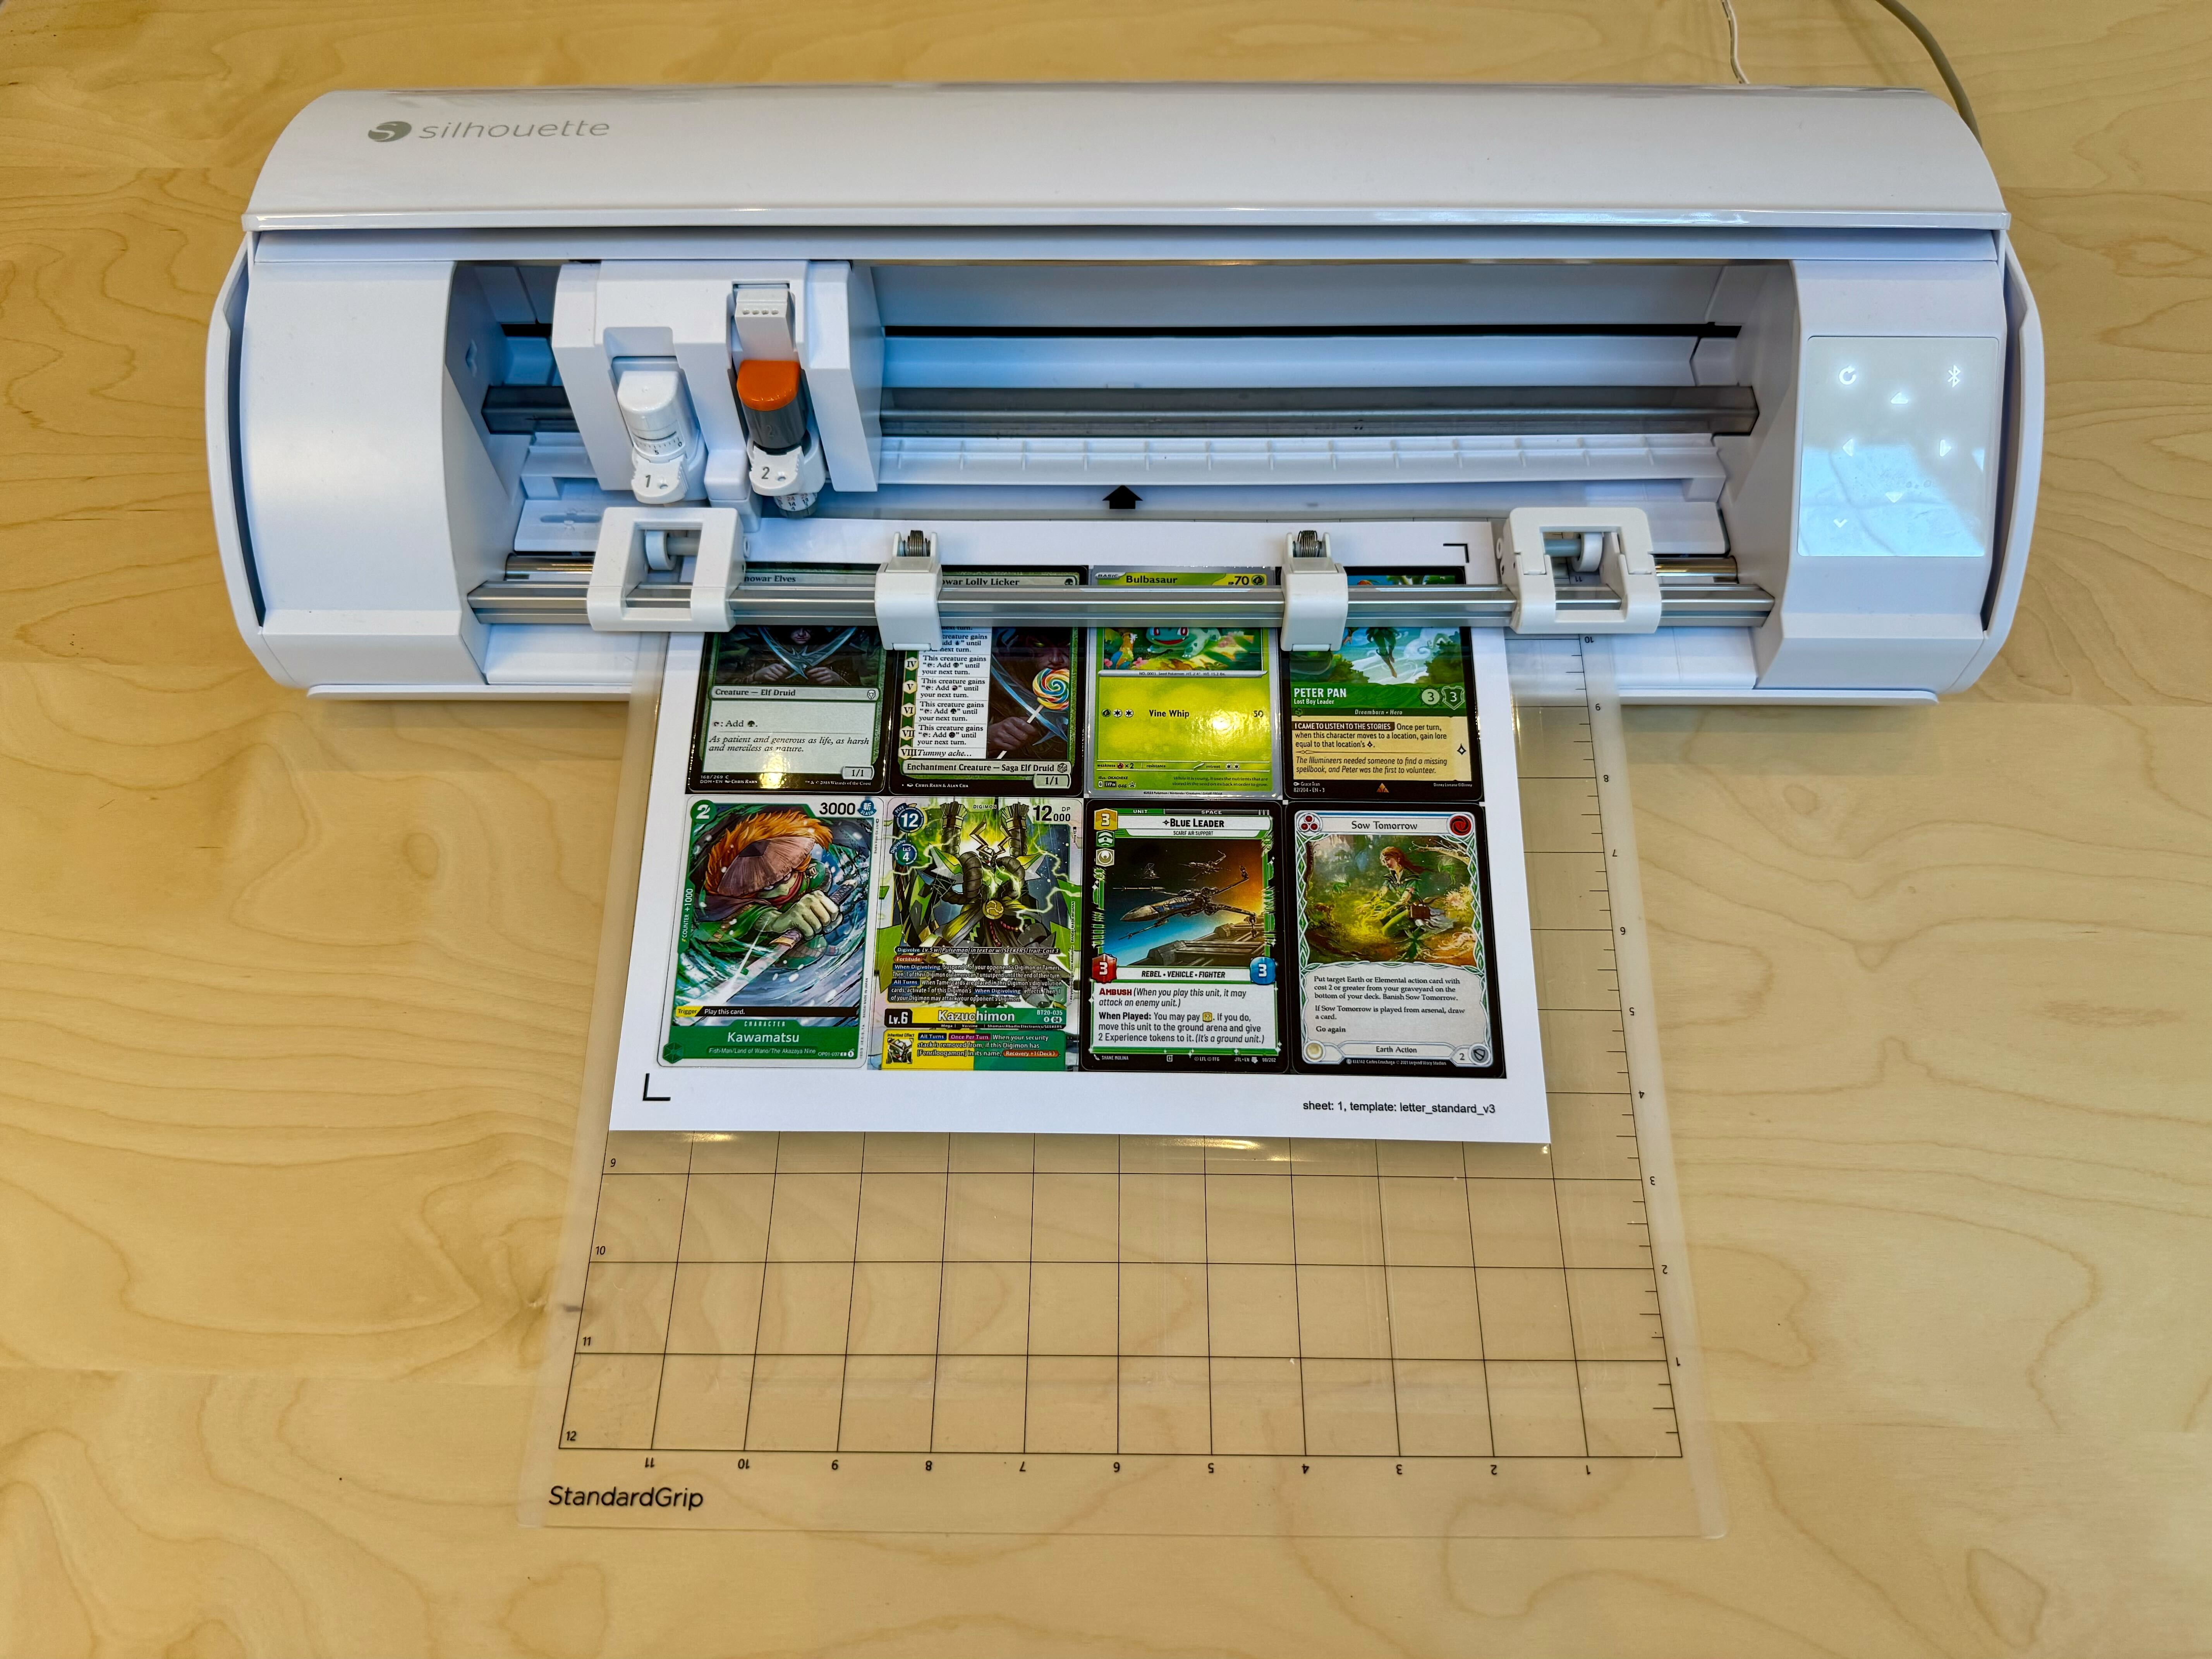
Put a sheet on the cutting mat. The position of the sheet should match what is depicted in Silhouette Studio.
For this cutting template, the sheet should be in the top left of the cutting mat grid and the black registration square should be in the top left as well.

Align the sheet to the grid using the edges of the paper, not the edges of the lamination.
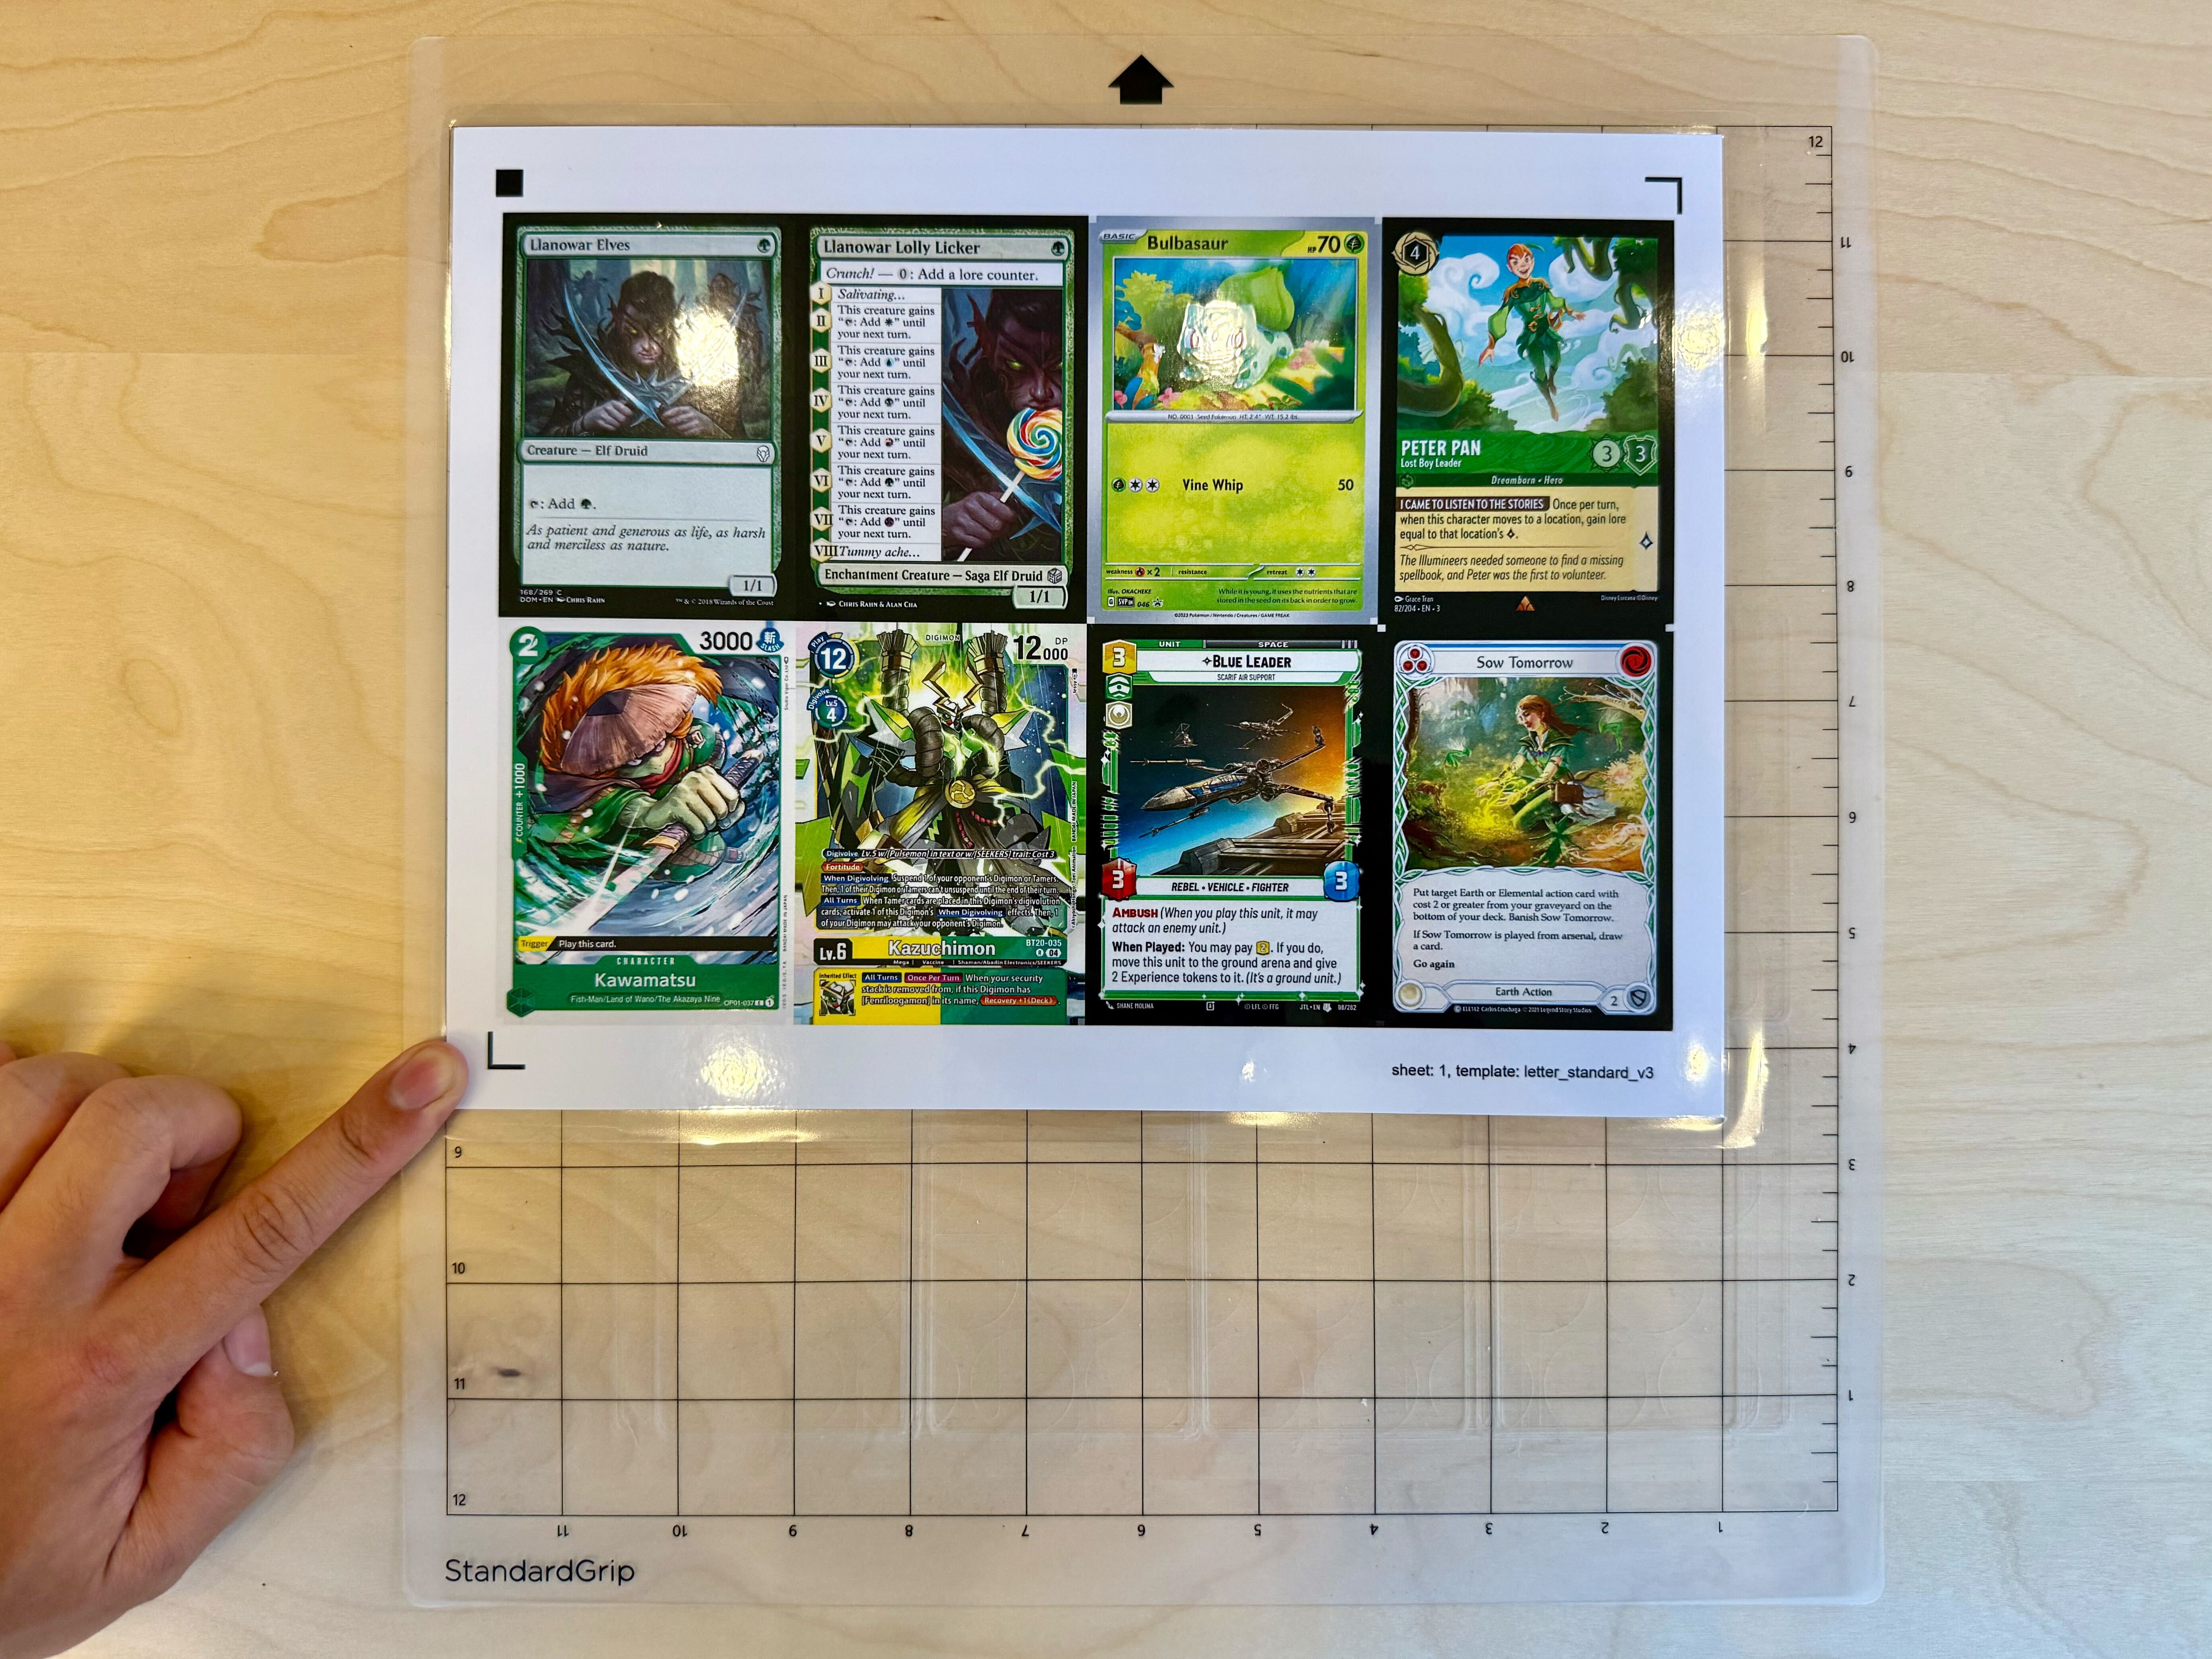
Use a Post-It note to cover the bottom left card.
Because the card is so close to the bottom left L registration mark, the machine can get the two confused. Covering the card will reduce registration issues.
You can also use masking tape or a piece of paper with tape on it, as long as whatever you use is lightly colored and closely matches the paper.
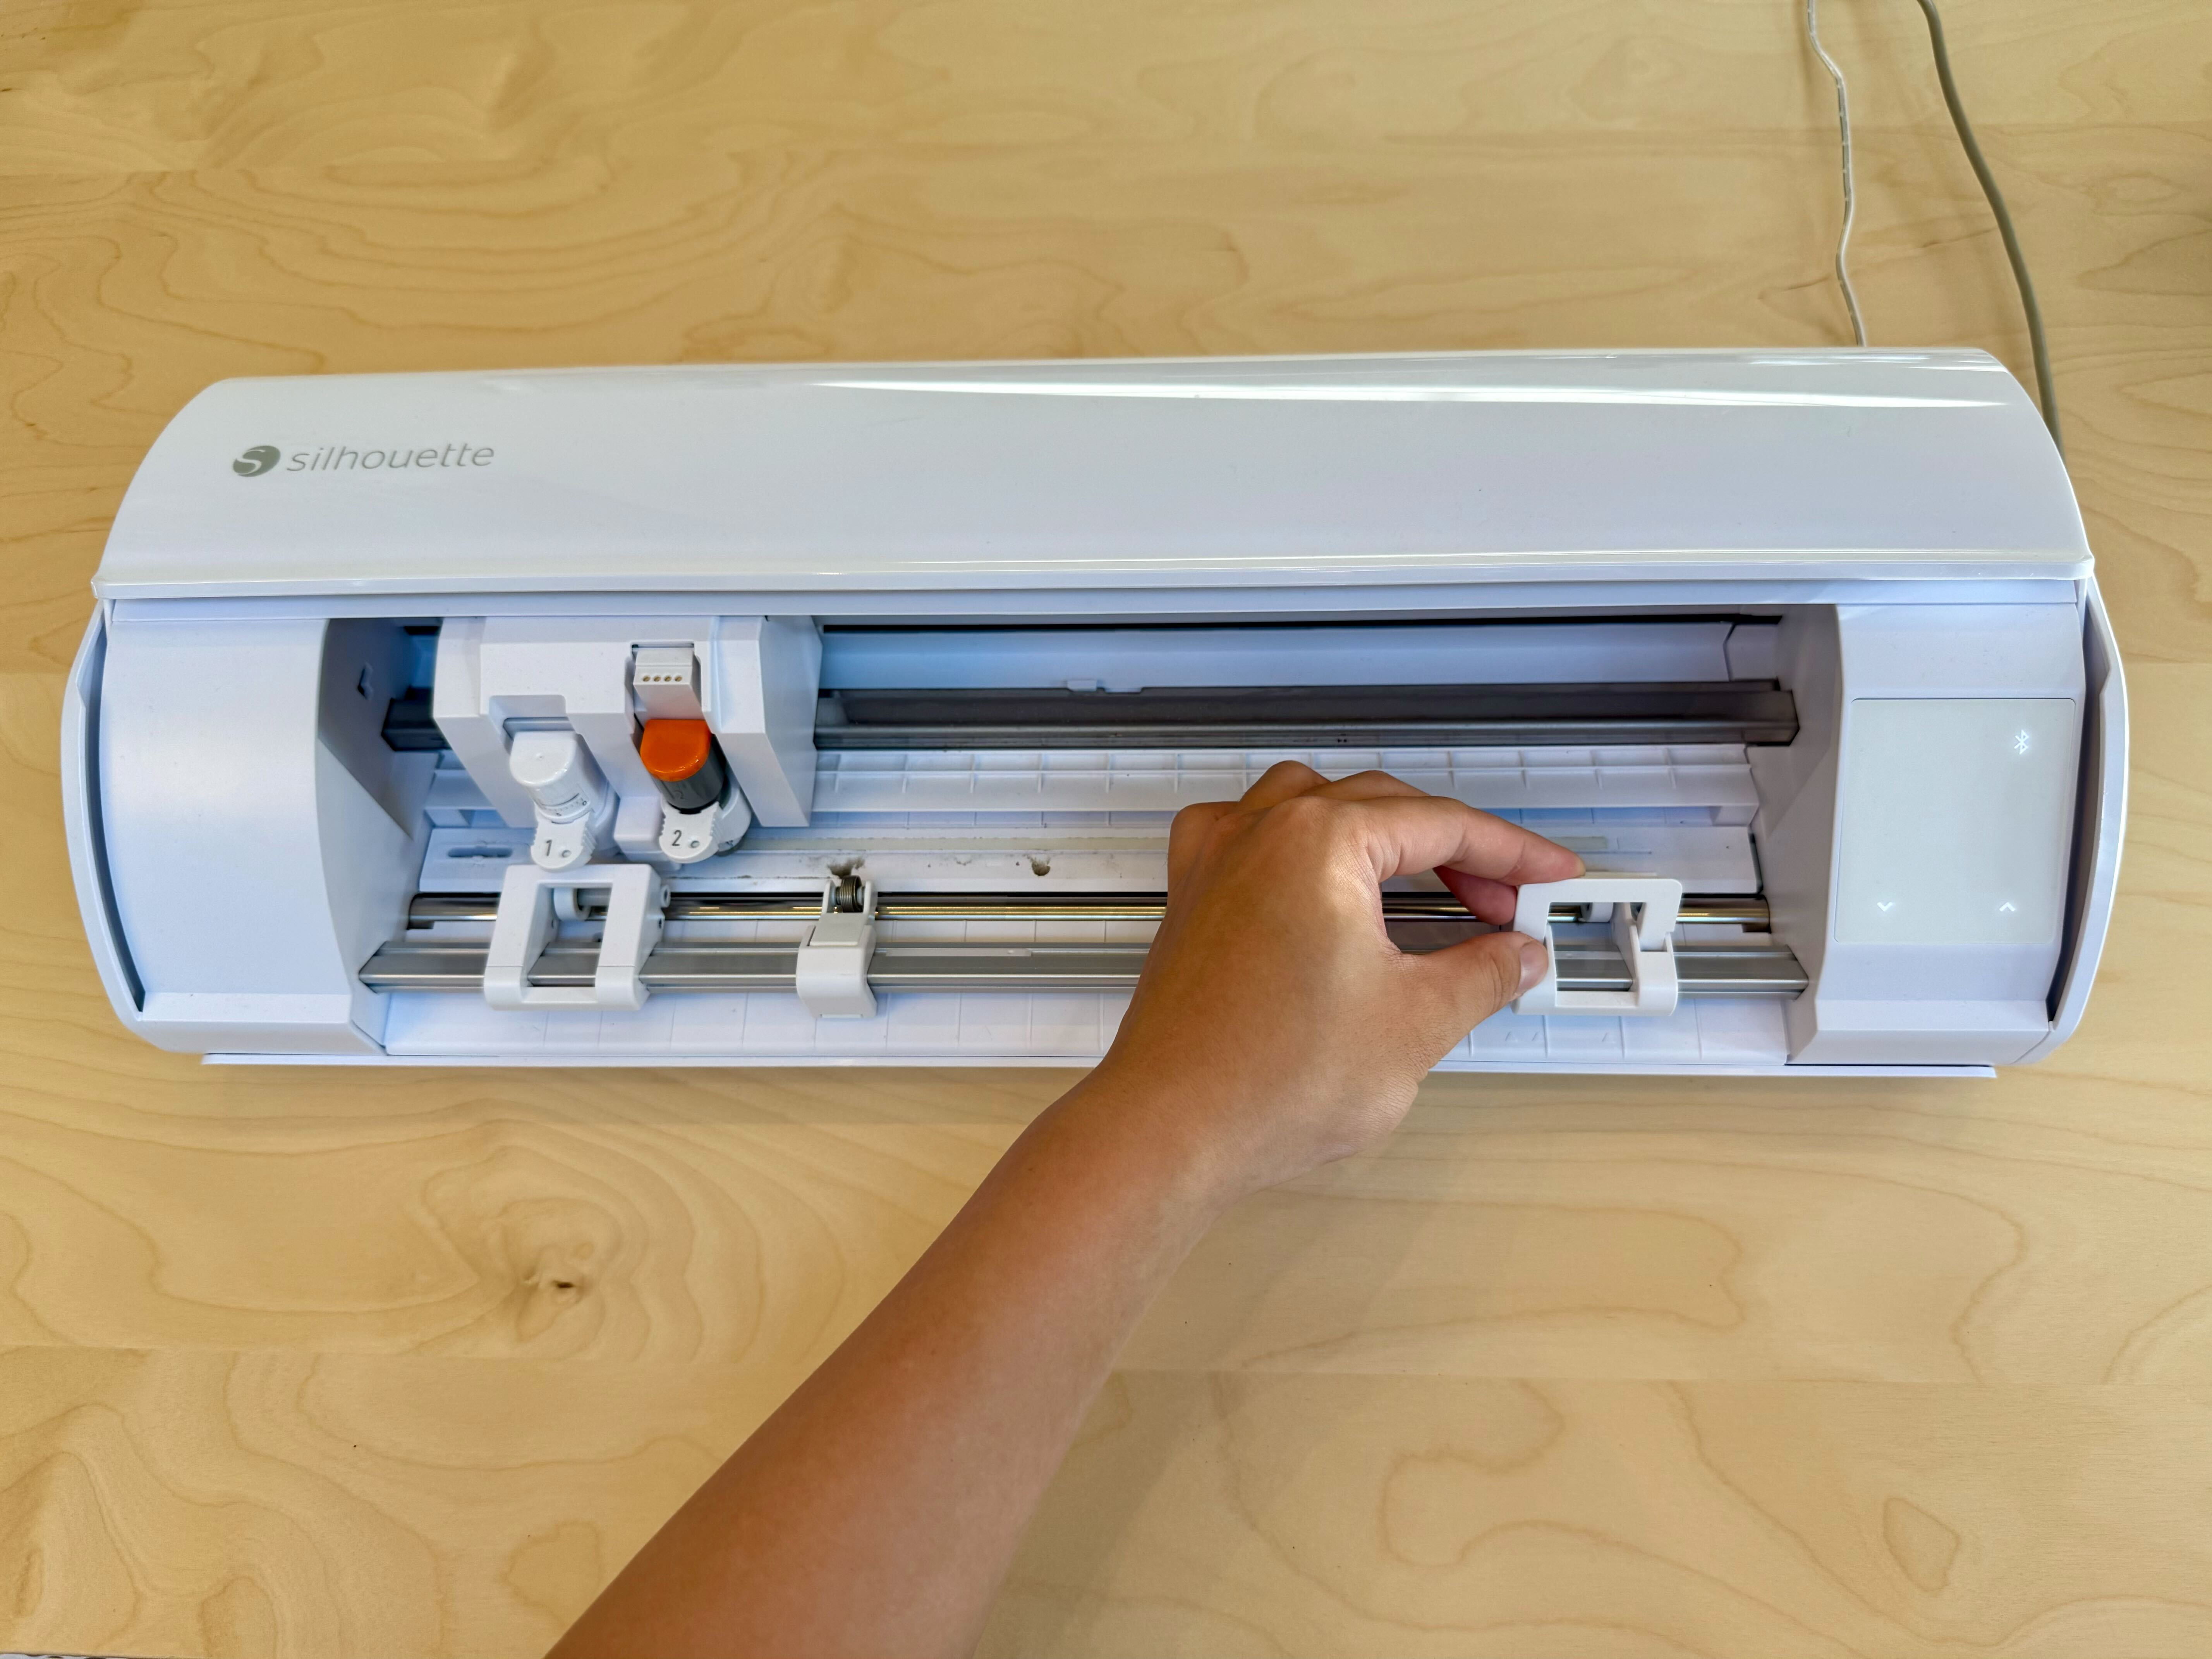
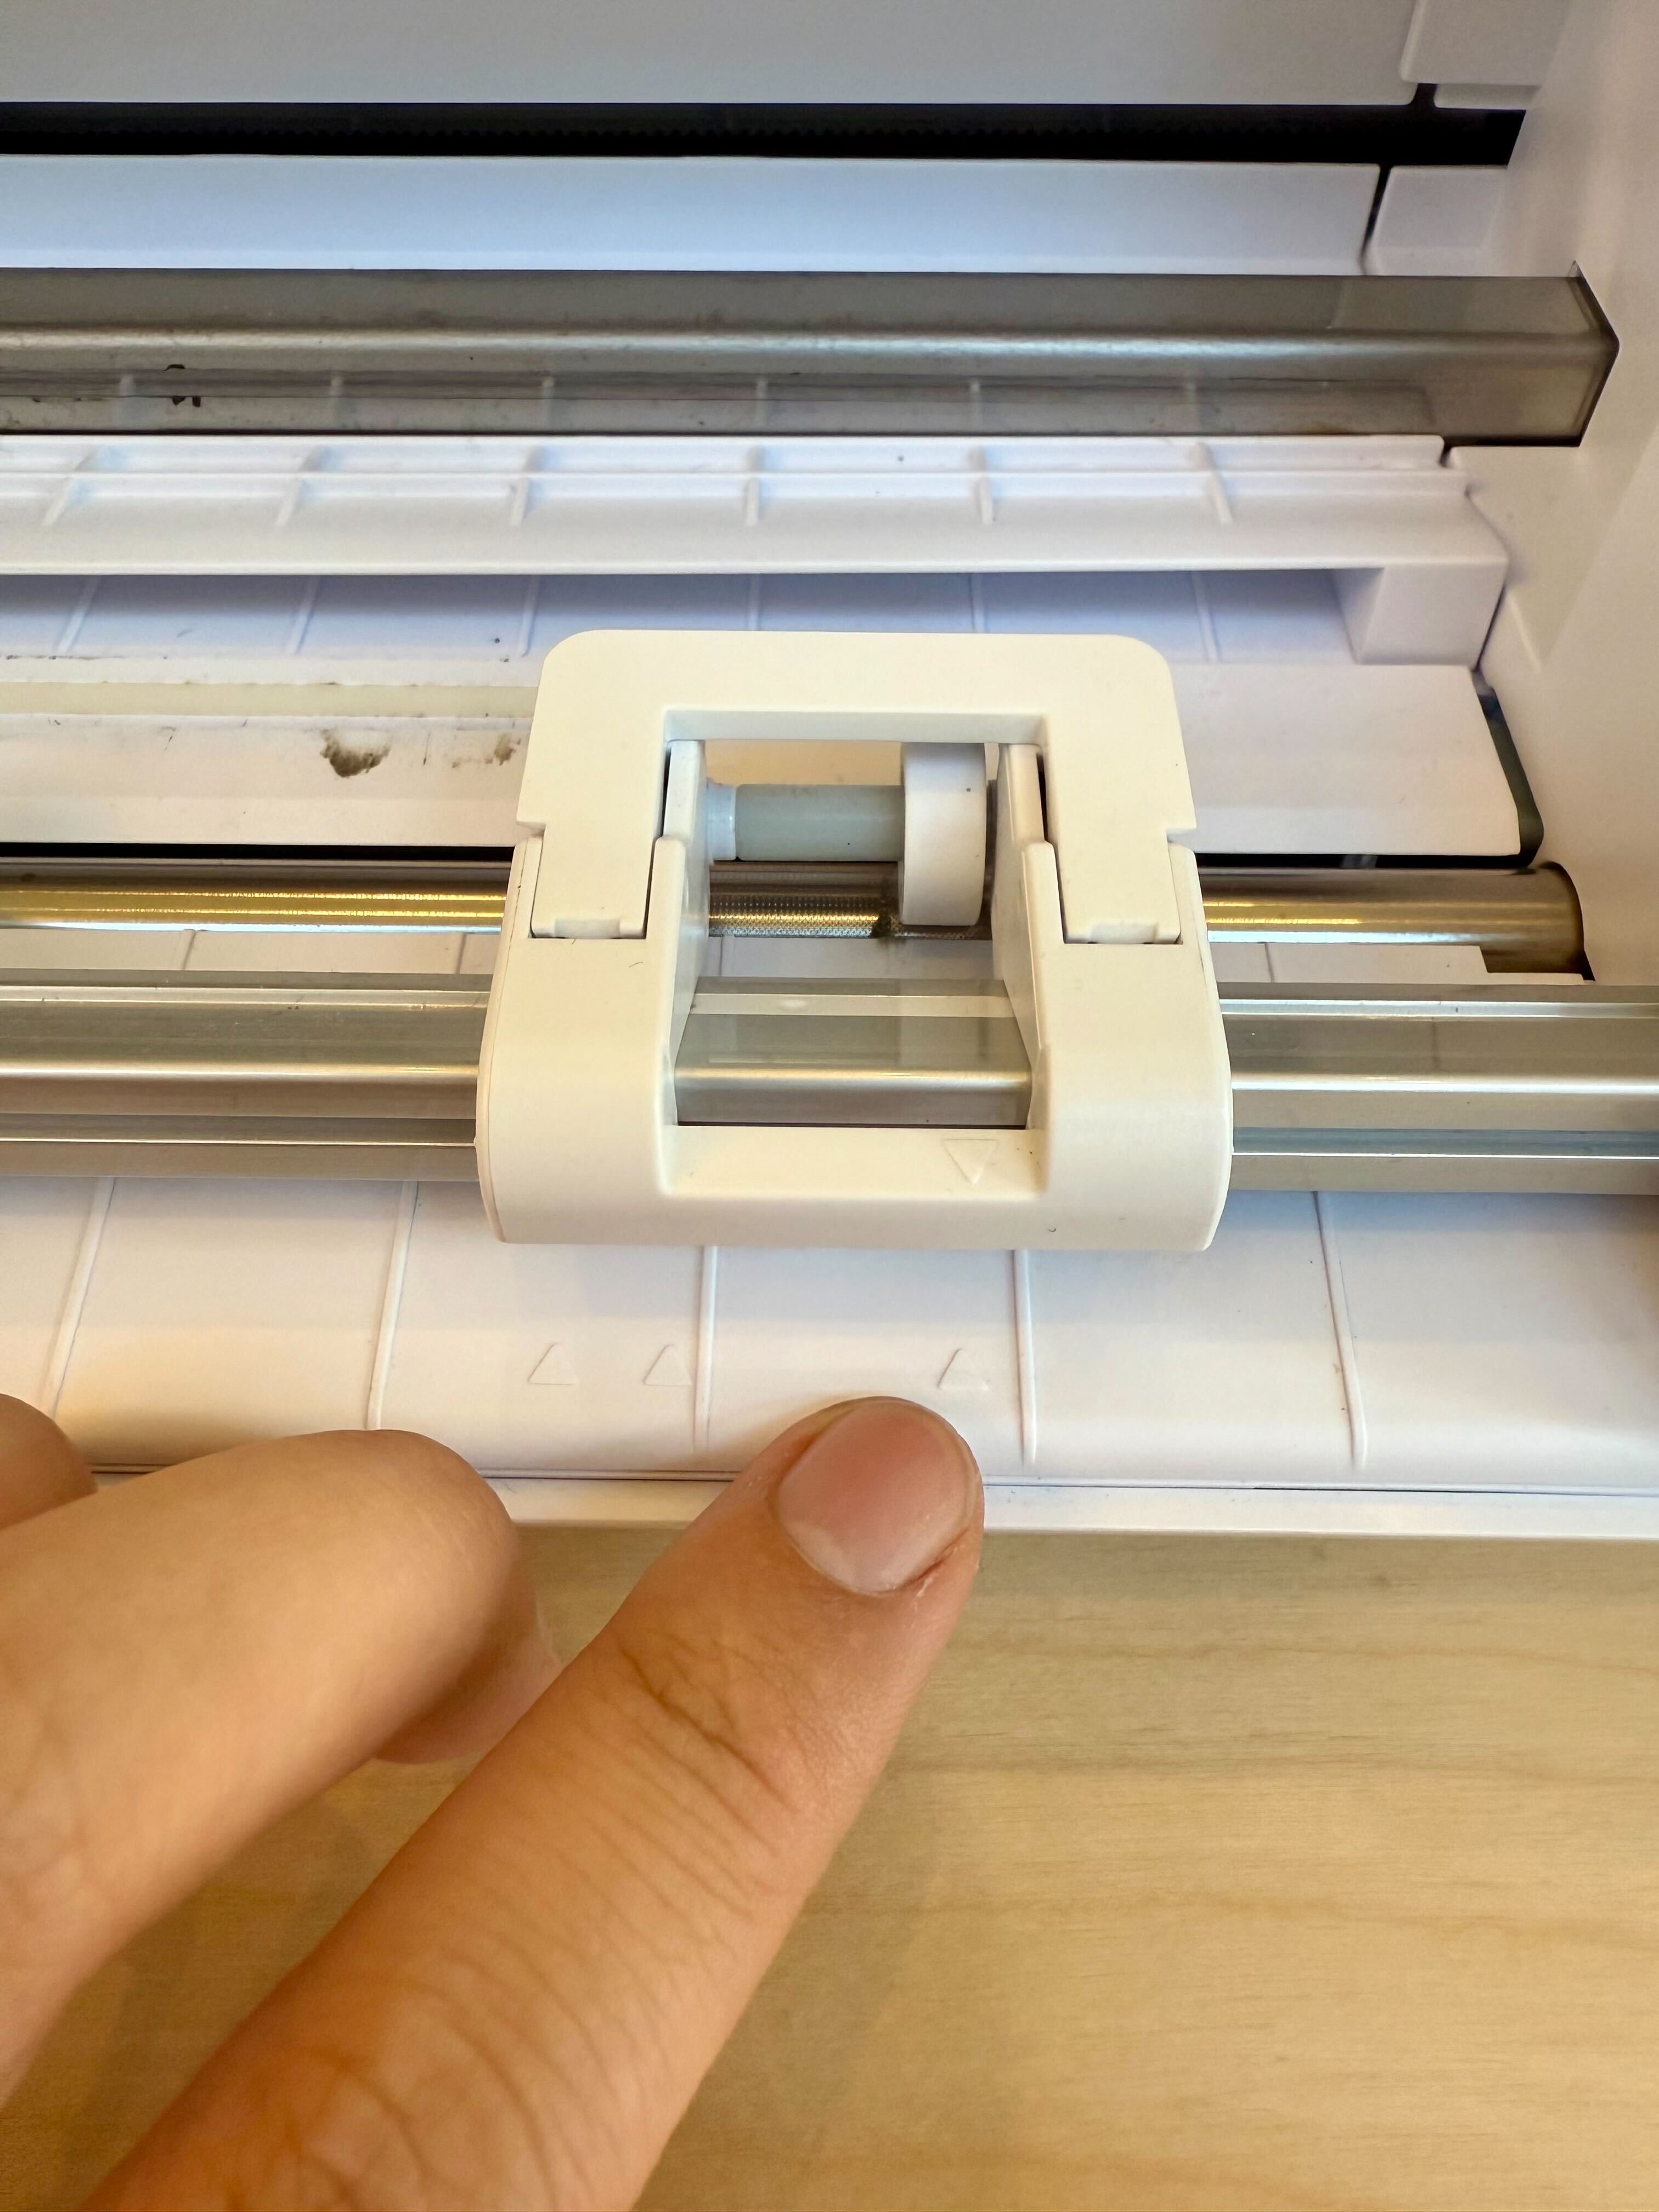
The machine’s pinch rollers grip and move the mat. Ensure that they are set to the right position for your mat.
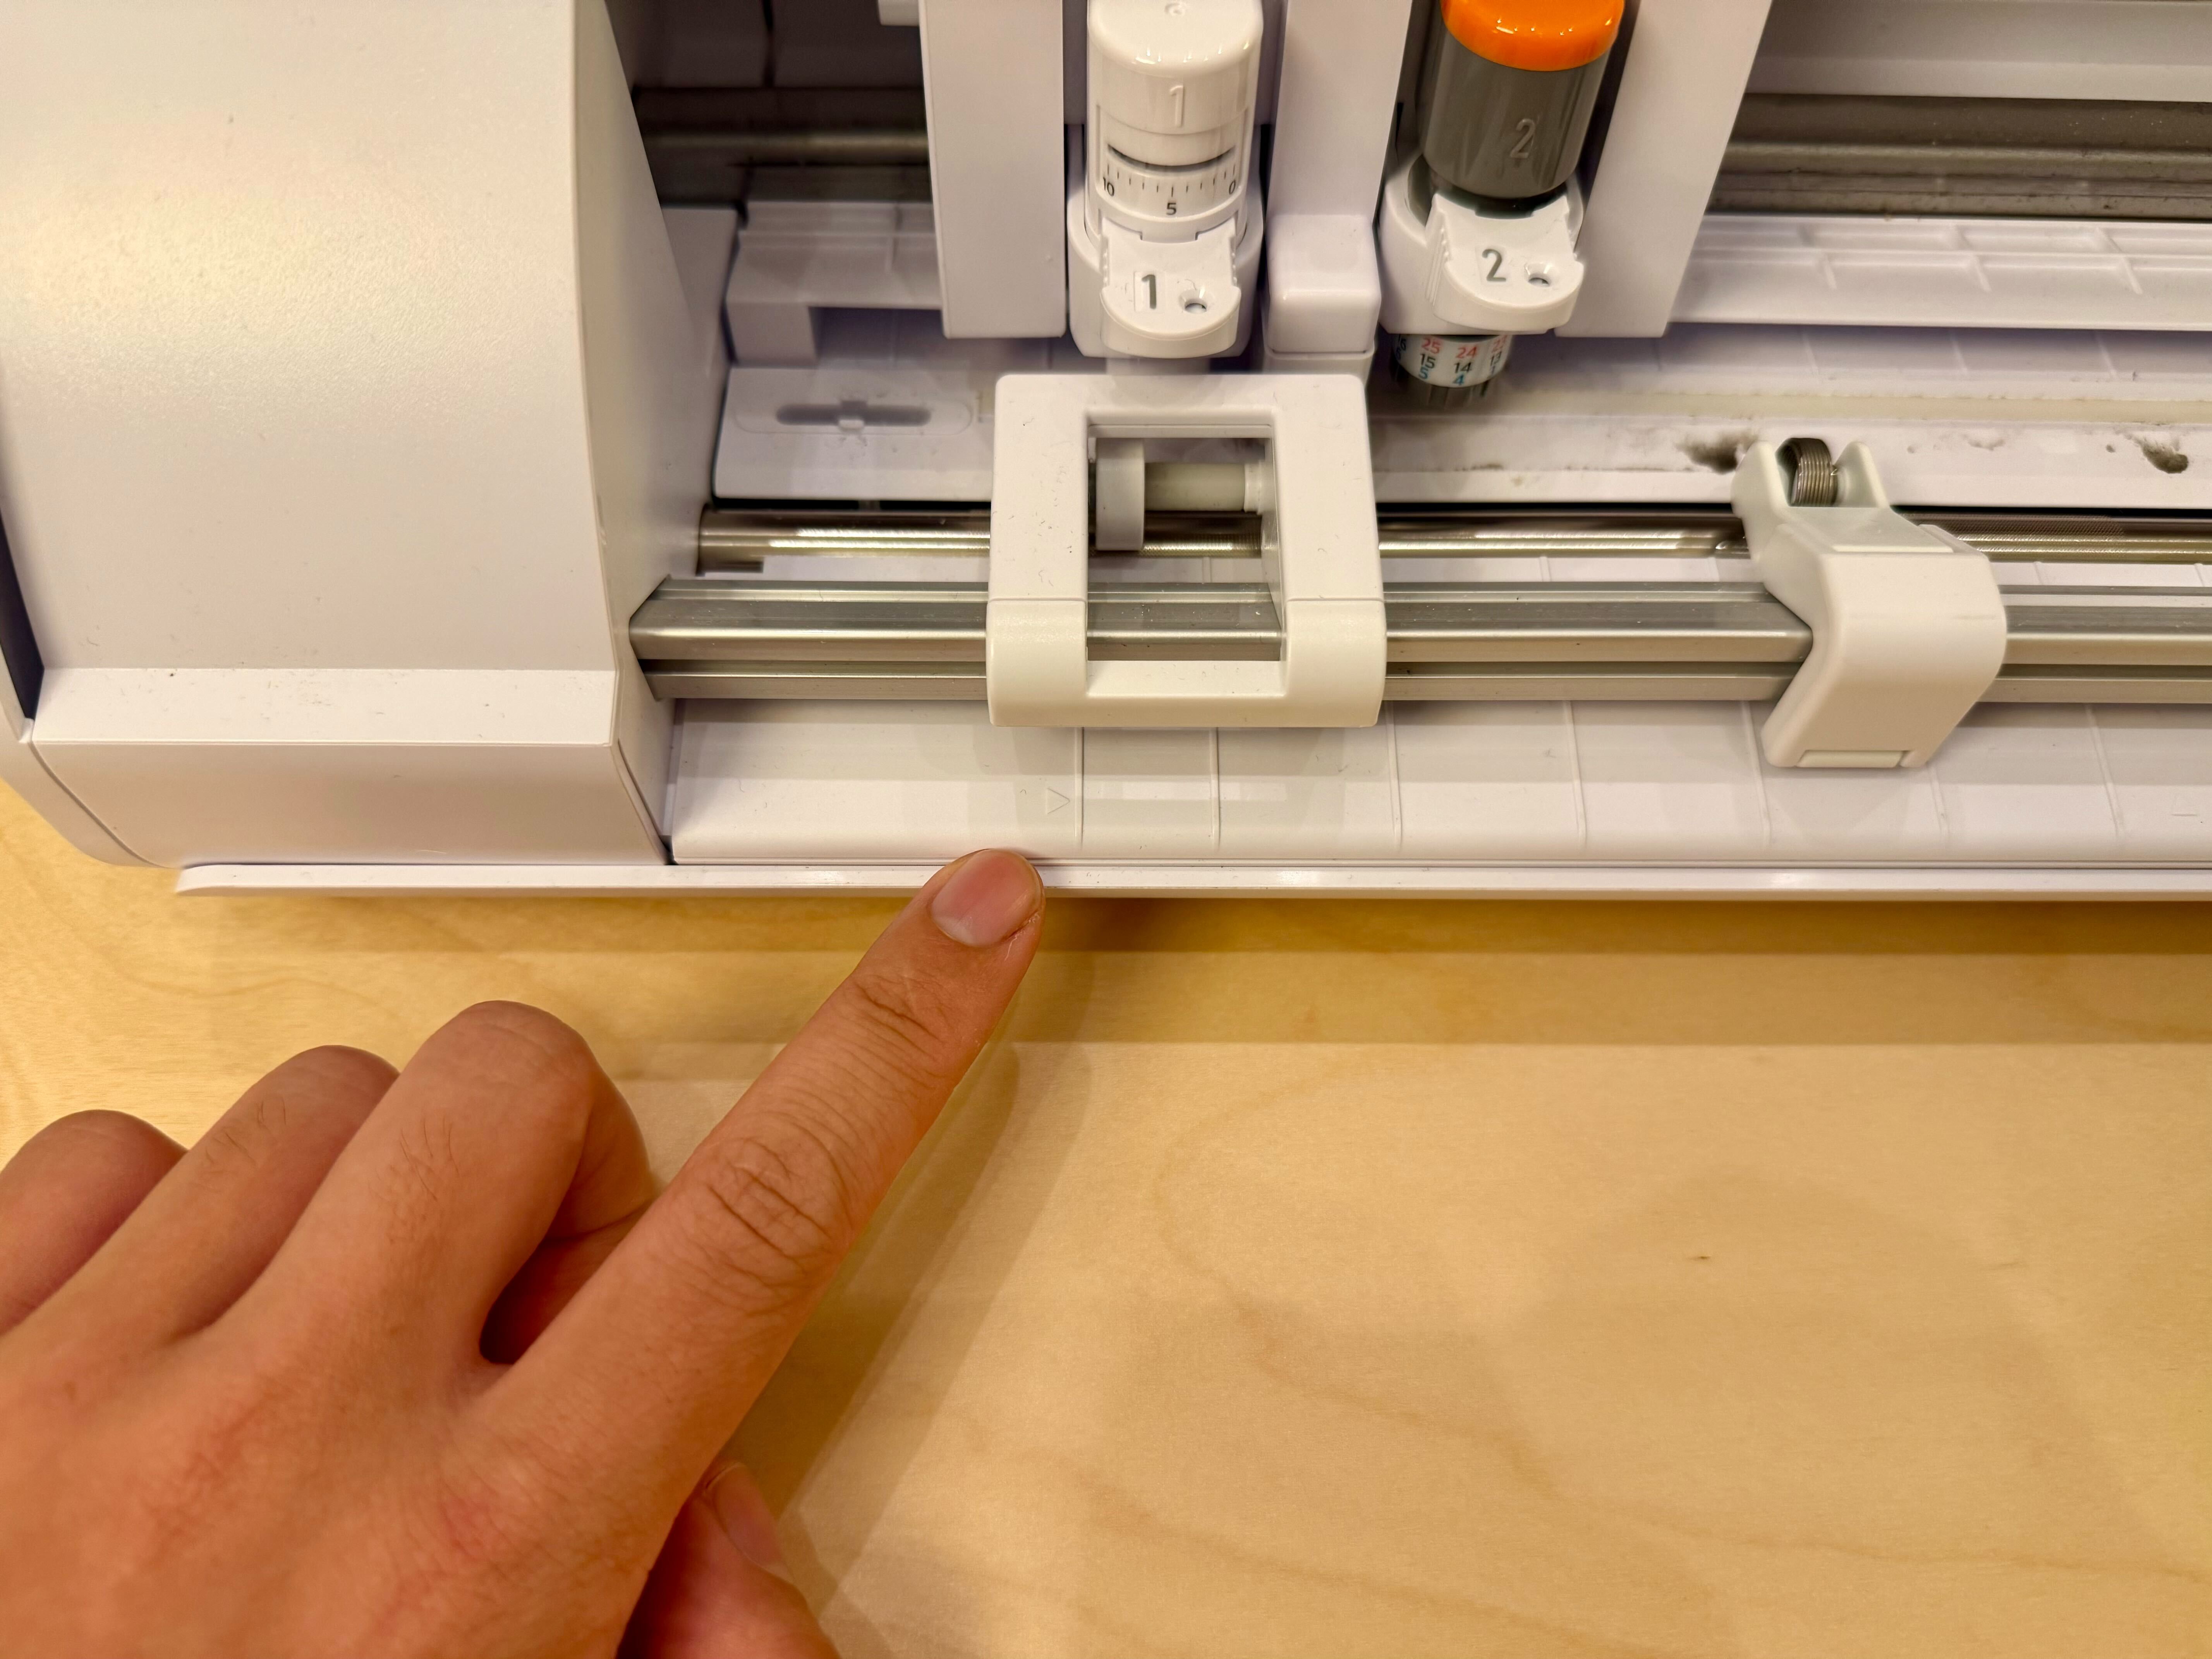
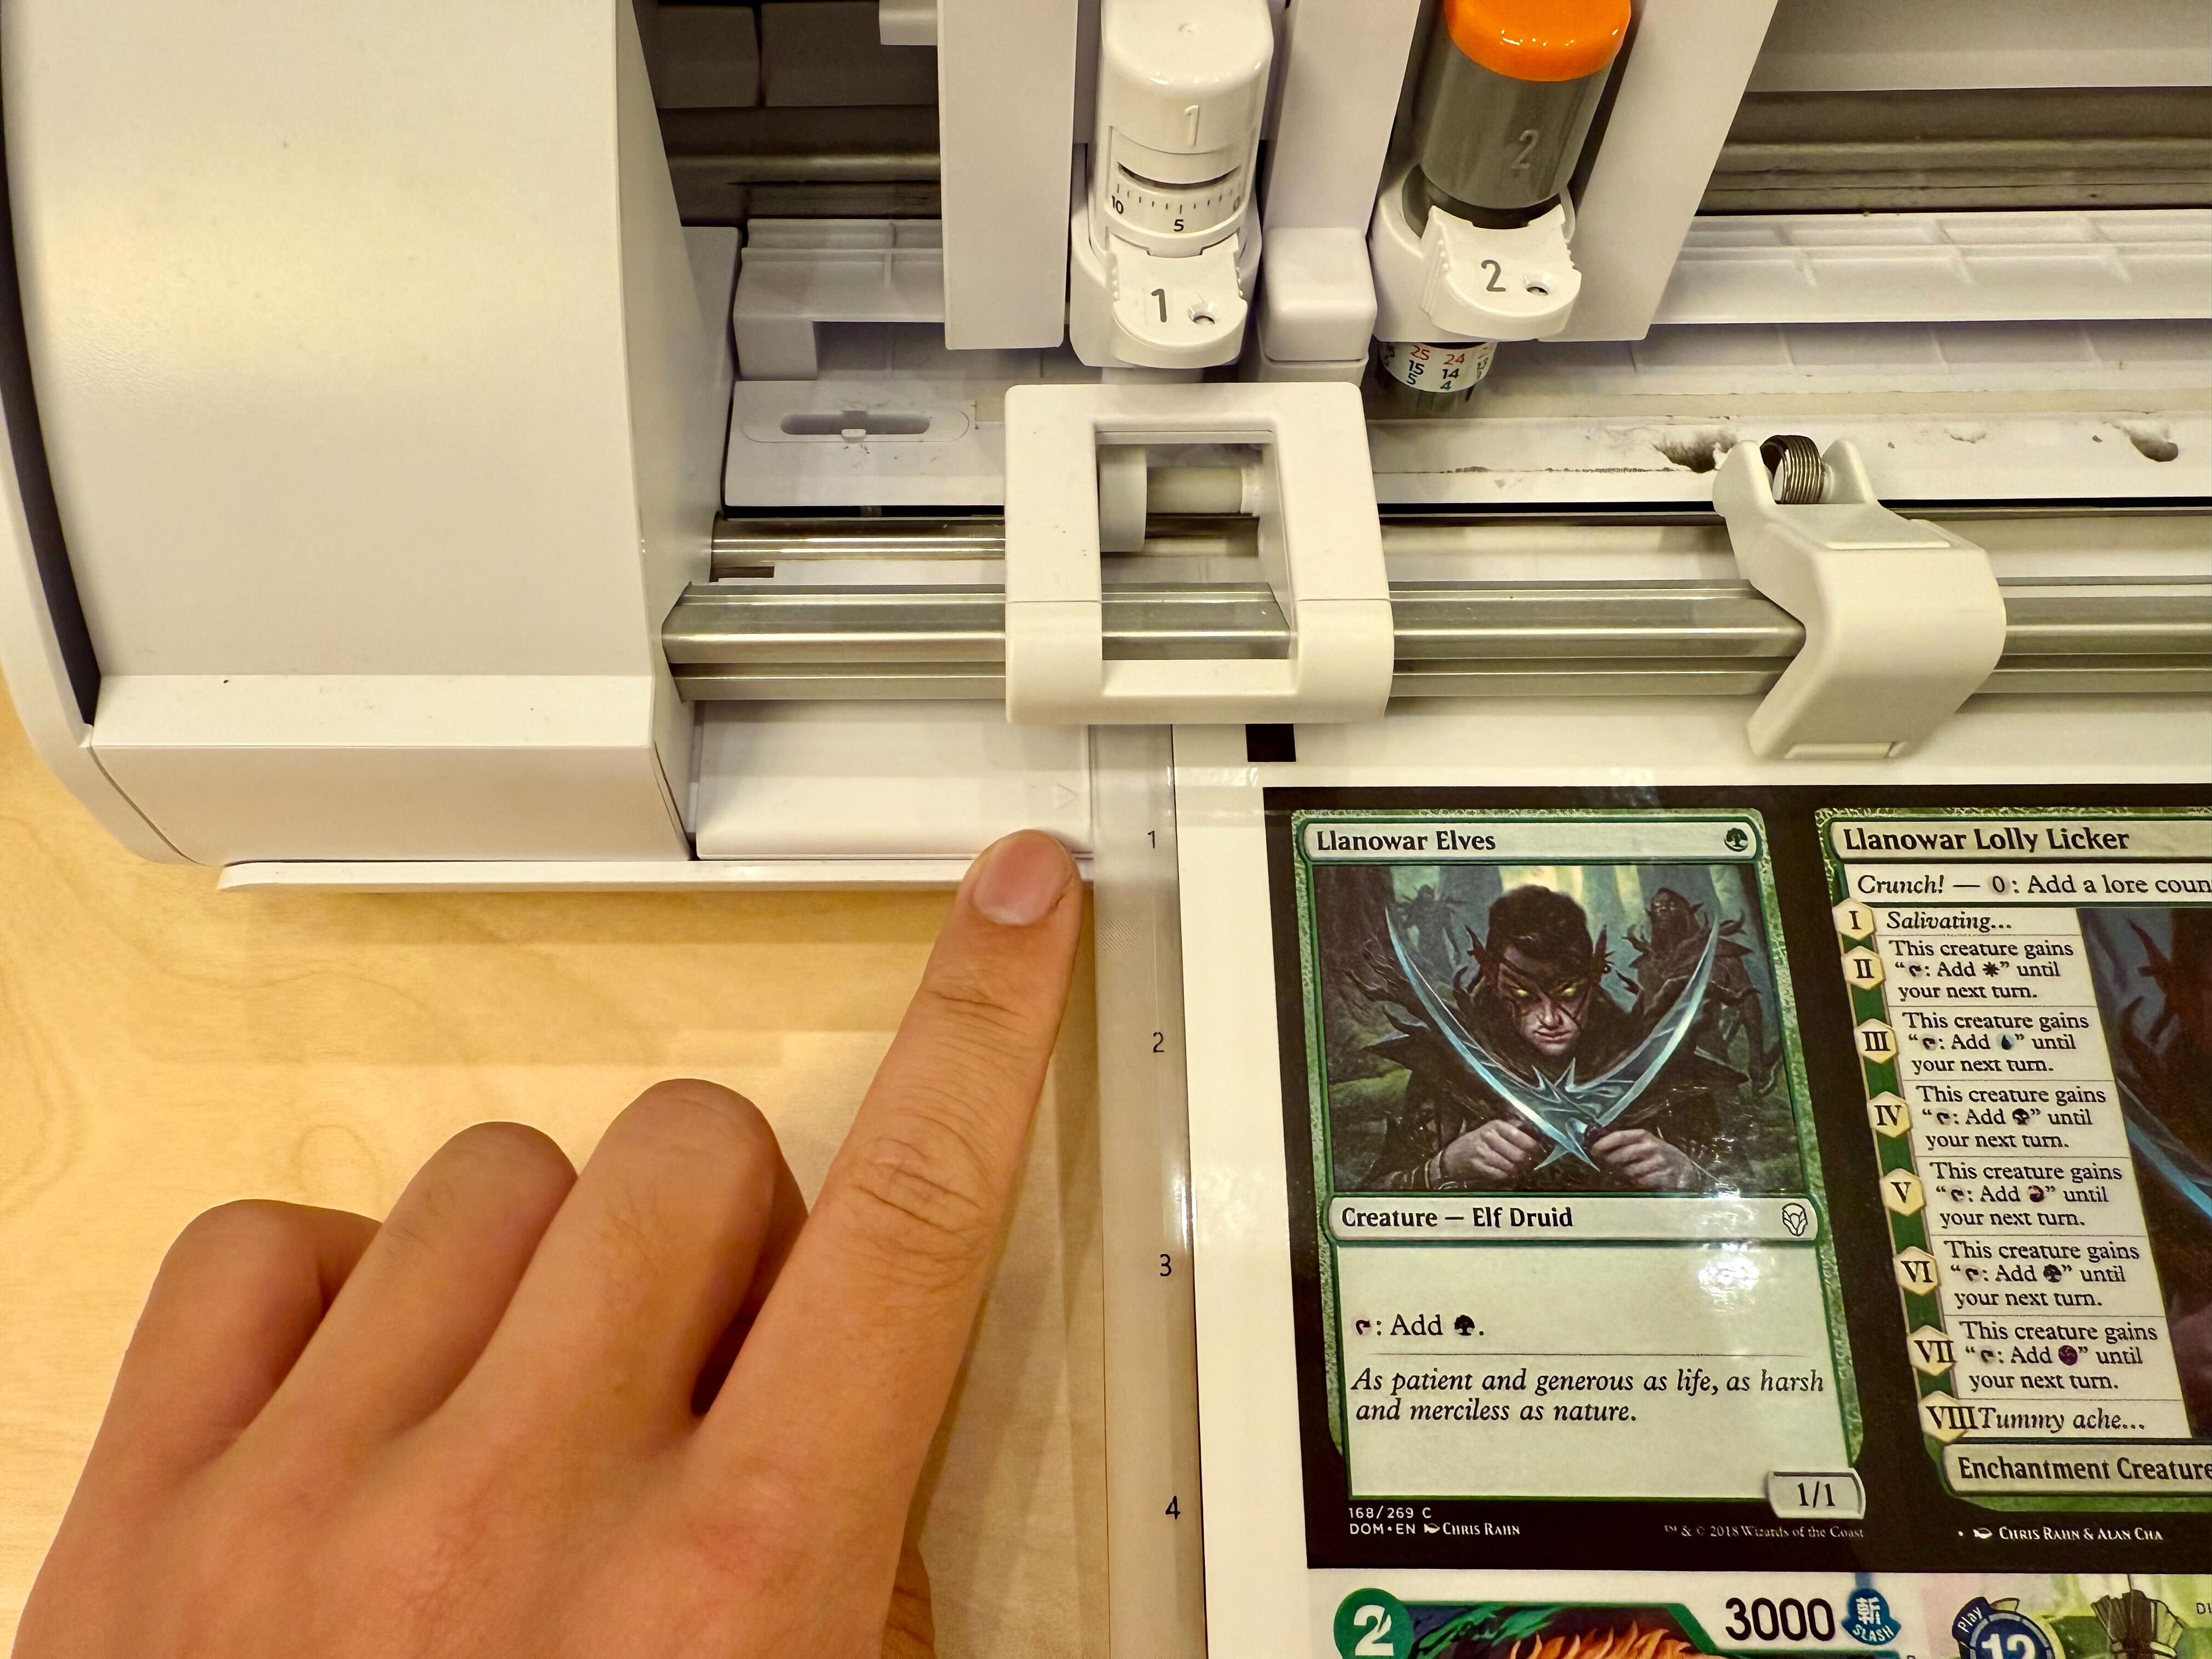
Insert the mat into the machine. The left edge of the mat should be aligned with the notch on the machine.
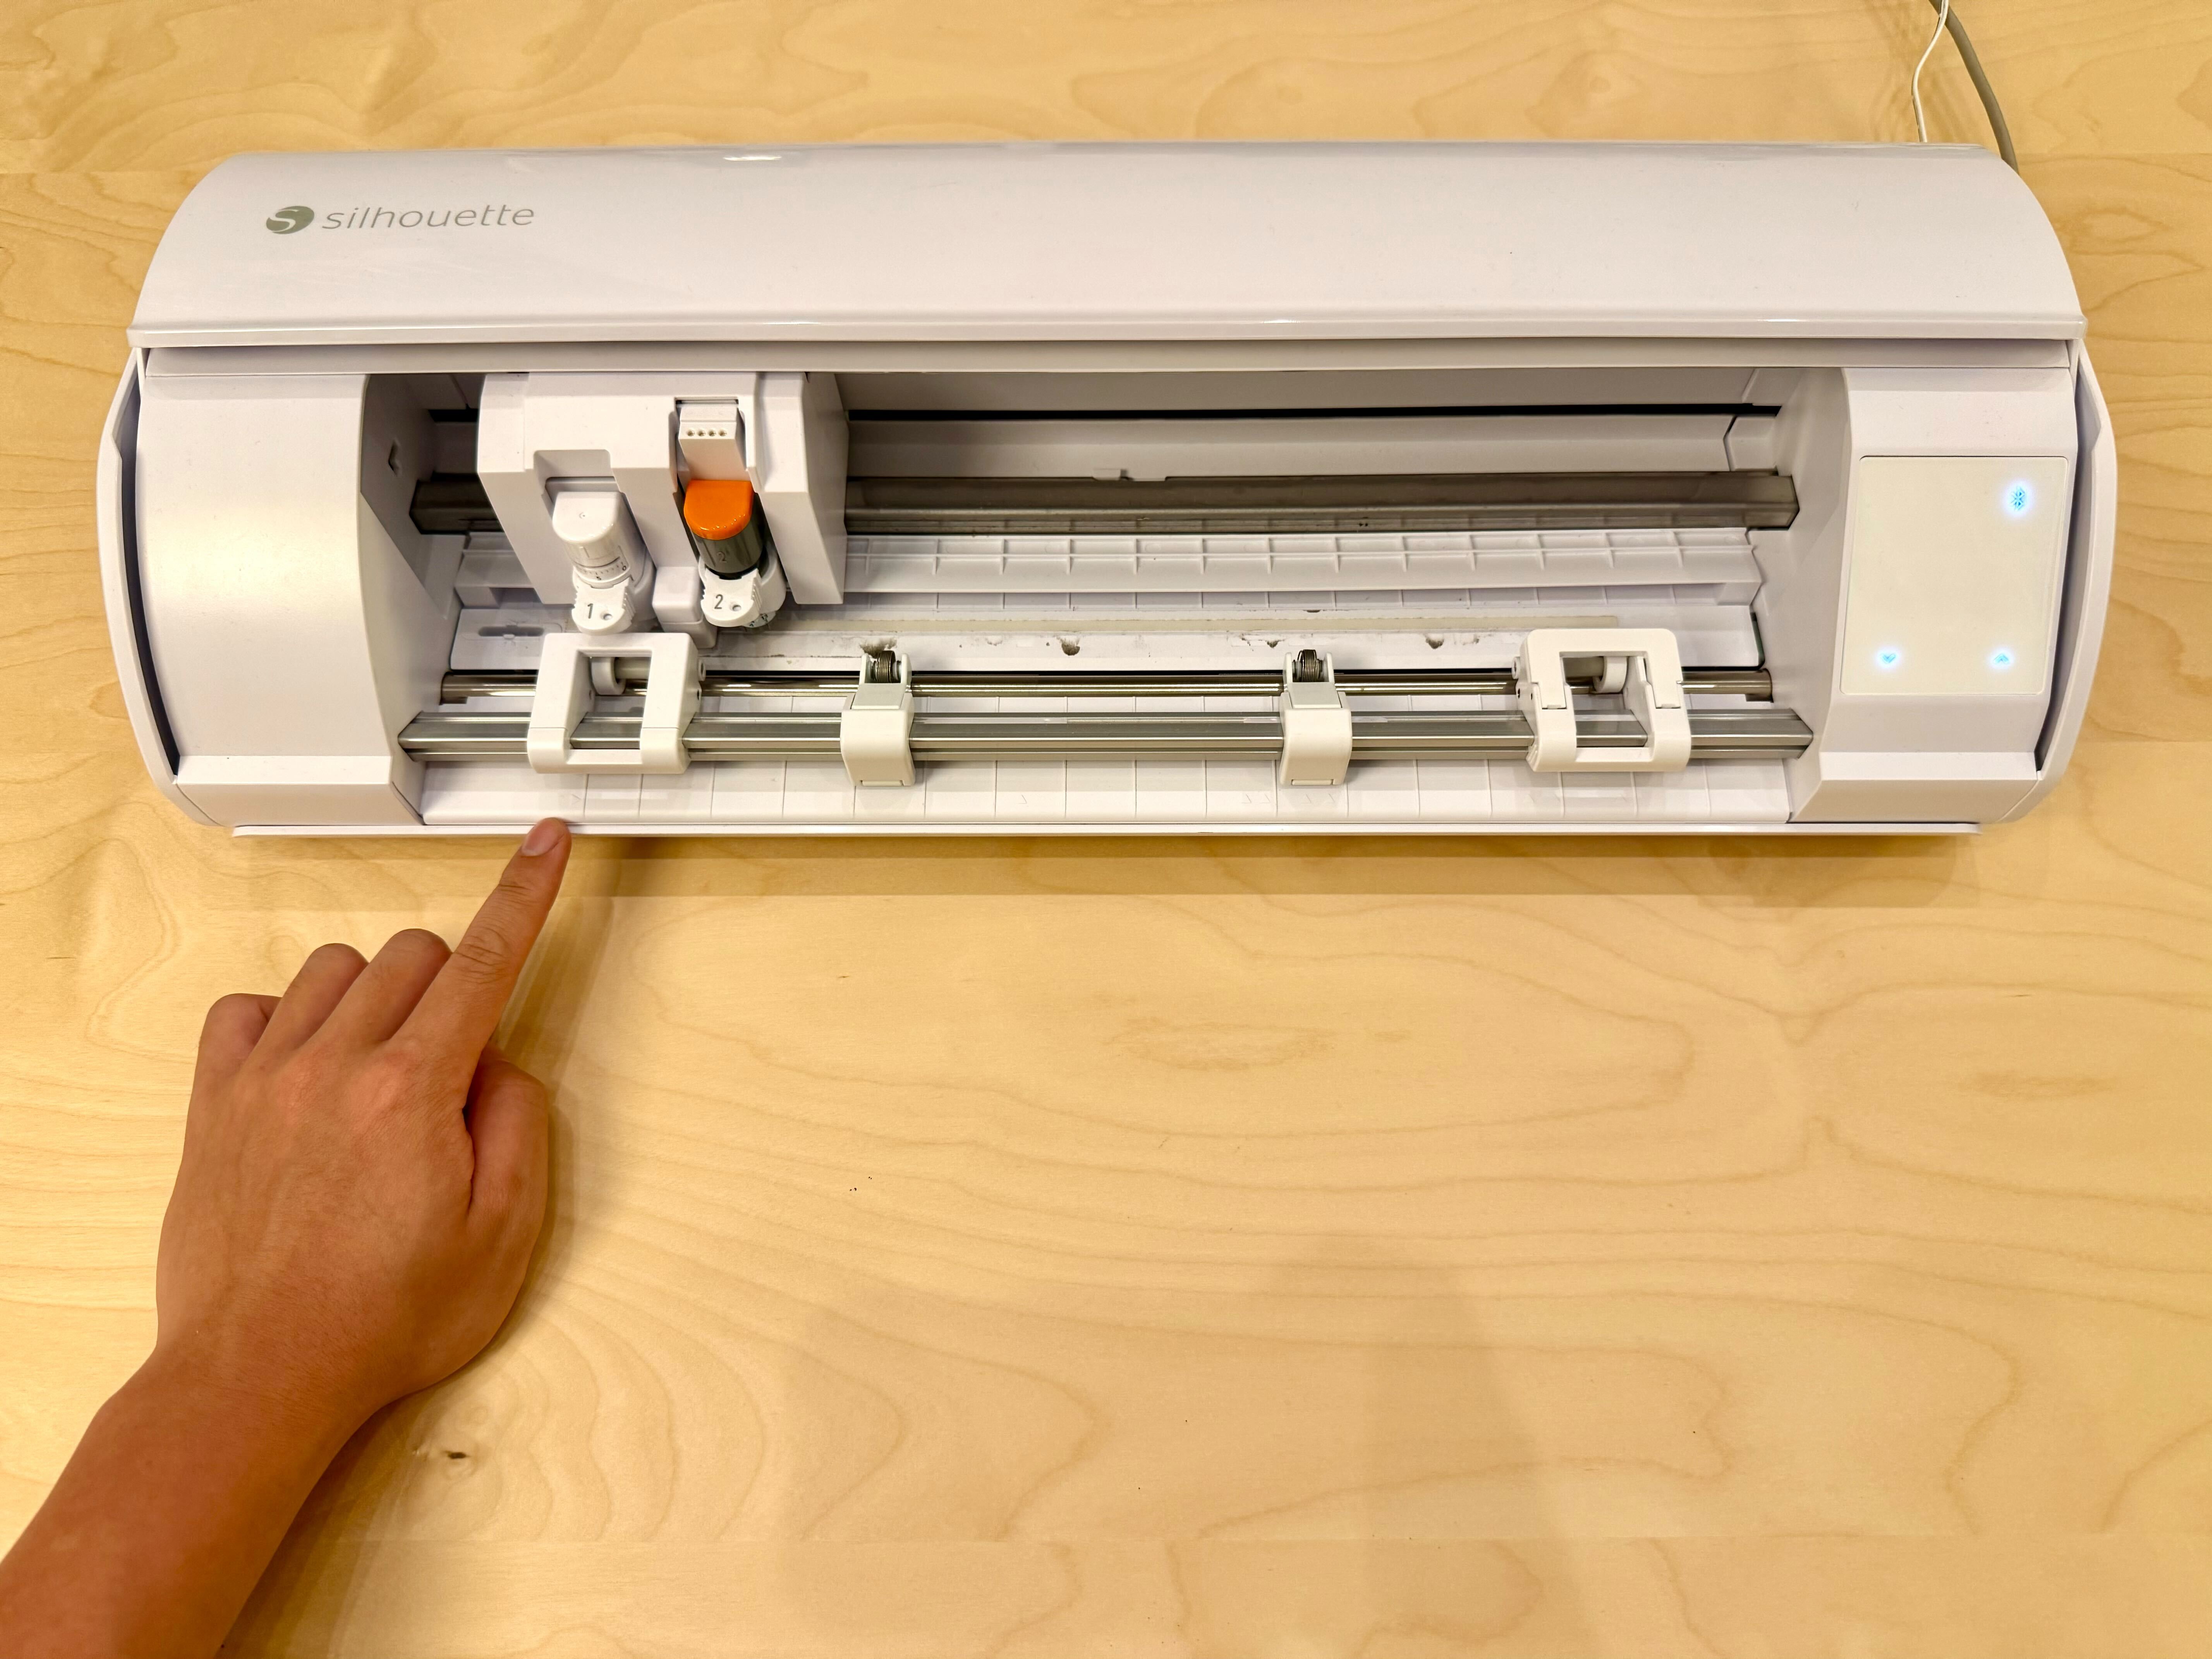
Click the media load button on the machine. The pinch rollers should pull the mat into the machine on both sides of the mat.
Put your cutting settings into Silhouette Studio.
Tip
You can save your cutting settings as a “New material” in Silhouette Studio.
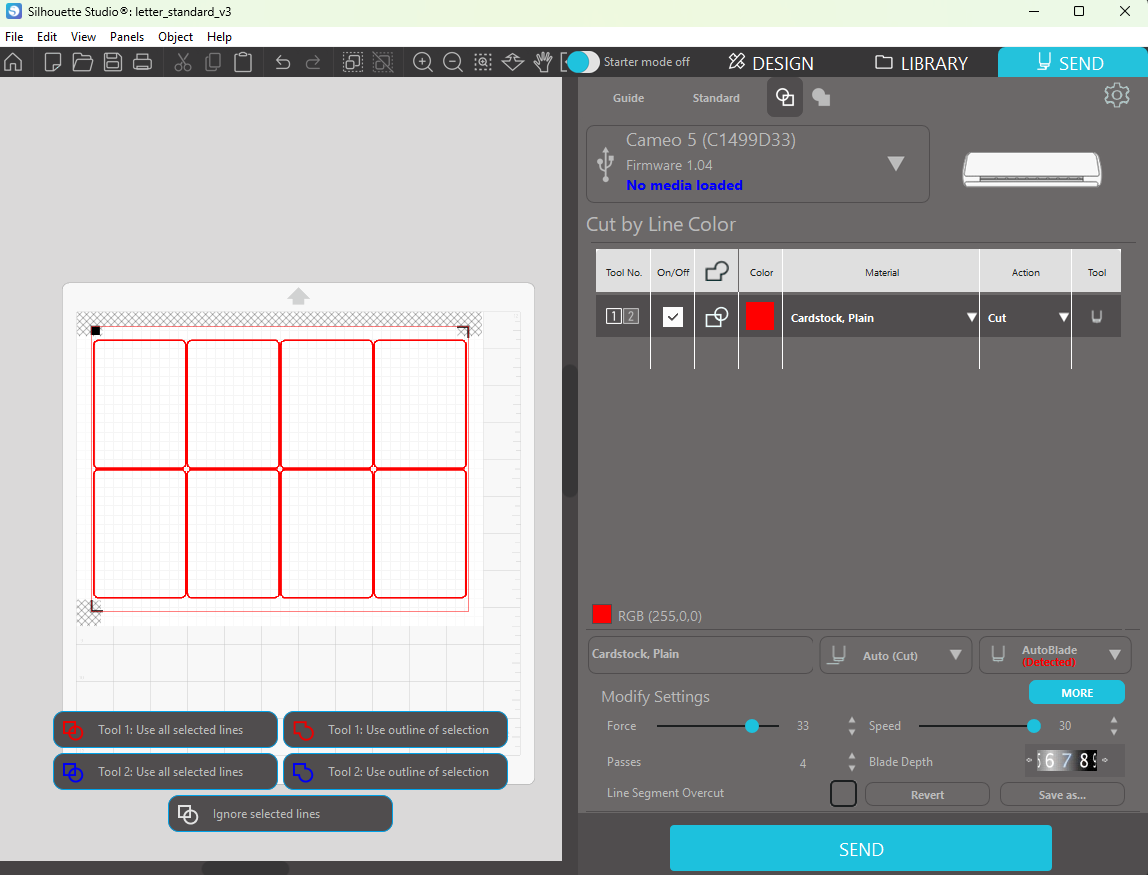
Click “Send” to start the cutting job. Remove the Post-It note after registration but before cutting.
Finish the cards
Click the media eject button on the machine to remove the mat.
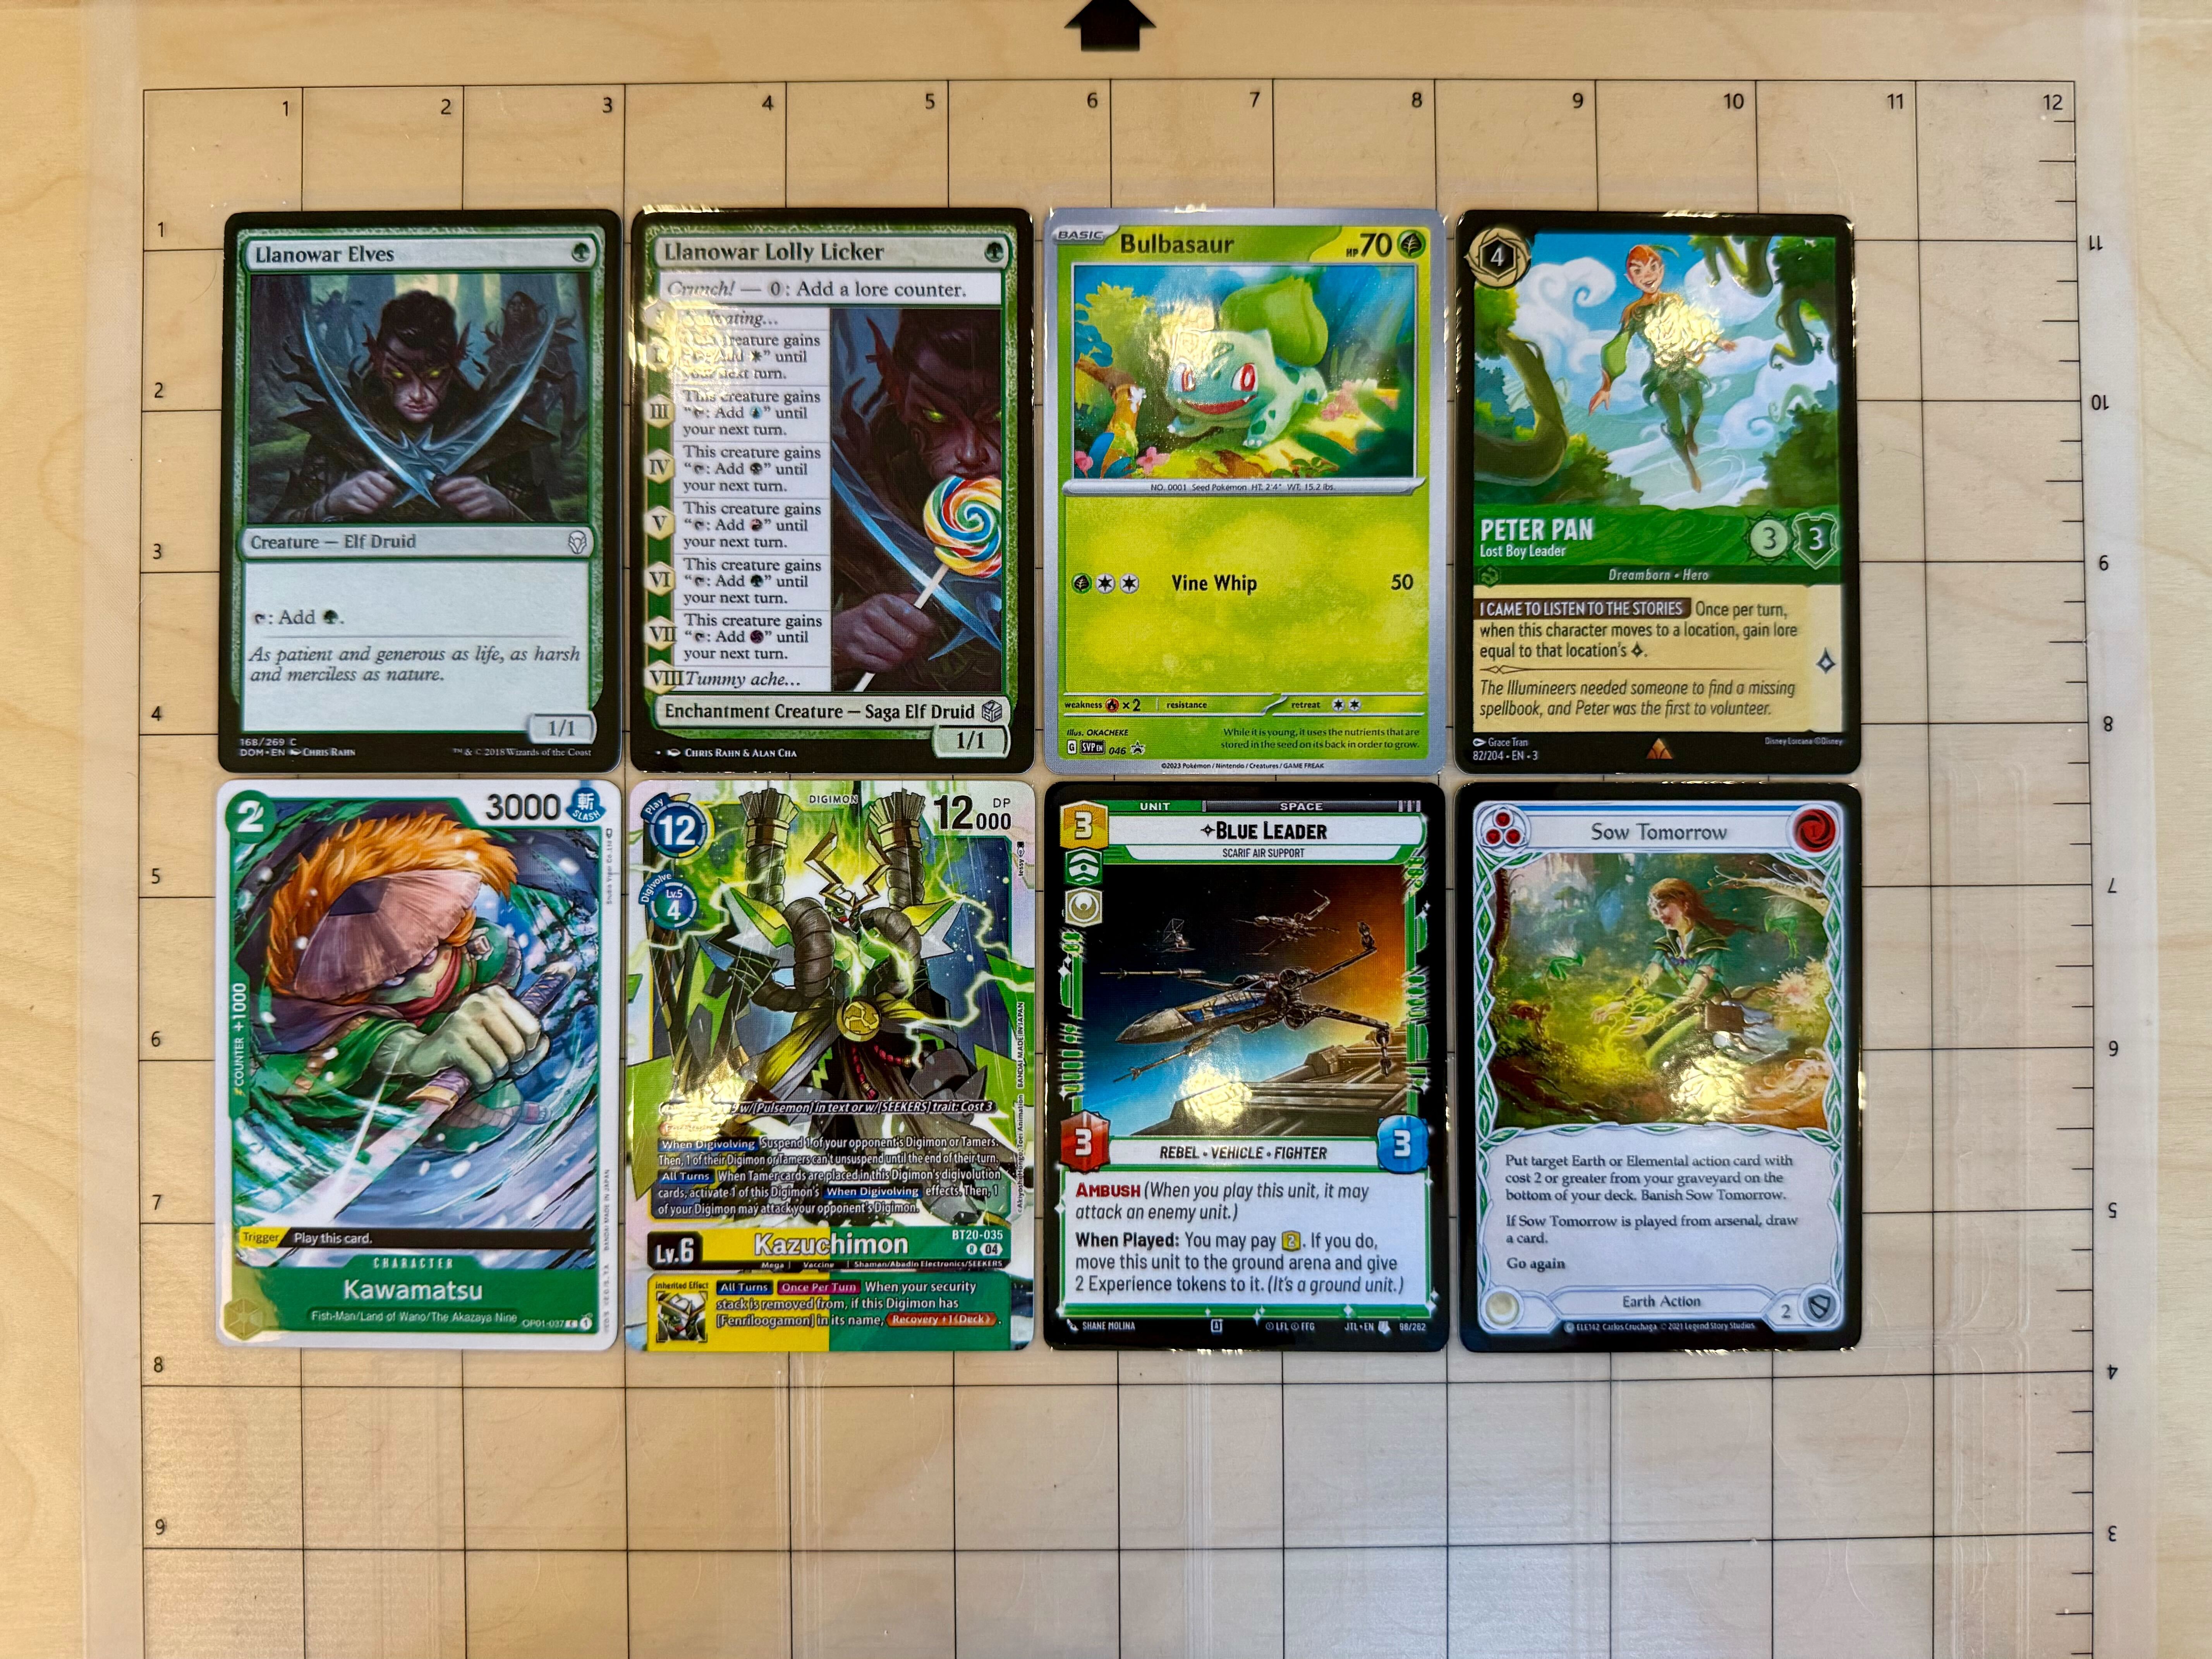
Peel off the cards and remove the excess.
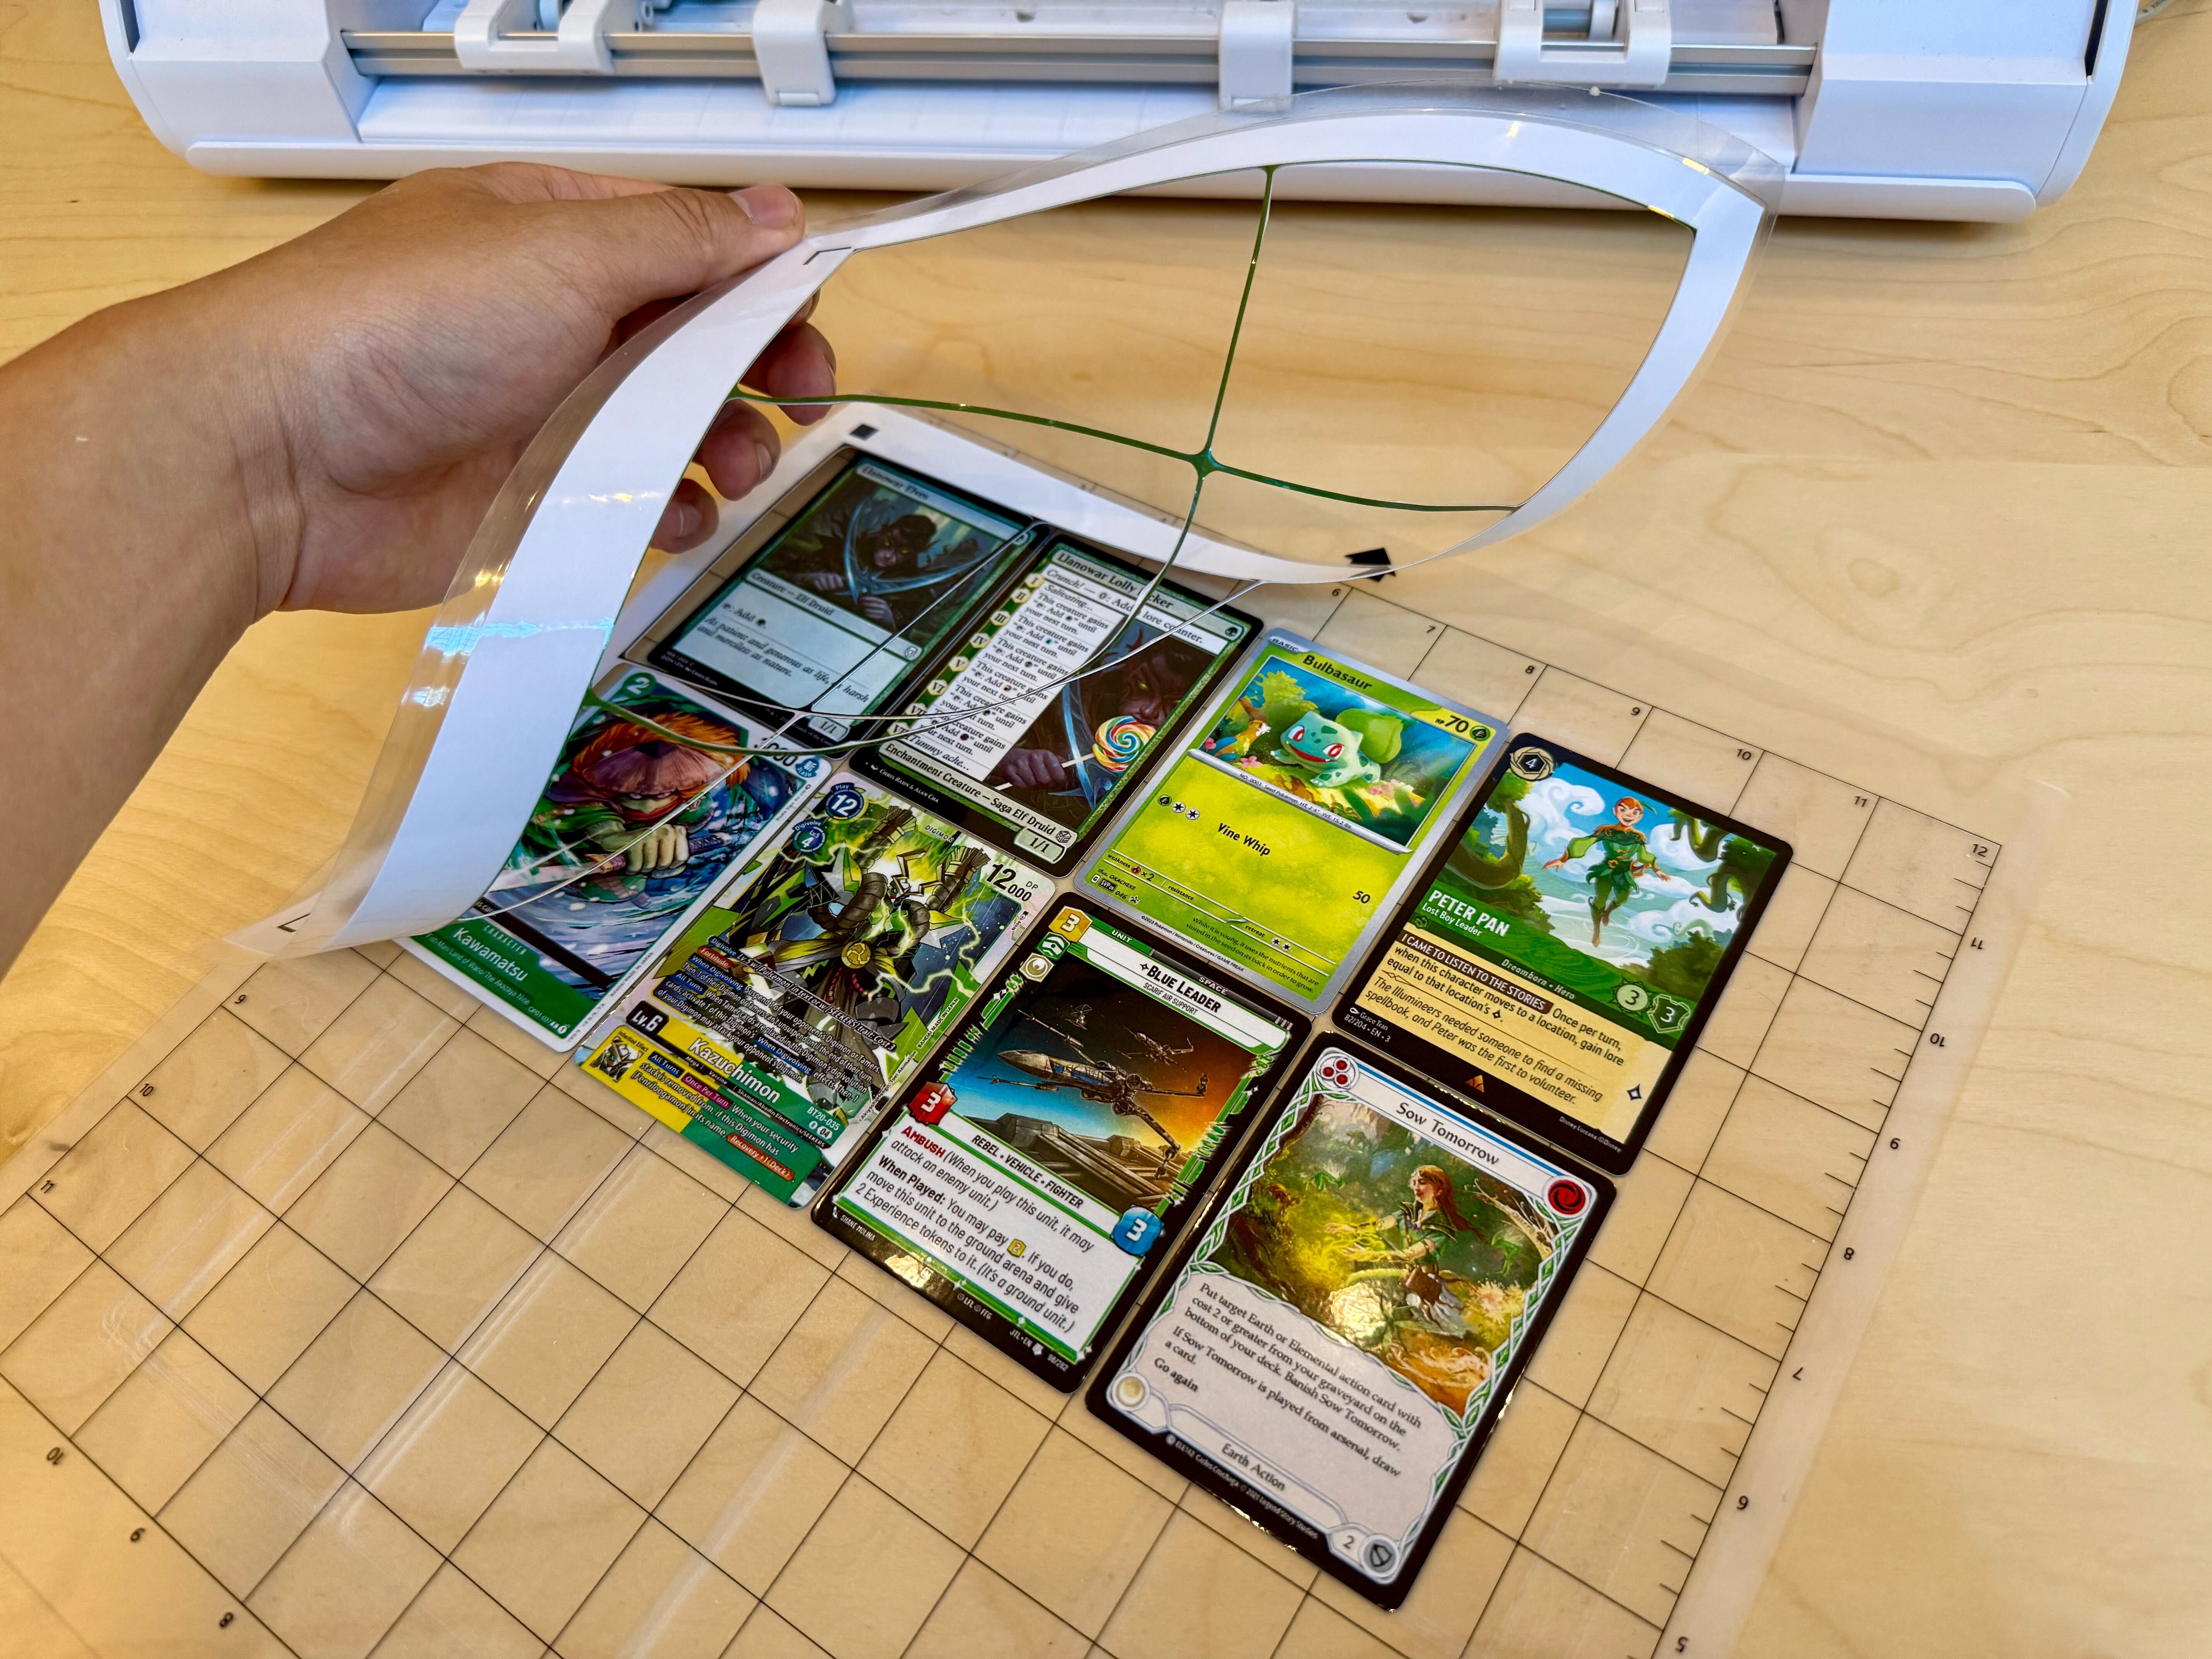
Because the cutting process can cause the card edges to delaminate, put the cards through the laminator a second time.
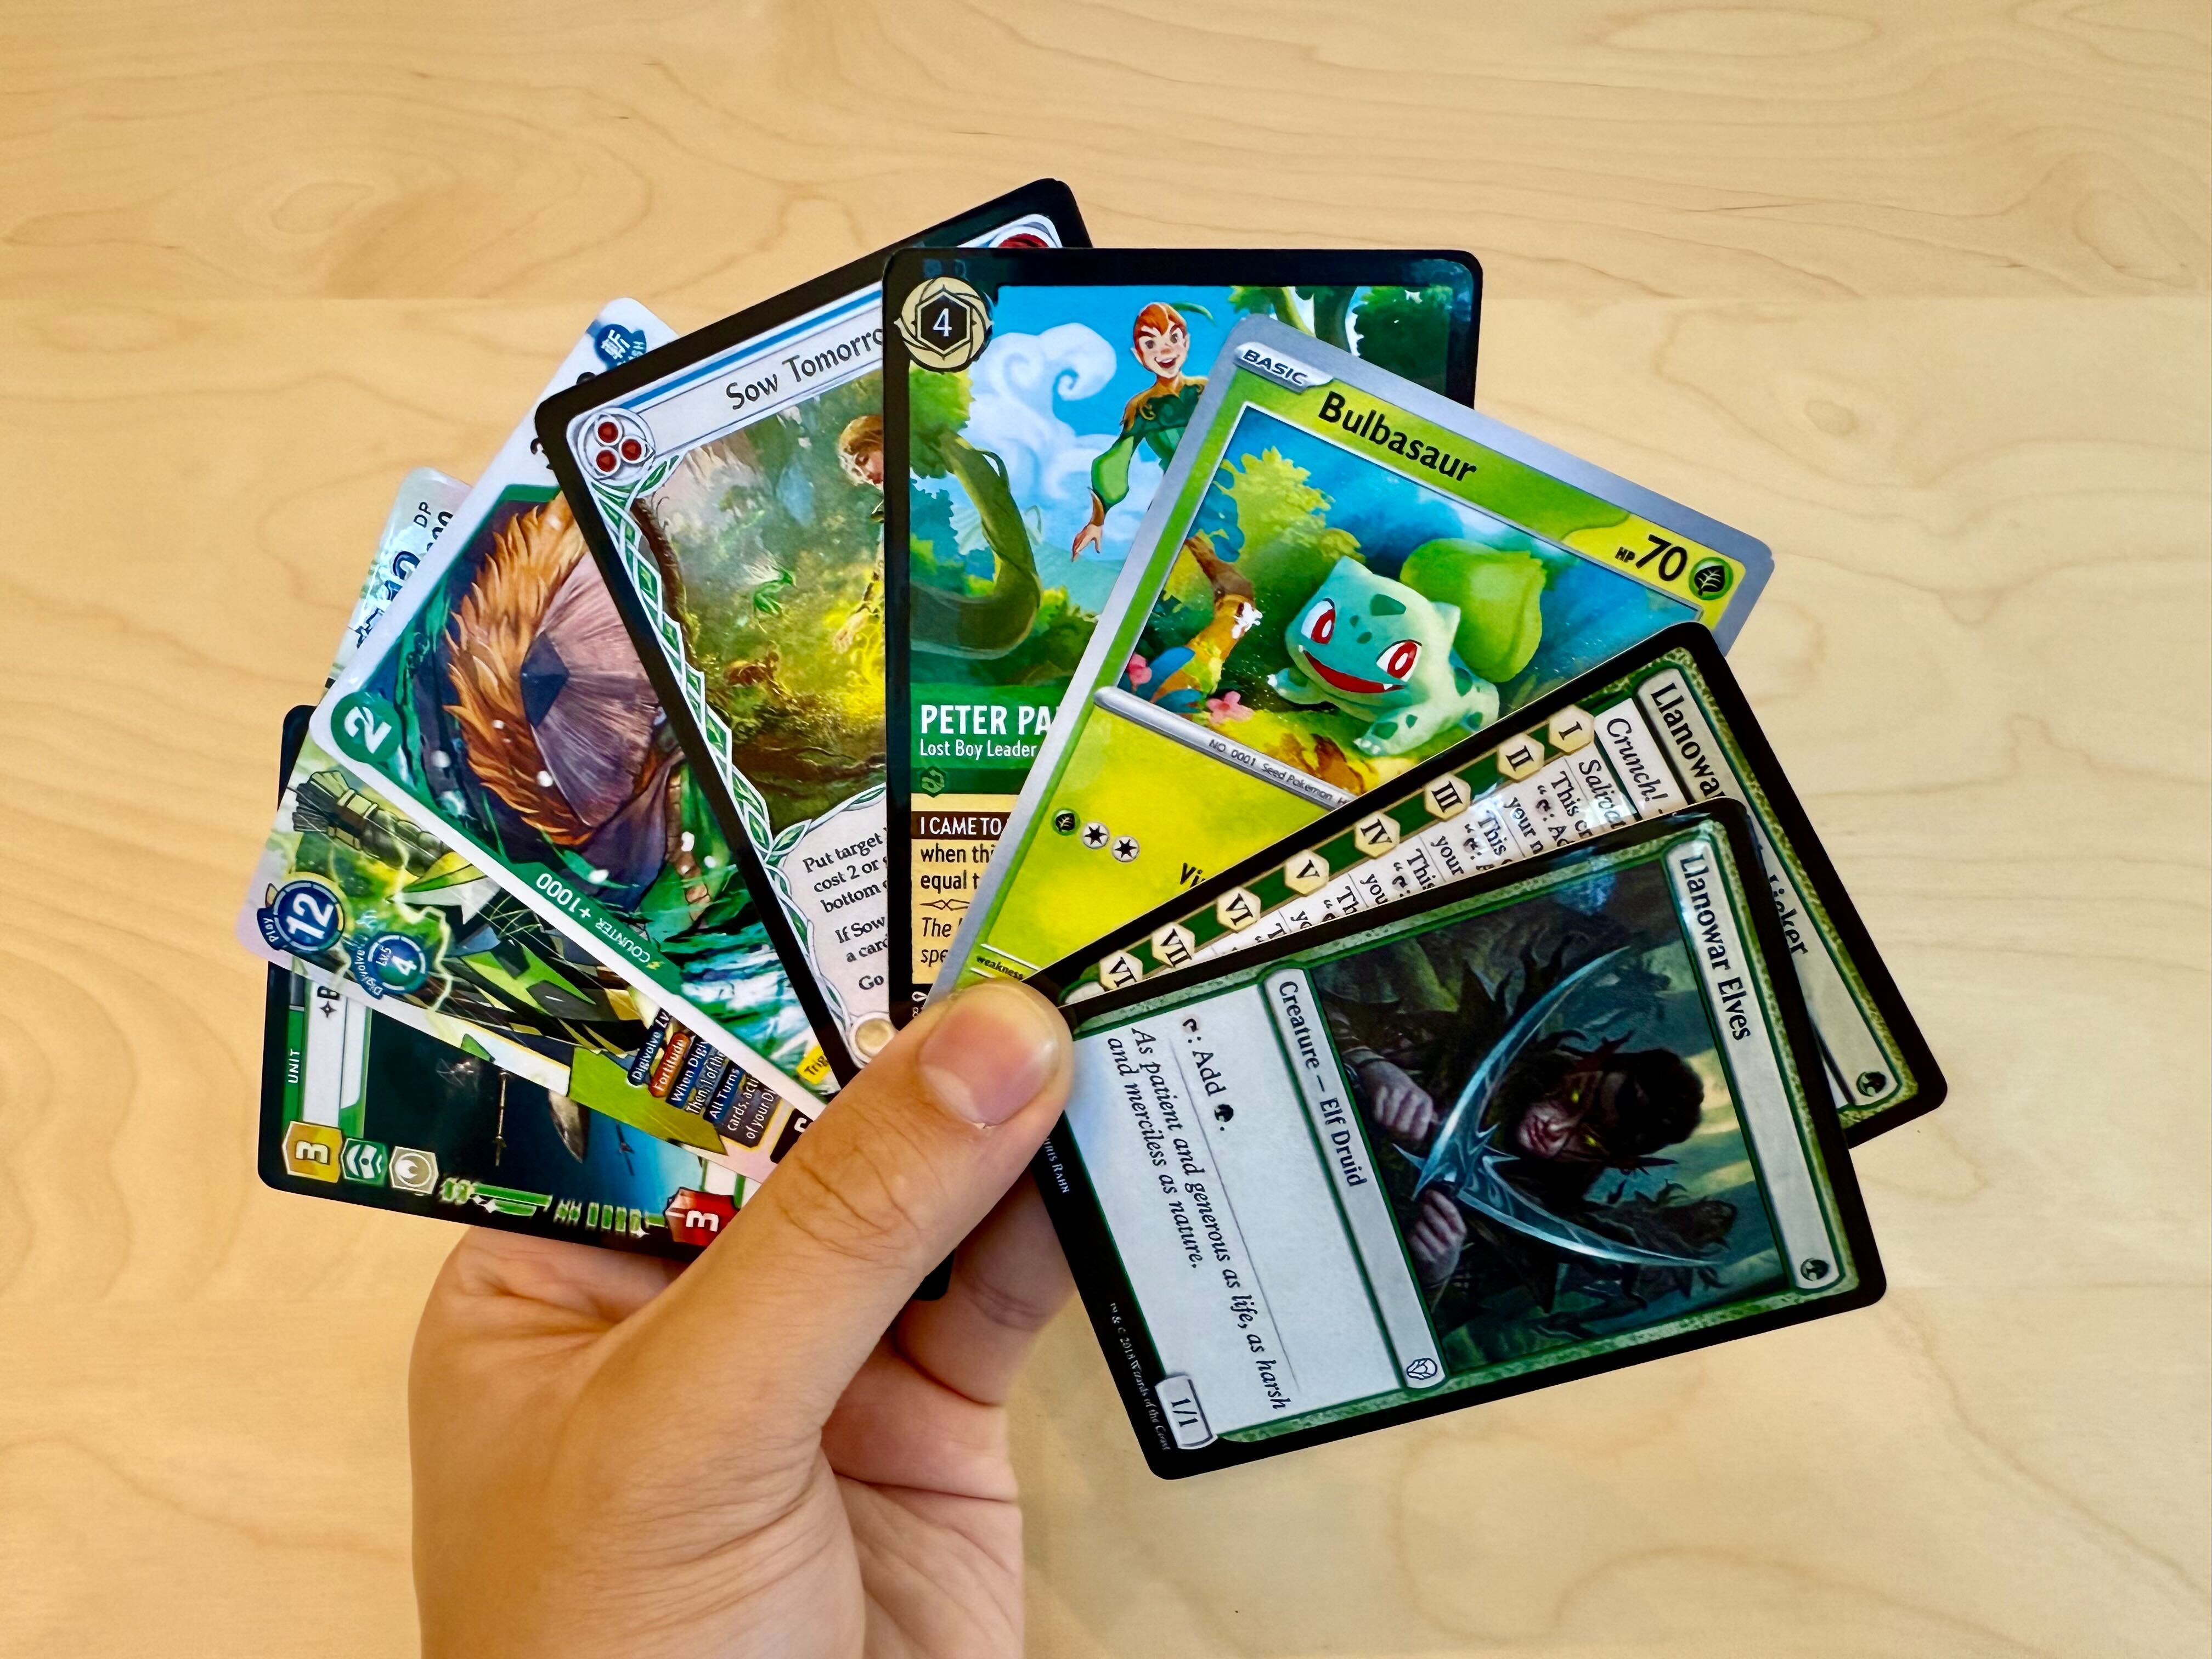
Now you’re ready to play with your cards!
What about next time?
Some of the steps shown during the PDF generation are one-time set up.
In the future, simply do the following:
- Open Terminal.
- Navigate to the code.
- Start the virtual environment.
- Generate the PDF.
cd ~
cd <path to code>
. venv/bin/activate
python create_pdf.py- Open Powershell.
- If necessary, run the following to stop security errors.
Set-ExecutionPolicy -ExecutionPolicy RemoteSigned -Scope Process- Navigate to the code.
- Start the virtual environment.
- Generate the PDF.
cd ~
cd <path to code>
.\venv\Scripts\Activate.ps1
python create_pdf.py
Then print, laminate, and cut with your machine!
Next Steps
Share your success in the Discord server! While you’re there, go to the Channels & Roles tab and claim the SCM Graduate role for completing the tutorial! Share pictures in #photo-showcase as well!
As mentioned, create_pdf.py offers many configuration options. For example, create_pdf.py can make double-sided cards, use different paper sizes, cut various card sizes, and more! Explore some of these options.
If you’re interested in making proxies for TCGs, try using a plugin. Currently, Silhouette Card Maker has support for many games including Magic: The Gathering, Pokemon, Yu-Gi-Oh!, Riftbound, One Piece, and Lorcana. All you need to do is provide a decklist and the plugin will automatically fetch the images for you!
Thanks and have fun cutting cards!
~ Alan Cha